Creating the Perfect Tile Shower Panel
A beautifully tiled shower panel can transform your bathroom into a luxurious and relaxing space. But creating the perfect tile shower panel is not just about choosing the right tiles. It also involves careful planning, preparation, and installation. Here are some essential aspects to consider when creating your own tile shower panel:
Planning and Design
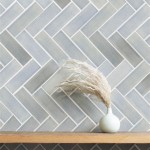
The first step is to plan the design of your shower panel. Consider the overall style of your bathroom, the size and shape of the shower area, and the type of tile you want to use. It's also important to decide on the layout of the tiles, including any accent tiles or mosaics you may want to incorporate.
Choosing the Right Tile
The choice of tile for your shower panel is crucial. Consider the following factors:
- Durability: Tiles should be able to withstand moisture, heat, and wear and tear.
- Slip resistance: Choose tiles with a high coefficient of friction to prevent slips and falls.
- Style: Select tiles that complement the overall design of your bathroom.
- Size and shape: The size and shape of the tiles will affect the overall look and feel of the shower panel.
Preparing the Surface
Before installing the tiles, it's essential to prepare the surface properly. This includes cleaning the surface, repairing any damage, and ensuring it is level and smooth. You will also need to install a backer board, such as cement board or HardieBacker, to provide a stable base for the tiles.
Installing the Tiles
The installation process involves applying thin-set mortar to the back of each tile and pressing it into place on the prepared surface. Ensure the tiles are aligned correctly and level. Use spacers to maintain even spacing between the tiles.
Grouting
Once the tiles are installed, you need to fill the spaces between them with grout. Choose a grout color that complements the tiles and apply it using a grout float. Allow the grout to dry and cure according to the manufacturer's instructions.
Sealing
To protect the tile shower panel from moisture and stains, it's essential to seal it. Apply a penetrating sealer to the tiles and grout, following the manufacturer's instructions. This will help to prevent water damage and keep the shower looking its best.
Finishing Touches
Once the shower panel is installed, sealed, and dry, you can add finishing touches such as installing shelves, a showerhead, and a drain. Consider the placement of these elements carefully to enhance the functionality and aesthetics of the shower space.
Professional Installation
While it is possible to install a tile shower panel yourself, it is highly recommended to hire a professional for optimal results. Professional installers have the experience and expertise to ensure a proper installation, minimizing the risk of leaks or other issues.
By carefully considering these essential aspects, you can create a tile shower panel that is both beautiful and functional, enhancing the comfort and value of your bathroom for years to come.

50 Shower Tile Design Ideas For Your Dream Bathroom Remodel 2024 Apollo

11 Materials For Shower Walls Luxurious And Budget Friendly Options

Most Innovative Elegant Bathroom Shower Panels For Your Home

73 Gorgeous Bathroom Tile Ideas From Designers

15 Best Bathroom Tiles Designs That Make You Go Wow Livspace

36 Refreshing Shower Tile Ideas To Make Over Your Bathroom Architectural Digest

9 Tips To Select The Best Bathroom Wall Tiles For Your Home

Comprehensive Guide To The Best Shower Wall Materials

Trending 6 Bathroom Panel Ideas For A Stylish Look

How To Choose Bathroom Tiles Bath Tune Up
Related Posts


