Create a Unique Look With Glass Tile Backsplash Clearances In Kitchen
The kitchen backsplash serves a dual purpose in modern home design. Functionally, it protects the wall behind the countertop from splashes, spills, and food splatters, making cleanup easier and preventing water damage. Aesthetically, the backsplash offers an opportunity to inject personality, style, and visual interest into the kitchen space. Glass tile backsplashes, in particular, have become increasingly popular due to their versatility, durability, and ability to create a bright, reflective surface. Achieving a successful glass tile backsplash installation extends beyond selecting the right tile; understanding and implementing proper clearances is crucial for both functionality and visual appeal.
Clearances in this context refer to the planned spaces around the backsplash, often where it meets countertops, cabinets, appliances, or windows. These clearances are not simply arbitrary measurements; they are deliberate design choices that contribute to the overall aesthetic, ease maintenance, and prevent potential issues associated with movement, settling, or temperature fluctuations. Proper planning and execution regarding these clearances can significantly impact the final look and longevity of a glass tile backsplash.
Understanding the Importance of Clearances
Ignoring clearances can lead to several problems, ranging from minor aesthetic flaws to significant structural issues. For instance, insufficient space between the backsplash and the countertop can create a dirt trap, difficult to clean and prone to mold growth. Similarly, failing to account for expansion and contraction due to temperature changes can result in cracked tiles or grout lines. Therefore, a thorough understanding of the importance of clearances is paramount for a successful and lasting installation.
Firstly, clearances allow for natural building movement. Homes, particularly newer ones, are subject to settling, which can cause slight shifts in walls and countertops. Without adequate clearance, these movements can transfer stress to the tile, potentially leading to cracking or detachment. Secondly, temperature fluctuations and humidity variations cause materials to expand and contract. Glass, while durable, is still susceptible to these changes. Sufficient clearance allows for this natural expansion and contraction, preventing the backsplash from becoming overly stressed. Thirdly, proper clearances simply make cleaning and maintenance easier. A small gap, correctly sealed, is far easier to clean than a tightly abutted joint, which easily traps dirt and debris.
Therefore, careful consideration of these factors during the design and installation process is essential. Accurate measurements, appropriate materials, and a detailed understanding of the surrounding structures are all vital components of a well-executed glass tile backsplash installation.
Key Clearance Areas and Considerations
Several key areas require specific attention regarding clearances when installing a glass tile backsplash. These include the countertop interface, the cabinet interface, around appliances, and window surrounds. Each of these areas presents unique challenges and requires tailored solutions to ensure a professional and lasting result.
Countertop Interface: The junction between the backsplash and the countertop is perhaps the most critical clearance area. A small gap, typically 1/16 to 1/8 inch, is recommended to allow for slight movement and facilitate cleaning. This gap should be filled with a flexible, waterproof sealant, such as silicone caulk, to prevent water penetration and maintain a clean, finished appearance. Avoid using grout in this area, as grout is rigid and prone to cracking and deterioration with movement.
When selecting the sealant, choose a color that complements the grout or tile. A clear sealant is also an option, but it is more susceptible to discoloration over time. Ensure the sealant is specifically designed for kitchen and bathroom use, as these products are formulated to resist mold and mildew growth. Proper application is also crucial; apply a smooth, even bead and remove any excess sealant immediately.
Cabinet Interface: Where the backsplash meets the underside of wall cabinets, a similar approach is recommended. A small clearance gap, again around 1/16 to 1/8 inch, provides space for movement and allows for easy cleaning. Some installers prefer to run the backsplash slightly behind the cabinet frame for a cleaner look, but this requires careful planning and precise cuts. Another option is to install a trim piece, such as a Schluter strip or a similar metal profile, to create a clean and defined edge between the backsplash and the cabinet.
Regardless of the chosen method, ensure that the cabinet surface is clean and free of any debris before applying the backsplash. If painting or staining the cabinets, complete this process before installing the backsplash to avoid contaminating the tiles. If running the tile behind the cabinet, the back of the cabinet may need to be treated with a moisture resistant paint or sealant to prevent damage from any potential water intrusion.
Around Appliances: Appliances such as stoves, refrigerators, and dishwashers often create unique clearance challenges. Stoves, in particular, generate significant heat, which can affect the surrounding tiles. Ensure adequate ventilation space around the stove and consider using heat-resistant materials for the backsplash in this area. A larger clearance gap, perhaps up to 1/4 inch, may be necessary to accommodate the stove's movement during cleaning or maintenance. Again, this gap should be sealed with a heat-resistant sealant.
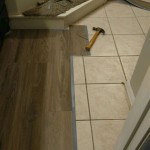
Refrigerators and dishwashers often have limited space between the appliance and the wall. Precisely measure the available space and plan the backsplash installation accordingly. It might be necessary to adjust the appliance's position slightly to accommodate the tile thickness. Protect the appliance's finish during installation to prevent scratches or damage. When installing behind a refrigerator, moisture control is still important. Consider a moisture barrier prior to tiling.
Window Surrounds: Installing a glass tile backsplash around a window requires careful attention to detail. Windowsills and frames can be susceptible to water damage, so proper sealing is essential. Ensure the windowsill is level and free of any cracks or gaps before installing the tile. Use a waterproof membrane or sealant to protect the underlying surface from water penetration.
Consider using a bullnose tile or a trim piece to create a clean and finished edge around the window. This not only enhances the aesthetic appeal but also protects the tile edges from chipping or cracking. The clearance gap between the tile and the window frame should be filled with a flexible, waterproof sealant to prevent water intrusion and accommodate movement. Pay close attention to the type of sealant used, selecting one that is compatible with both the tile and the window frame material.
Installation Techniques and Best Practices
Effective installation techniques significantly contribute to the overall success and longevity of a glass tile backsplash. Proper preparation, the use of appropriate materials, and meticulous attention to detail are crucial for achieving a professional and visually appealing result. Furthermore, adhering to industry best practices can minimize potential problems and ensure a durable and lasting installation.
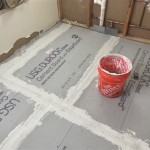
Surface Preparation: Before commencing the installation, thoroughly prepare the wall surface. Clean the surface to remove any dirt, grease, or loose paint. Ensure the wall is flat and plumb. Any imperfections or irregularities can affect the tile's alignment and appearance. For uneven surfaces, apply a leveling compound to create a smooth and uniform base. Prime the surface with a suitable primer to improve adhesion and prevent moisture absorption.
Material Selection: Selecting the correct materials is as essential as proper installation. Use a high-quality thin-set mortar specifically designed for glass tile. These mortars are formulated to provide excellent adhesion and prevent the tile from discoloration. Choose a grout that is appropriate for glass tile and resistant to staining and mildew. Epoxy grouts are particularly well-suited for kitchen backsplashes due to their durability and water resistance. Ensure all sealants used are specifically designed for kitchen and bathroom applications and are resistant to moisture, mold, and mildew.
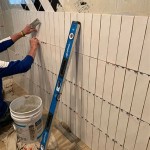
Cutting and Laying Tile: Glass tile requires specialized cutting tools to prevent chipping or cracking. A wet saw with a diamond blade is the preferred method for cutting glass tile. Use a slow and steady cutting speed to minimize the risk of damage. When laying the tile, apply a generous amount of thin-set mortar to the back of each tile and press it firmly into place. Use tile spacers to maintain consistent grout lines. Periodically check the tile alignment with a level to ensure a straight and uniform appearance.
Grouting and Sealing: After the thin-set mortar has fully cured, remove the tile spacers and clean the grout lines. Apply the grout evenly and thoroughly, ensuring that all the joints are filled. Remove any excess grout with a damp sponge. Allow the grout to cure according to the manufacturer's instructions. Once the grout is cured, apply a sealant to protect it from staining and moisture penetration. Reapply the sealant periodically to maintain its effectiveness.
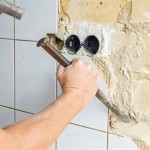
Addressing Challenges: During the installation process, various unforeseen challenges may arise. These could include encountering plumbing or electrical fixtures, dealing with irregular wall surfaces, or working with unusual tile shapes or sizes. Adaptability and problem-solving skills are essential for overcoming these challenges and achieving a successful outcome. In cases where the installation is particularly complex or challenging, consider consulting a professional tile installer.
By adhering to these installation techniques and best practices, the likelihood of a successful and aesthetically pleasing glass tile backsplash is significantly increased. Proper preparation, appropriate materials, meticulous attention to detail, and adaptable problem-solving are all key components of a well-executed installation.

Glass Backsplashes A Sleek Modern Option For Contemporary Kitchens
12 Modern Glass Tile Backsplash Sleek Designs

12 Modern Glass Tile Backsplash Sleek Designs

12 Modern Glass Tile Backsplash Sleek Designs

20 Modern Glass Backsplash Ideas Elegant Tiles

13 Modern Kitchen Backsplash Ideas That Will Add Freshness

Glass Backsplashes A Sleek Modern Option For Contemporary Kitchens

Pros And Cons Of Glass Kitchen Tiles Deco

13 S Backsplash Ideas Natural Beauty Tiles

13 Modern Kitchen Backsplash Ideas That Will Add Freshness
Related Posts