Create A Masterpiece With Tile Mirror Framework
The tile mirror framework, a construction technique combining the reflective elegance of mirrors with the structural integrity and aesthetic versatility of tiles, offers a pathway to creating unique and captivating design elements within various environments. This approach transcends mere decorative application; it allows for the creation of functional art pieces that enhance spatial perception, amplify light, and introduce customized visual textures. The integration of tiles and mirrors requires careful planning, meticulous execution, and a thorough understanding of the materials involved. This article will explore the core concepts, design considerations, and practical steps involved in crafting a masterpiece with a tile mirror framework.
The initial consideration when embarking on a tile mirror framework project is defining the desired aesthetic and functional outcome. This necessitates evaluating the existing space, the intended purpose of the piece (decorative, functional, or both), and the overall design style it should complement. The size and shape of the mirror, the type and arrangement of tiles, and the surrounding environment are all crucial factors influencing the final result. Detailed sketches and mock-ups are highly recommended to visualize the concept and identify potential challenges before committing to the actual installation.
Selecting Appropriate Tiles and Mirrors
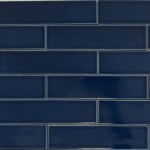
The selection of tiles and mirrors is paramount to the success of the project. The type of tile influences the overall aesthetic, durability, and maintenance requirements of the framework. Ceramic, porcelain, glass, and natural stone tiles each offer distinct visual characteristics and performance capabilities. Ceramic tiles are often a cost-effective and versatile choice, available in a wide array of colors, patterns, and sizes. Porcelain tiles are denser and more durable, making them suitable for high-traffic areas and environments exposed to moisture. Glass tiles provide a sleek, modern look and are resistant to staining. Natural stone tiles, such as marble or granite, offer a luxurious and timeless appeal, but may require specialized sealing and maintenance.
The mirror itself should be of high quality, free from imperfections, and appropriate for the intended application. Consider the thickness of the mirror glass, as thicker mirrors are less prone to distortion. Safety is also a key factor. Opting for safety-backed mirrors, which have a film applied to the back that prevents shattering, is crucial, especially in environments where children or pets may be present. The size and shape of the mirror will significantly impact the overall design, and its framing will further define the aesthetic. Beveled edges can add elegance, while simple, unframed mirrors offer a minimalist look. Colored or tinted mirrors can introduce additional visual interest and complement the chosen tile palette.
The adhesive used to secure the tiles and mirrors is also critical. Selecting an adhesive specifically designed for mirror and tile applications is essential. These specialized adhesives are formulated to prevent damage to the mirror's reflective coating and provide a strong, durable bond. Ensure the adhesive is compatible with both the tile and mirror materials. Read the manufacturer's instructions carefully and follow them precisely for proper application and curing times. The grout selection, too, plays a significant role in the overall aesthetic and functionality. Epoxy grout is highly recommended for its water resistance and durability, particularly in wet environments such as bathrooms or kitchens. Cement-based grout is a more economical option, but requires sealing to prevent staining and water penetration.
The substrate, or the surface to which the tiles and mirror will be adhered, must be properly prepared. It should be clean, dry, level, and structurally sound. If the substrate is uneven, it may be necessary to apply a leveling compound to create a smooth surface. In wet environments, a waterproof membrane should be installed to prevent water damage. Proper substrate preparation is essential for ensuring a long-lasting and visually appealing tile mirror framework. Ignoring this step can lead to tile cracking, mirror delamination, and other issues that compromise the integrity of the installation.
Design Principles for Tile Mirror Framework
Effective design is the cornerstone of a successful tile mirror framework. The arrangement of tiles around the mirror can drastically alter the overall aesthetic. Symmetrical patterns, such as a simple border or a grid arrangement, offer a classic and balanced look. Asymmetrical designs, with varying tile sizes and placements, can create a more dynamic and contemporary feel. Herringbone, chevron, and mosaic patterns can add visual interest and texture. Consider the use of contrasting colors or materials to highlight certain areas of the framework and create focal points. The placement of the tiles in relation to the mirror's edge also influences the design. A narrow tile border can create a subtle frame, while a wider border can make a bolder statement.
The scale and proportion of the framework should be carefully considered in relation to the surrounding space. A large mirror with an elaborate tile surround may overwhelm a small room, while a small mirror with a minimalist framework may be lost in a large space. Use the mirror to enhance the spatial perception of the room. Mirrors can visually expand a small space, reflect natural light to brighten a dark room, or create the illusion of depth. Consider the placement of the mirror in relation to other features in the room, such as windows, doors, and furniture. A strategically placed mirror can reflect a beautiful view or create a sense of symmetry within the space. The lighting around the mirror is also important. Proper lighting can enhance the reflective qualities of the mirror and highlight the textures and colors of the tiles.
The overall style of the tile mirror framework should complement the existing décor. A modern bathroom might benefit from sleek glass tiles and a minimalist frameless mirror, while a traditional living room might be enhanced by natural stone tiles and a beveled-edge mirror. Consider the color palette of the room and choose tiles and mirror finishes that complement or contrast with the existing colors. The chosen design should be cohesive and harmonious with the overall aesthetic of the space. Avoid clashing styles or colors that can create visual disharmony. The goal is to create a seamless integration of the tile mirror framework into the existing environment, enhancing its overall beauty and functionality.
Practical Installation Techniques
The installation of a tile mirror framework requires precision, patience, and attention to detail. Start by carefully measuring and marking the area where the framework will be installed. Use a level to ensure that the lines are straight and accurate. Dry-fit the tiles around the mirror to ensure that they fit properly and that the desired pattern is achieved. This step allows for adjustments and corrections before applying any adhesive.
Apply the adhesive to the substrate using a notched trowel, ensuring that the adhesive is evenly distributed and that the notches are oriented in the correct direction. Press the tiles firmly into the adhesive, using a slight twisting motion to ensure good contact. Use tile spacers to maintain consistent spacing between the tiles. For the mirror, apply a specialized mirror adhesive to the back of the mirror, following the manufacturer's instructions. Carefully position the mirror on the prepared substrate and apply gentle pressure to ensure that it is securely bonded.
Allow the adhesive to cure completely before applying grout. Remove the tile spacers and clean any excess adhesive from the tile surfaces. Apply the grout using a grout float, pressing it firmly into the joints between the tiles. Remove excess grout with a damp sponge, being careful not to remove grout from the joints. Allow the grout to dry according to the manufacturer's instructions, and then buff the tile surfaces with a clean, dry cloth. Finally, seal the grout to protect it from staining and water penetration. Proper maintenance, including regular cleaning with a mild detergent, will help to preserve the beauty and longevity of the tile mirror framework. Inspect the grout and sealant periodically and reapply as needed to prevent water damage.
Creating a masterpiece with a tile mirror framework is a rewarding endeavor that combines artistic vision with practical construction skills. By carefully considering the design principles, selecting appropriate materials, and employing precise installation techniques, it is possible to create stunning and functional design elements that enhance the aesthetic and spatial qualities of any environment.

30 Diy Mirror Frames Scratch And Stitch

30 Diy Mirror Frames Scratch And Stitch

30 Diy Mirror Frames Scratch And Stitch

30 Diy Mirror Frames Scratch And Stitch

30 Diy Mirror Frames Scratch And Stitch

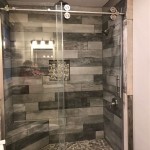
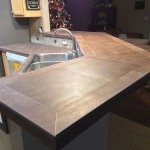
Tile Masterpiece Bathroom

30 Diy Mirror Frames Scratch And Stitch

Tile Masterpiece Bathroom

Bathroom Wall Mosaic Tile Ideas 21 Artistic Creations Mec Bespoke Luxury Mosaics

Easy Mirror Diy A Hanging Lamp Repurpose Girl Just
Related Posts