Create A Masterpiece With Tile Mirror Frames
Mirrors serve both a functional and aesthetic purpose in interior design. Beyond their practical use for reflection, they contribute to the perceived size and brightness of a room. Enhancing a mirror with a custom tile frame elevates its design impact significantly. Tile, with its versatility in color, texture, and pattern, offers a unique opportunity to create personalized and visually stunning mirror frames. This article explores the process of crafting a masterpiece using tile mirror frames, highlighting key considerations and design possibilities.
Selecting the Right Tile for Your Mirror Frame
The selection of tile is paramount to the success of a tile mirror frame project. Numerous factors influence this decision, including the overall design aesthetic of the space, the size and shape of the mirror, and the desired durability of the finished frame. Considering these elements will guide the selection process and ensure a cohesive and visually appealing result.
First, analyze the existing decor of the room. Is the style modern, traditional, rustic, or eclectic? The tile chosen should complement and enhance the existing design scheme. For instance, a modern bathroom might benefit from sleek, minimalist tiles in neutral tones, while a rustic living room would be enhanced by textured stone or reclaimed ceramic tiles. Consider the color palette of the room and choose tiles that either harmonize with or provide a contrasting accent to the existing colors. Small mosaic tiles can add intricate detail, while larger format tiles offer a more streamlined and contemporary look.
The size and shape of the mirror also play a crucial role in tile selection. Larger mirrors can accommodate larger tiles or intricate mosaic patterns without appearing cluttered, while smaller mirrors may benefit from smaller, simpler tiles to avoid overwhelming the space. Consider the proportions of the mirror and the surrounding area when selecting tile size. For instance, a long, rectangular mirror might look best with vertically oriented rectangular tiles, while a round mirror might be enhanced by small, square mosaic or a circular arrangement of tiles.
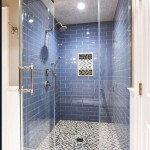
Durability is another important consideration, particularly in high-moisture environments such as bathrooms. Ceramic and porcelain tiles are excellent choices for bathrooms due to their water resistance and durability. Glass tiles, while visually appealing, may be more susceptible to scratching and chipping. Stone tiles, such as slate or travertine, offer a natural and textured look but may require sealing to protect them from moisture and stains. The intended location of the mirror and the level of use it will receive should inform the tile selection.
Beyond the practical considerations, explore the vast array of tile materials, finishes, and patterns available. Ceramic tiles are a versatile and affordable option, available in a wide range of colors, shapes, and sizes. Porcelain tiles are more durable and water-resistant than ceramic tiles, making them ideal for high-traffic areas and bathrooms. Glass tiles offer a sleek and modern look and can be used to create stunning mosaic patterns. Stone tiles provide a natural and textured look, adding warmth and character to a space. Consider the texture and finish of the tile to achieve the desired aesthetic. Glossy tiles reflect light and create a sense of spaciousness, while matte tiles offer a more subdued and natural look.
Preparing the Mirror and Workspace
Proper preparation is essential for a successful tile mirror frame project. This includes preparing the mirror surface, gathering the necessary tools and materials, and creating a clean and organized workspace. Attention to detail during the preparation phase will streamline the tiling process and ensure a professional-looking finished product.
Begin by thoroughly cleaning the mirror surface with a glass cleaner and a lint-free cloth. Remove any dust, dirt, or smudges that could interfere with the adhesion of the adhesive. If the mirror has any existing frame or backing material, carefully remove it to expose the edges of the glass. Use a putty knife or scraper to gently separate the frame from the mirror, being careful not to damage the glass. Once the frame is removed, clean any remaining adhesive residue from the mirror surface with a suitable solvent.
Next, gather all the necessary tools and materials. This includes the selected tiles, tile adhesive, grout, grout sealer, tile spacers, a tile cutter (if necessary), a notched trowel, a rubber grout float, a sponge, a bucket of clean water, measuring tape, a pencil, and safety glasses. Ensure that all tools are clean and in good working order. If using a tile cutter, familiarize yourself with its operation and practice cutting a few scrap tiles to get a feel for the tool.
Create a clean and organized workspace. Cover the work surface with a drop cloth or plastic sheeting to protect it from adhesive and grout. Arrange the tiles in the desired pattern to visualize the finished frame. This will help determine the number of tiles needed and identify any necessary cuts. Ensure that the workspace is well-ventilated, especially when working with tile adhesive and grout.
Before applying the adhesive, dry-fit the tiles around the mirror to ensure a proper fit and alignment. Use tile spacers to maintain consistent spacing between the tiles. Make any necessary adjustments to the tile layout before proceeding with the adhesive application. This will prevent costly mistakes and ensure a professional-looking finished product. If the mirror will be mounted on a wall, consider the weight of the mirror and tile frame and reinforce the wall mounting hardware as needed.
Applying the Tile and Grouting the Frame
The application of the tile and grouting process are the final steps in creating a tile mirror frame. Precision and attention to detail are crucial during these stages to ensure a durable and aesthetically pleasing result. Careful application of the adhesive, proper tile alignment, and meticulous grouting techniques will transform a plain mirror into a stunning focal point.
Apply a thin, even layer of tile adhesive to the back of each tile using a notched trowel. The size of the notch on the trowel will depend on the size and type of tile being used. Follow the manufacturer's instructions for the recommended trowel size. Ensure that the adhesive covers the entire back of the tile to provide a strong bond to the mirror surface. Avoid applying excessive adhesive, as this can squeeze out between the tiles and create a messy finish.
Carefully press each tile onto the mirror surface, aligning it with the desired position and spacing. Use tile spacers to maintain consistent spacing between the tiles. Gently wiggle each tile to ensure proper adhesion to the adhesive. Remove any excess adhesive that squeezes out between the tiles with a damp sponge. Check the alignment of the tiles frequently to ensure that they are straight and level. Use a level to verify that the frame is level and adjust as needed. Allow the adhesive to dry completely according to the manufacturer's instructions, typically 24-48 hours.
Once the adhesive is dry, remove the tile spacers. Prepare the grout according to the manufacturer's instructions. Mix the grout with water to a smooth, paste-like consistency. Apply the grout to the tile joints using a rubber grout float. Work the grout into the joints, ensuring that they are completely filled. Remove any excess grout from the tile surfaces with the grout float. Allow the grout to set for a few minutes, then use a damp sponge to wipe away the excess grout, leaving a smooth and clean surface.
Rinse the sponge frequently in a bucket of clean water. Avoid using excessive water, as this can weaken the grout. Allow the grout to cure completely according to the manufacturer's instructions, typically 24-72 hours. Once the grout is cured, apply a grout sealer to protect it from moisture and stains. Follow the manufacturer's instructions for the application of the grout sealer. The grout sealer will help prevent the grout from absorbing water and dirt, extending its lifespan and maintaining its appearance.
Clean the mirror surface with a glass cleaner and a lint-free cloth. Inspect the tile frame for any imperfections and make any necessary repairs. The finished tile mirror frame will add a touch of elegance and sophistication to any room. With proper care and maintenance, it will provide years of enjoyment.

Mosaic Mirrors The Most Captivating Focal Point Of Your Space

30 Diy Mirror Frames Scratch And Stitch

Mirror Mosaic Art

Mosaic Mirrors The Most Captivating Focal Point Of Your Space

30 Diy Mirror Frames Scratch And Stitch

Blue Pottery Hand Made Mirror Wooden Frame With Ceramic Tiles Knobco

How To Make A Dollar Etched Mirror Diy Hometalk

Rustic Travertine Stone Mirror Gorgeous Statement Traditional Aesthetic Handmade Turkish Quirky Boho Décor

Diy Mosaic Picture Frame Project Mosaics Mostly

Green And White Ceramic Tile Mirror With Wooden Frame Knobco
Related Posts