Ceiling Tiles: A DIY Guide to Installation Instructions
Updating your ceiling can make a significant difference to the overall look and feel of a room. Installing ceiling tiles is a relatively simple DIY project that can be accomplished with basic tools and a little patience. Whether you're aiming for a modern, minimalist aesthetic or a more traditional feel, ceiling tiles offer a versatile and affordable solution. This guide will provide you with the essential information you need to successfully install ceiling tiles.
1. Planning and Preparation
Before you begin, it's crucial to plan and prepare for a successful installation. This includes gathering necessary materials and taking accurate measurements.
Gathering Materials
The following materials are required for installing ceiling tiles:
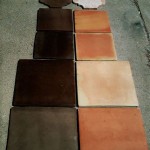
- Ceiling tiles of your choice (ensure the number of tiles matches your ceiling area).
- T-bar grid system (for suspended ceilings).
- J-mold (for finishing edges).
- Screws (for securing the T-bar grid to the ceiling).
- Measuring tape and level.
- Utility knife and scissors.
- Safety glasses and gloves.
- Ladder or scaffolding for reaching the ceiling.
Measuring and Planning
Accurately measure your ceiling area to determine the number of ceiling tiles required. Consider the size and shape of the room, and allow for any existing fixtures (light fixtures, smoke detectors, etc.). Calculate the total area of the ceiling and divide it by the area of each tile. This will give you the approximate number of tiles you need. It's always a good idea to purchase a few extra tiles to account for any cutting or potential mistakes.
2. Installing the T-Bar Grid System
The T-bar grid system provides a framework for suspending the ceiling tiles. This step is essential for ensuring a secure and level installation.
Installing the Main Runners
Begin by installing the main runners, which run along the length of the room, using screws to attach them to the ceiling joists. Make sure the runners are level and parallel to each other, using a level to guide your installation. The spacing of the runners should match the width of your ceiling tiles. This will allow the tiles to fit snugly within the grid system.
Installing the Cross Tees
Once the main runners are in place, you can install the cross tees, which run perpendicular to the main runners. Connect the cross tees to the main runners by inserting the tabs into the slots provided. Ensure the cross tees are level and that they are perpendicular to the main runners. When installing the cross tees, make sure they are evenly spaced and that they are supported by the main runners.
3. Installing the Ceiling Tiles
With the T-bar grid system in place, you're ready to install the ceiling tiles. Be cautious when handling the tiles, as they can be fragile.
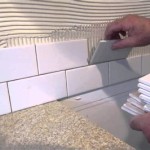
Starting the Installation
Start installing the tiles from one corner of the room and work your way across the ceiling. Carefully push the tiles into the T-bar grid, ensuring they are securely in place. Each tile should fit snugly within the grid, creating a seamless and even appearance.
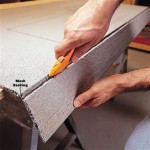
Cutting and Trimming
If you need to cut tiles to fit around obstructions or to achieve a desired look, use a utility knife or scissors to trim the tiles. Mark the tile where you need to cut and score the surface. This will allow you to cleanly break the tile along the marked line. Be sure to wear safety glasses to protect your eyes from any debris.
Finishing Touches
Once the tiles are installed, use J-mold to finish the edges. J-mold provides a clean, professional finish and hides the raw edges of the tiles. Apply the J-mold to the edges of the ceiling, securing it with screws or adhesive. When cutting J-mold, it's best to use a miter saw for a clean, precise cut.

Ceiling Tile Installation Comparing Your Options Ceilings Armstrong Residential

How To Install Drop Ceilings Easy Guide Kanopi By Armstrong

How To Install A Drop Ceiling 14 Steps With Pictures Wikihow

How To Install Direct Mount Ceiling Tiles Audimute

How To Install Easy Ceiling Tile

How To Tile A Ceiling Tips And Guidelines Howstuffworks

Ceiling Installation Overview Ceilings Armstrong Residential

How To Install A Drop Ceiling 14 Steps With Pictures Wikihow

7 Ways To Fit Plastic Ceiling Panels Wikihow

A Basic Guide To Nail Up Tin Ceiling Tiles Installation American Ceilings
Related Posts