Can You Tile on Concrete Walls? A Comprehensive Guide
Tiling concrete walls is a popular choice for bathrooms, kitchens, and other areas requiring a durable, water-resistant surface. This article explores the feasibility and methods of tiling directly onto concrete walls, addressing key considerations and providing a step-by-step guide for successful tile installation.
Assessing Concrete Wall Suitability
Before starting a tiling project, it's crucial to assess the concrete wall's suitability. Several factors determine whether direct tiling is possible:
1. Moisture Content: Excessive moisture within the concrete can compromise the bond between the tile and the substrate. A moisture meter can determine the moisture level, which should ideally be below a specific threshold determined by the chosen tile adhesive manufacturer.
2. Surface Texture: Smooth concrete surfaces may require roughening or the application of a bonding agent to enhance adhesion. Conversely, excessively rough or uneven surfaces necessitate leveling to create a suitable tiling base.
3. Structural Integrity: Cracks, crumbling, or other signs of structural damage must be addressed before tiling. Repairs may involve patching, reinforcing, or applying a waterproof membrane.
4. Previous Treatments: Existing paint, sealers, or other coatings can interfere with tile adhesion. These may need to be removed or treated with a primer designed to promote bonding.
Preparing the Concrete Surface
Proper surface preparation is essential for successful tile installation. This process involves several steps:
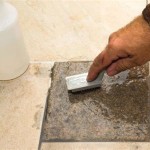
1. Cleaning: Thoroughly clean the concrete surface to remove dust, dirt, grease, and any loose debris. A pressure washer, stiff brush, and appropriate cleaning solution are recommended.
2. Repairing Imperfections: Fill cracks and other imperfections with a suitable concrete patching compound. Allow the patch to dry and cure completely before proceeding.
3. Leveling: Uneven surfaces require leveling with a concrete leveling compound. Apply the compound according to the manufacturer's instructions and ensure a smooth, even surface for tile application.
4. Priming (if necessary): Depending on the concrete's condition and the chosen adhesive, a primer may be required to promote adhesion. Consult the adhesive manufacturer's guidelines for primer recommendations.
Choosing the Right Tile and Adhesive
Selecting appropriate tiles and adhesive is critical for long-lasting tile installation.
1. Tile Selection: Consider the environment and intended use when choosing tiles. Ceramic and porcelain tiles are popular choices for their durability and water resistance. Natural stone tiles may require specialized sealants and adhesives.
2. Adhesive Selection: Use a high-quality thin-set mortar specifically designed for concrete surfaces. Modified thin-set mortars offer enhanced bonding properties and flexibility.
Tiling Techniques and Best Practices
Proper tiling techniques ensure a professional and durable finish.
1. Layout Planning: Plan the tile layout carefully to minimize cuts and create a visually appealing pattern. Dry-fitting tiles before applying adhesive can help visualize the final result.
2. Applying Adhesive: Apply the thin-set mortar to the concrete surface using a notched trowel. The size and depth of the notches depend on the tile size and type.
3. Tile Placement: Firmly press each tile into the adhesive, ensuring full contact and proper alignment. Use spacers to maintain consistent grout lines.
4. Cutting Tiles: Use a tile cutter or wet saw to cut tiles to fit edges and corners. Ensure accurate measurements and clean cuts for a professional finish.
Grouting and Finishing Touches
Grouting completes the tile installation and provides a water-resistant seal between the tiles.
1. Grout Selection: Choose a grout color and type that complements the tile and environment. Sanded grout is typically used for wider grout lines, while unsanded grout is suitable for narrower lines.
2. Grout Application: Apply the grout using a grout float, pressing it firmly into the grout lines. Remove excess grout with a damp sponge.
3. Sealing (if necessary): Some grout types require sealing to prevent staining and water penetration. Consult the grout manufacturer's recommendations for sealing instructions.
Addressing Common Challenges
Several challenges can arise during concrete wall tiling projects:
1. Efflorescence: Efflorescence is a white, powdery deposit that can appear on concrete surfaces due to moisture and mineral salts. Address the underlying moisture issue and remove efflorescence before tiling.
2. Uneven Walls: Significant wall unevenness can complicate tile installation. Consider applying a thicker layer of leveling compound or opting for a different wall finish if the unevenness is excessive.
3. Adhesive Failure: Improper surface preparation, incorrect adhesive selection, or inadequate mixing can lead to adhesive failure. Follow manufacturer instructions carefully and ensure proper substrate conditioning.
Long-Term Maintenance
Regular cleaning with appropriate cleaning solutions will help maintain the appearance and longevity of tiled concrete walls. Avoid harsh chemicals that can damage the tile or grout.

How To Install Ceramic Tiles On A Beautiful Concrete Wall Easily Construction Houses Step By

How To Prepare Uneven Walls And Floors Tile

Tile Over Blockwork Mike Haduck

Exterior Tile Installation On Walls Floor Trends

How To Use Concrete Tile Indoors

The Ultimate Guide To Outdoor Wall Tiles Eurotiles Bathrooms

5 Ways Cement Tile On Walls Can Transform Your Space Granada Blog Ideas Tips And More

Adhesion Of Ceramic Tile Coating System On Concrete Block Wall Sciencedirect

Nuance Studio Grey Distressed Concrete Wall Tile Thickness 8 12 Mm Size 300 X 12000 At Rs 800 Square Feet In Bengaluru

How To Install A Cement Board For Tiling Beaumont Tiles
Related Posts