Can You Tile Directly Over Cement Board? A Comprehensive Guide
Cement board, also known as cement backer board, is a popular substrate used in tiling projects, particularly in wet environments such as bathrooms and kitchens. Its inherent resistance to water damage and mold growth makes it a superior choice compared to traditional drywall or plywood. A key question often arises when working with this material: Can tile be directly installed over cement board? The short answer is yes, tile can be directly installed over cement board. However, there are several crucial steps and considerations that must be addressed to ensure a successful and long-lasting tiling installation.
This article will delve into the specific requirements, best practices, and potential pitfalls associated with tiling directly over cement board, providing a comprehensive guide for both DIY enthusiasts and professional tile installers. We will discuss the essential preparation stages, the correct type of mortar to use, proper installation techniques, and how to address potential challenges that may arise during the tiling process.
Understanding Cement Board and Its Advantages
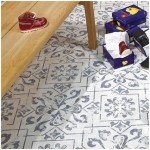
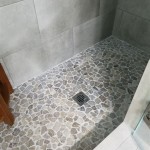
Cement board is a composite material consisting of cement, reinforcing fibers, and aggregates. This composition provides exceptional strength, durability, and resistance to moisture. Its primary advantage over other common substrates like drywall or plywood lies in its ability to withstand repeated exposure to water without degrading, warping, or promoting mold growth. This makes it ideal for areas prone to high humidity and moisture, such as showers, tub surrounds, and backsplashes.
Furthermore, cement board has a textured surface that provides a good bonding surface for thin-set mortar, the adhesive commonly used to attach tiles to substrates. While some cement boards have a smoother side, it is generally recommended to tile on the rougher, more textured side for optimal adhesion. It's also fire-resistant, providing an added layer of safety and protection in building construction.
Different types of cement board are available, varying in thickness and composition. The choice of cement board depends on the specific application and the type of tile being used. Thicker cement board provides greater rigidity and is typically preferred for larger tiles or installations where structural support is critical. It's crucial to select a cement board that meets the manufacturer's recommendations for the intended tile type and application.
Key Preparation Steps Before Tiling
Proper preparation is the most crucial factor in ensuring a successful tile installation over cement board. This involves several key steps, including proper installation of the cement board itself, adequate seam treatment, and surface preparation. Skimping on preparation can lead to issues down the line with tiles developing cracks from movement in the substrate or even tiles popping off due to inadequate adhesion.
The cement board must be securely fastened to the underlying framing with screws specifically designed for cement board. These screws are often coated to resist corrosion and have a self-countersinking head to prevent damage to the board's surface. The screws should be spaced according to the manufacturer's recommendations, typically every 6-8 inches along the edges and every 8-12 inches in the field of the board. Gaps between cement boards should be kept to a minimum (ideally no more than 1/8 inch) to prevent the thin-set mortar from squeezing through and creating an uneven surface.
Treating the seams between cement boards is paramount to creating a waterproof and stable substrate. This involves applying fiberglass mesh tape over the seams and embedding it in a layer of thin-set mortar. The thin-set mortar should be specifically designed for use with cement board and should be applied in a smooth, even layer, completely covering the mesh tape. It's important to allow the thin-set mortar to fully cure according to the manufacturer's instructions before proceeding with tiling.
Finally, ensure the surface of the cement board is clean and free of dust, debris, and any loose particles. Vacuuming the surface thoroughly is recommended. Some manufacturers recommend applying a primer to the cement board before tiling. Check the specific recommendations of the cement board and thin-set mortar manufacturers to determine if a primer is necessary and if so, which type to use. The primer can improve adhesion and help prevent the thin-set mortar from drying out too quickly, especially in hot or dry environments.
Choosing the Right Mortar and Installation Techniques
The type of thin-set mortar used to install the tile is critical for a successful installation. Modified thin-set mortars are generally recommended for use with cement board and most types of tile. These mortars contain polymers that enhance their adhesion, flexibility, and water resistance. There are different types of modified thin-set mortars available, so it's important to choose one that is specifically recommended for the type of tile being installed and the intended application (e.g., large format tile, natural stone, wet area).
When mixing the thin-set mortar, follow the manufacturer's instructions carefully. Use the correct amount of water and mix thoroughly to achieve a smooth, consistent consistency. Avoid adding too much water, as this can weaken the mortar and compromise its adhesion. After mixing, allow the mortar to slake for the recommended time (typically 5-10 minutes) before remixing briefly.
The thin-set mortar should be applied to the cement board using a notched trowel. The size and shape of the trowel notches depend on the size and type of tile being installed. Use the trowel to create ridges of mortar that will provide optimal contact and support for the tile. Apply the mortar in small sections, working quickly to prevent it from drying out before the tile is installed. Press the tile firmly into the mortar with a slight twisting motion to ensure good contact. Use tile spacers to maintain consistent grout lines.
For larger tiles, back-buttering is often recommended. This involves applying a thin layer of thin-set mortar to the back of the tile in addition to applying it to the cement board. Back-buttering helps to ensure full coverage and prevent voids beneath the tile, which can weaken the installation. Periodically lift a tile to check for proper mortar coverage, aiming for at least 80% coverage for dry areas and 95% coverage for wet areas. Adjust the trowel size or application technique if necessary to achieve adequate coverage.
Once the tiles are installed, allow the thin-set mortar to cure completely before grouting. The curing time varies depending on the type of mortar and the environmental conditions. Consult the manufacturer's instructions for the recommended curing time. After the mortar has cured, remove the tile spacers and apply grout to fill the spaces between the tiles. Choose a grout that is appropriate for the type of tile and the intended application. After grouting, clean the tiles thoroughly and apply a grout sealer to protect the grout from staining and water damage.
Addressing Potential Challenges
While tiling over cement board is generally straightforward, certain challenges can arise. One common issue is unevenness in the cement board surface. This can be caused by improper installation, variations in the board's thickness, or damage during handling. To address unevenness, use a self-leveling compound to create a smooth, flat surface before tiling. Follow the manufacturer's instructions carefully when applying the self-leveling compound. The compound needs to bond fully with the cement board to prevent any movement.
Another potential challenge is working in corners and around fixtures. Precise cutting of the tiles is essential to achieve a professional-looking finish. Use a wet saw or a tile cutter to make accurate cuts. Dry-fitting the tiles before applying the thin-set mortar is recommended to ensure a proper fit. When working around pipes or other obstructions, use a hole saw to create clean, precise holes in the tiles.
Cracking in the grout lines can be a sign of movement in the substrate. This can be caused by inadequate fastening of the cement board, expansion and contraction due to temperature changes, or excessive deflection in the floor joists. To prevent cracking, ensure the cement board is securely fastened to the framing and that the framing is adequately supported. Using a flexible grout can also help to accommodate minor movement in the substrate.
In situations where significant movement is expected, consider installing a crack isolation membrane between the cement board and the tile. These membranes are designed to absorb stress and prevent cracks from transferring from the substrate to the tile. Follow the manufacturer's instructions carefully when installing a crack isolation membrane.
Finally, always refer to the manufacturer's specifications for both the cement board and the tiling materials being used. Different products can have varying tolerances or requirements. Following manufacturer recommendations will give the best possibility for a long lasting secure tiling job.

How To Install Cement Board On A Floor Diy Family Handyman

How To Install Cement Board The Home Depot

Tile Backerboard Material Options Fine Homebuilding

How To Install Cement Board For Tile Projects Diy Family Handyman

How To Install Hardiebacker Cement Board On Floors James Hardie Pros

How To Install A Cement Board For Tiling Beaumont Tiles

How To Install Cement Board The Home Depot

The Ins And Outs Of Cement Board Repair Grout Experts

Tile Installers Select Hardiebacker Cement Board As Most Preferred Brand 2024 02 22 Stone World

Installing Cement Board In The Bathroom Angie S Roost
Related Posts