Can You Put Vinyl On Top of Ceramic Tiles? A Comprehensive Guide
The question of whether vinyl flooring can be installed over existing ceramic tile is a common one arising from renovation projects. The answer is generally yes, but it is contingent upon several factors and requires careful preparation for optimal and long-lasting results. A seamless and durable vinyl floor installation over ceramic tile necessitates a thorough understanding of the existing tile's condition, appropriate subfloor preparation techniques, and the selection of suitable vinyl flooring materials and installation methods.
Installing vinyl directly over ceramic tile can be an attractive option for several reasons. It can save time and labor by avoiding the potentially messy and arduous task of removing the existing tile. It can also be a cost-effective solution, as demolition and disposal fees for the old tile are eliminated. Furthermore, the existing tile can provide a relatively stable and level subfloor, which is crucial for a successful vinyl flooring installation.
However, success is not guaranteed. Certain issues need to be addressed before proceeding with the project. Failure to adequately prepare the surface or select the appropriate vinyl flooring can lead to problems such as unevenness, telegraphing of grout lines, adhesive failure, and ultimately, a compromised finished floor. This article will explore the key considerations and best practices for putting vinyl on top of ceramic tiles, ensuring a professional and durable outcome.
Key Point 1: Assessing the Existing Ceramic Tile Condition
The initial step is a comprehensive assessment of the existing ceramic tile floor. The condition of the tiles directly impacts the feasibility and required preparation for a successful vinyl installation. The critical factors to evaluate include the tile's stability, levelness, and integrity.
Firstly, the tiles must be firmly adhered to the subfloor. Loose, cracked, or broken tiles must be repaired or replaced. Loose tiles will create movement under the vinyl, leading to cracking and premature failure. Replacement tiles should be of the same thickness as the existing tiles to maintain a level surface. If matching tiles cannot be found, the surrounding tiles may need to be removed and the area filled with a leveling compound to create a uniform plane. The repair mortar and leveling compound must be allowed to fully cure according to the manufacturer’s instructions before proceeding.
Secondly, the overall levelness of the tile floor is crucial. Significant height variations between tiles or sloping areas can cause the vinyl to flex and potentially crack. A long level or straight edge should be used to identify any unevenness. Minor variations can often be addressed with a self-leveling compound. However, more significant deviations may require more extensive leveling work, potentially involving grinding down high spots or filling in low spots with mortar. The goal is to create a flat and even surface that will provide a stable base for the vinyl flooring.
Thirdly, the condition of the grout lines must be considered. Deep or wide grout lines can telegraph through the vinyl, creating an unsightly texture on the finished floor. This telegraphing effect is more pronounced with thinner vinyl flooring options. Filling the grout lines with a cement-based grout filler or a specialized grout leveling compound is essential to create a smooth surface. The filler should be applied according to the manufacturer's instructions and allowed to cure completely before sanding it smooth.
Finally, a thorough cleaning of the tile floor is necessary. Any dirt, grease, wax, or other contaminants must be removed. A degreasing cleaner should be used to thoroughly scrub the surface, followed by a rinse with clean water. Allowing the floor to dry completely is paramount before proceeding with any further preparation or installation.
Key Point 2: Subfloor Preparation Techniques
Proper subfloor preparation is paramount for ensuring the longevity and aesthetics of the vinyl floor. The primary objective is to create a smooth, clean, and level surface that will provide adequate adhesion for the vinyl flooring adhesive.
After cleaning and repairing the tile floor, the next crucial step is to address the grout lines. As discussed previously, deep or wide grout lines can telegraph through the vinyl flooring, creating an undesirable textured appearance. There are several methods for dealing with grout lines, each with its own advantages and disadvantages.
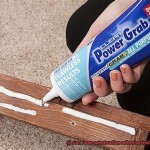
One option is to use a cement-based grout filler. This is a relatively inexpensive and readily available solution. The grout filler is applied directly into the grout lines, filling them flush with the surface of the tile. After the filler has cured, it should be sanded smooth to eliminate any ridges or imperfections. Multiple applications may be necessary to achieve a perfectly smooth surface.
Another option is to use a self-leveling compound specifically designed for filling grout lines. These compounds are typically more expensive than cement-based grout fillers, but they offer the advantage of self-leveling, which can result in a smoother and more uniform surface. The self-leveling compound is poured over the tile floor and allowed to spread evenly, filling the grout lines. Once cured, the surface should be lightly sanded to remove any imperfections.
Once the grout lines have been filled and sanded smooth, a primer may be necessary. Primers improve the adhesion of the vinyl flooring adhesive to the tile surface. Select a primer specifically designed for use with vinyl flooring adhesives and follow the manufacturer's instructions carefully. Application is typically done with a roller or brush, ensuring even coverage across the entire surface. Allow the primer to dry completely before proceeding with the vinyl installation.
Finally, for particularly uneven tile floors, a layer of self-leveling underlayment may be required. This is a pourable compound that creates a perfectly smooth and level surface. The self-leveling underlayment is applied over the entire tile floor, filling in any low spots and creating a uniform plane. This is the most comprehensive method for preparing the subfloor and is recommended for floors with significant unevenness.
Key Point 3: Selecting and Installing the Appropriate Vinyl Flooring
The choice of vinyl flooring and the installation method are critical factors in determining the success of the project. Different types of vinyl flooring have varying thicknesses, wear layers, and installation requirements. Selecting the appropriate vinyl flooring for the specific application and following the manufacturer's instructions closely will ensure a durable and aesthetically pleasing finished floor.
Vinyl flooring is available in several forms, including sheet vinyl, vinyl tile, and luxury vinyl plank (LVP). Sheet vinyl is a large continuous piece of vinyl that is rolled out and adhered to the subfloor. It offers excellent water resistance and is a good choice for bathrooms and kitchens. Vinyl tile is individual tiles that are adhered to the subfloor. It is available in a variety of sizes, shapes, and colors, offering design flexibility. LVP is designed to mimic the look of hardwood or stone flooring. It is typically thicker than sheet vinyl or vinyl tile and offers exceptional durability and water resistance.
The thickness of the vinyl flooring is a crucial consideration when installing over ceramic tile. Thicker vinyl flooring, such as LVP, is generally better at concealing imperfections in the subfloor and preventing telegraphing of grout lines. Thinner vinyl flooring, such as sheet vinyl, may require more extensive subfloor preparation to ensure a smooth finished surface. The wear layer, which is the top layer of the vinyl flooring that protects it from scratches and wear, should also be considered. A thicker wear layer will provide greater durability and longevity.
The installation method will depend on the type of vinyl flooring selected. Sheet vinyl typically requires full-spread adhesive, where adhesive is applied to the entire subfloor. Vinyl tile and LVP may be installed using full-spread adhesive, perimeter-bonded adhesive, or a click-lock system. Full-spread adhesive provides the most secure bond and is recommended for areas with heavy traffic or moisture. Perimeter-bonded adhesive is applied only around the perimeter of the flooring, allowing for easier removal if necessary. Click-lock systems are interlocking planks or tiles that do not require adhesive. They are easy to install and are a good choice for DIY projects.
Before installing any vinyl flooring, it is essential to read and follow the manufacturer's instructions carefully. The instructions will provide specific guidance on subfloor preparation, adhesive selection, and installation techniques. Proper installation is crucial for ensuring the longevity and performance of the vinyl floor. Using the wrong adhesive or failing to properly prepare the subfloor can lead to premature failure of the flooring.
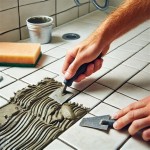
It is also important to use the right tools for the job. This may include a notched trowel for applying adhesive, a seam roller for pressing the vinyl flooring into the adhesive, and a utility knife for trimming the flooring. Accuracy and precision are crucial throughout the installation process to achieve a professional-looking finished floor. Taking the time to carefully measure and cut the vinyl flooring and to ensure that it is properly aligned will result in a seamless and durable installation.
In summary, putting vinyl on top of ceramic tiles is a viable option for many homeowners. By carefully assessing the existing tile condition, adequately preparing the subfloor, and selecting and installing the appropriate vinyl flooring, a beautiful and long-lasting floor can be achieved. However, it is crucial to understand that the quality of the final result hinges directly on the thoroughness of the preparation and the adherence to best practices throughout the process.

Transform Your Home Installing Vinyl Flooring Over Ceramic Tiles City Wall And Floor

What Type Of Flooring Can You Install Over Ceramic Tile

Should You Install Vinyl Floor Over Tile

How To Lay Vinyl Flooring Sheet Over Tiles

How To Install Vinyl Or Laminate Flooring Over Existing Ceramic Tile

Can You Put Lvp Over Tile Wc Supply Whole Cabinet

How To Install L Stick Tile Over Existing Bathroom Vinyl Floor Diy Power Couple

New Vinyl Plank Flooring Over Tile Table And Hearth

Can I Lay Premium Vinyl Flooring Over A Tile Floor Hometalk

Can You Put Vinyl Flooring Over Tile A Complete Guide Teka
Related Posts