Can You Put Plywood Over Tile? A Comprehensive Guide
The question of whether plywood can be installed over existing tile flooring is a common one for homeowners considering renovations or updates. The answer is not a simple yes or no; rather, it involves careful consideration of several factors, including the condition of the existing tile, the intended use of the room, and the type of flooring being installed over the plywood subfloor. This article provides a detailed analysis of the possibilities and potential pitfalls associated with this type of installation.
Installing plywood over tile can be a cost-effective approach to preparing a subfloor for new flooring, particularly when the existing tile is firmly adhered and relatively level. Removing tile can be a laborious and messy process, generating substantial dust and debris. Covering it with plywood offers a potentially faster and cleaner alternative, avoiding the need for demolition and disposal. However, it's crucial to understand the underlying principles and potential consequences to ensure a successful and long-lasting result. Failure to properly assess the situation and prepare the surface can lead to problems such as unevenness, squeaking, and ultimately, failure of the new flooring.
Assessing the Existing Tile
The first, and arguably most important, step is to thoroughly examine the existing tile floor. The goal is to determine its stability, flatness, and overall condition. This assessment will dictate whether or not installing plywood over the tile is a viable option.
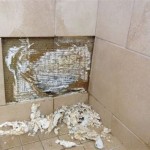
Begin by walking across the entire tiled area, paying close attention to any loose, cracked, or uneven tiles. Loose tiles must be addressed before any further work is undertaken. Attempting to overlay plywood over loose tiles will only exacerbate the problem, leading to movement and potential cracking of the new flooring. Similarly, cracked tiles should be repaired or replaced. Small cracks can sometimes be filled with epoxy, but larger, more significant cracks may indicate underlying structural issues that need to be addressed.
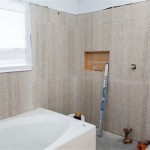
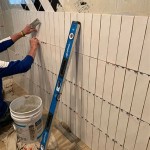
Next, assess the flatness of the floor. Use a long level (at least six feet) to check for any dips, humps, or variations in height. Minor imperfections can often be addressed with self-leveling compound, but significant irregularities will need more aggressive solutions. Remember that plywood will conform to the underlying surface, so any unevenness in the tile will be transferred to the plywood subfloor. This can create problems with the installation of the final flooring, particularly with materials like hardwood or luxury vinyl plank.
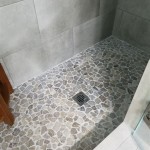
Finally, consider the type of tile. Certain types of tile, such as extremely hard porcelain, may not provide a sufficient bonding surface for adhesives. In these cases, mechanical fasteners may be the only reliable way to secure the plywood.
Preparing the Tile Surface
Once the existing tile has been assessed and any necessary repairs have been made, the surface needs to be properly prepared to ensure a strong bond with the plywood. This preparation is crucial for the long-term stability and performance of the installation.
Begin by thoroughly cleaning the tile surface. Remove any dirt, grease, wax, or other contaminants that could interfere with adhesion. A strong degreasing cleaner is recommended, followed by a thorough rinsing with clean water. Allow the surface to dry completely before proceeding. The cleaner is important as it removes any substance that may affect how the tile bonds with the plywood. This includes any old adhesives or residue that have remained behind from cleaning products.
Next, consider scuffing the surface of the tile. This creates a mechanical key that will improve the adhesion of the adhesive. A coarse-grit sandpaper or a diamond-grit grinding pad can be used for this purpose. Be careful not to remove too much material, as you only want to create a rough surface. After scuffing, vacuum the surface thoroughly to remove any dust or debris.
In some cases, a primer may be necessary to improve adhesion. Consult with the adhesive manufacturer to determine if a primer is recommended for your specific application. Apply the primer according to the manufacturer's instructions and allow it to dry completely before installing the plywood.
Installing the Plywood Subfloor
With the tile surface properly prepared, the plywood subfloor can now be installed. The selection of the appropriate plywood and fastening method is critical for a successful installation.
Choose a suitable grade and thickness of plywood for the intended application. For most residential applications, a minimum of 3/4-inch thick plywood is recommended. CDX plywood is a common and cost-effective choice, but higher grades, such as AC or BC plywood, may be preferred for improved appearance and stability. Ensure the plywood is properly acclimated to the room's environment for several days prior to installation to minimize expansion and contraction after installation. This reduces the chance of warping, which can contribute to an uneven surface.
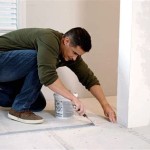
Apply a high-quality construction adhesive specifically designed for bonding wood to tile. Spread the adhesive evenly across the back of the plywood sheet using a notched trowel, following the manufacturer's recommendations for trowel size and coverage. Place the plywood sheet on the prepared tile surface and press it firmly into place. It's best to use a urethane adhesive that is resistant to water and moisture. This helps to reduce future issues with warping to the tiles and plywood.
In addition to adhesive, mechanical fasteners are generally recommended for added security. Use screws or nails that are long enough to penetrate the plywood and reach into the underlying subfloor. Space the fasteners evenly across the plywood sheet, typically every 6-8 inches around the perimeter and every 12 inches in the field. Countersink the fasteners slightly to avoid interfering with the installation of the final flooring. Make sure the screw heads are flush with the surface of the plywood. This prevents anything from snagging on the screw heads and contributing to damage.
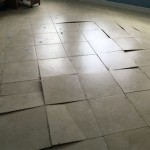
Stagger the seams of the plywood sheets to avoid creating continuous weak points in the subfloor. Leave a small gap (approximately 1/8 inch) between the plywood sheets to allow for expansion and contraction. Fill any gaps or seams with wood filler or patching compound to create a smooth and even surface. Sand the entire surface lightly to remove any imperfections or rough spots. Vacuum the surface thoroughly to remove any dust or debris before installing the final flooring.
Ensure all building codes regarding subfloor construction are followed. Specific requirements might differ depending on the location and use of the space. Consult with local building authorities to confirm compliance with all relevant regulations. This is especially important in areas subject to high moisture or load requirements.
Alternatives to Plywood Installation
While plywood can be a viable option, there are alternative methods for dealing with existing tile that should be considered. These alternatives may be more suitable depending on the specific circumstances.
Self-leveling concrete is a cementitious mixture that can be poured over existing tile to create a perfectly level surface. This is an excellent option for addressing significant unevenness in the floor. However, it can be more expensive than plywood and requires careful preparation and application. This method ensures a flat, stable surface for installing new flooring.
Cement backer board is another option, particularly when installing new tile or stone flooring. It provides a stable and moisture-resistant substrate for tile installations. Cement boards are often thinner than plywood, minimizing the impact on floor height.
Removing the existing tile and installing a new subfloor is often the best solution, although it is the most labor-intensive. This allows for a complete inspection of the underlying subfloor and ensures that any structural issues are addressed. This option provides the best long-term results, ensuring a solid and stable foundation for the new flooring.
Ultimately, the decision of whether to install plywood over tile depends on a careful assessment of the existing conditions, the intended use of the room, and the desired outcome. By carefully considering the factors outlined in this article, homeowners can make an informed decision and achieve a successful and long-lasting flooring installation.

Blog Expert Advice How To Tile Onto Wood Plywood Or Chipboard

Blog Expert Advice How To Tile Onto Wood Plywood Or Chipboard

How To Lay Tile Over Plywood

How To Prepare A Subfloor For Tile Installation The Home Depot

How To Install Tile Backer Board On A Wood Subfloor Diy

Blog Expert Advice How To Tile Onto Wood Plywood Or Chipboard

How To Prepare Subfloor For Tile The Home Depot

Tile Subfloor Deflection Thickness Common Substrates

Tile Underlayment The Complete Guide For Beginners Diytileguy

How To Install Tile On Plywood Floor
Related Posts