Can You Put Plywood Over Tiles? A Comprehensive Guide
The question of whether plywood can be installed directly over existing tile flooring is a common one in renovation and construction projects. Circumstances where this might be considered arise when the existing tile is structurally sound but aesthetically undesirable, or when raising the floor height is necessary to match adjacent flooring surfaces. While technically feasible in certain scenarios, laying plywood over tiles presents a range of considerations that must be carefully evaluated to ensure a stable, durable, and long-lasting result.
This article will explore the feasibility of installing plywood over tiles, examining the advantages, disadvantages, and crucial preparation steps required for a successful installation. It will also address potential pitfalls and alternative solutions, providing a comprehensive understanding of this flooring approach.
Evaluating the Existing Tile Surface
The foundation of any successful flooring installation lies in the integrity of the subfloor. In this case, the existing tile floor acts as the subfloor. A thorough inspection of the tile is critical before considering any further steps. The evaluation should encompass several key aspects:
Structural Soundness: Each tile should be individually inspected for cracks, chips, or any signs of damage. Loose tiles are a major concern, as they will create instability under the plywood. Repairing or replacing damaged and loose tiles is paramount before proceeding. If a significant portion of the tile floor is compromised, removing the entire tile layer might be the more practical and cost-effective solution.
Levelness: Tiles, even when properly installed, can have minor variations in height. Significant unevenness can create inconsistencies in the plywood surface, leading to potential problems with the final flooring. Self-leveling compound can be used to address minor discrepancies. However, major variations might necessitate more extensive preparation or reconsideration of the project.
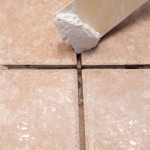
Cleanliness: The tile surface must be thoroughly cleaned to remove any dirt, grease, wax, or debris that could interfere with adhesion. A degreasing cleaner followed by a thorough rinse is recommended. The surface should be completely dry before proceeding with any adhesive application.
Type of Tile: The type of tile (ceramic, porcelain, etc.) can influence the choice of adhesive and the overall performance of the plywood installation. Porous tiles may offer better adhesion than smoother, non-porous tiles. Consider consulting with adhesive manufacturers for recommendations specific to the tile type.
Preparing the Tile Surface and Installing the Plywood
Assuming the existing tile surface meets the aforementioned criteria, the next step involves preparing the surface and installing the plywood. This phase is crucial for ensuring a stable and secure bond between the tile and the plywood.
Priming: Applying a suitable primer to the tile surface is often recommended. Primers enhance adhesion by creating a better bonding surface for the adhesive. Select a primer that is specifically designed for use on non-porous surfaces like tile. Follow the manufacturer's instructions for application and drying time.
Choosing the Right Adhesive: Selecting the appropriate adhesive is paramount. Construction adhesives designed for bonding wood to non-porous surfaces are typically recommended. These adhesives provide a strong and flexible bond, accommodating minor movement and preventing delamination. Consult with adhesive manufacturers and flooring professionals for specific product recommendations.
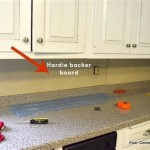
Plywood Selection: The type and thickness of plywood are critical factors. Subfloor-grade plywood is typically recommended due to its structural integrity and resistance to moisture. The thickness of the plywood should be determined by the span between the floor joists and the anticipated load on the floor. Thicker plywood is generally required for wider spans and heavier loads. Proper acclimation of the plywood to the environment is also important to minimize expansion and contraction after installation.
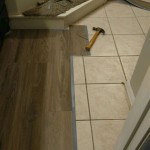
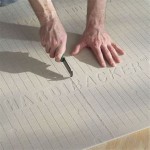
Plywood Installation: Apply the construction adhesive to the primed tile surface in a consistent pattern. Place the plywood sheets firmly onto the adhesive, ensuring full contact. Use construction screws to secure the plywood to the subfloor. The screws should penetrate through the tile and into the subfloor below. Ensure the screws are countersunk to avoid protruding above the plywood surface. Stagger the seams between plywood sheets to enhance stability. Leave a small expansion gap (approximately 1/8 inch) between the plywood sheets and the walls to accommodate expansion and contraction.
Addressing Potential Problems and Considerations
While installing plywood over tiles can be a viable solution, it is crucial to be aware of potential problems and considerations that can impact the success of the project.
Moisture: Moisture is a significant concern in any flooring installation. If the tile floor is located in a moisture-prone area (e.g., bathroom, kitchen, basement), taking extra precautions to prevent moisture from penetrating the plywood is imperative. Consider installing a moisture barrier between the tile and the plywood. Proper ventilation and climate control are also essential.
Floor Height: Adding plywood over tiles will raise the floor height. This can create transitions between rooms and affect the operation of doors. Carefully consider the impact of the increased floor height and plan accordingly. Trimming doors and adjusting thresholds may be necessary.
Sound Transmission: The combination of tile and plywood can affect sound transmission. If soundproofing is a concern, consider incorporating a sound-dampening underlayment between the tile and the plywood. Consult with flooring professionals for recommendations on suitable soundproofing materials.
Weight: Adding plywood over tiles will increase the overall weight of the floor. Ensure the subfloor can support the additional load. Consult with a structural engineer if necessary to assess the load-bearing capacity of the floor.
Fastener Selection and Spacing: It's critical to select appropriate fasteners (screws) that can properly penetrate the tile layer and securely anchor into the subfloor below. The length of the screws should be carefully calculated based on the thickness of the tile, the plywood, and the penetration depth required for the subfloor material. Furthermore, the spacing of the screws is crucial for ensuring adequate holding power and preventing the plywood from lifting or shifting over time. A denser screw pattern is often recommended in areas with high traffic or potential for movement.
Dealing with Existing Floor Drains or Plumbing Fixtures: If the tiled area contains floor drains, toilets, or other plumbing fixtures, careful planning and execution are necessary to ensure proper integration with the new plywood floor. Cutouts in the plywood must be precisely made to accommodate these fixtures, and appropriate sealing or flashing may be required to prevent water damage and maintain a watertight seal. It's often advisable to consult with a licensed plumber to ensure compliance with local building codes and proper functionality of the plumbing system.
Ensuring Proper Subfloor Ventilation: If the subfloor beneath the tiled area is a crawl space or an unheated basement, proper ventilation is essential to prevent moisture buildup and potential mold growth. Ensure adequate airflow to these areas to minimize the risk of moisture-related problems that could compromise the integrity of the plywood flooring. Consider installing vapor barriers and ensuring proper insulation to further protect the subfloor from moisture and temperature fluctuations.
Potential for Future Tile Removal: While the goal is to create a long-lasting and stable floor, it's important to consider the potential for future tile removal. If the tiles are particularly valuable or potentially desirable in the future, installing the plywood in a way that minimizes damage to the underlying tiles might be a priority. This could involve using milder adhesives or employing techniques that allow for easier disassembly without significantly damaging the tile surface. Documenting the installation process can also be helpful for future reference.
In conclusion, while putting plywood over tiles can present an appealing alternative to extensive tile removal, it mandates careful consideration of existing tile condition, proper preparation, and understanding of potential long-term implications. Ignoring these factors could lead to flooring instability, moisture-related issues, and ultimately, a compromised final result. Alternative flooring solutions should also be evaluated to determine the most appropriate and cost-effective approach for the specific project requirements.

Blog Expert Advice How To Tile Onto Wood Plywood Or Chipboard

Blog Expert Advice How To Tile Onto Wood Plywood Or Chipboard

How To Lay Tile Over Plywood

How To Prepare A Subfloor For Tile Installation The Home Depot

How To Install Tile Backer Board On A Wood Subfloor Diy

Blog Expert Advice How To Tile Onto Wood Plywood Or Chipboard

How To Prepare Subfloor For Tile The Home Depot

Tile Subfloor Deflection Thickness Common Substrates

Tile Underlayment The Complete Guide For Beginners Diytileguy

How To Prepare A Subfloor For Tile Installation The Home Depot
Related Posts