Can You Put Lino On Top of Tiles? A Comprehensive Guide
The prospect of installing new flooring can be daunting, often involving extensive preparation, potential demolition, and significant disruption to daily life. Laying new flooring over existing surfaces is a common consideration to minimize these challenges. Linoleum, often referred to as lino, offers a relatively inexpensive and easy-to-install solution. This article will explore the feasibility of installing linoleum over existing tile flooring, outlining the benefits, potential drawbacks, necessary preparations, and best practices for achieving a successful and long-lasting result.
Linoleum is a natural flooring material made from renewable resources such as linseed oil, rosin, cork dust, wood flour, and mineral pigments. It is known for its durability, water resistance, and ease of maintenance. While it is a resilient and long-lasting material under proper conditions, its performance when installed over tile depends heavily on the condition of the existing tiles and the quality of the subfloor created. Failing to adequately prepare the surface can lead to problems such as unevenness, adhesive failure, and eventual damage to both the linoleum and the underlying tile.
Key Point 1: Assessing the Suitability of Existing Tile
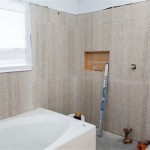
Before considering linoleum installation, a meticulous assessment of the existing tile flooring is crucial. The primary concern is the stability and levelness of the tile surface. Any loose, cracked, or uneven tiles will compromise the integrity of the new linoleum floor. These deficiencies must be addressed prior to installation.
Loose tiles should be removed and replaced. The subfloor beneath the removed tiles must be cleaned and repaired to ensure a solid base for the new tile. It is advisable to use the same type of tile and adhesive as the original installation to ensure compatibility and a seamless transition. If the original tiles are unavailable, a tile of similar thickness and material can be used, ensuring any slight height differences are addressed with appropriate leveling compounds.
Cracked tiles pose a similar challenge. Minor hairline cracks may be filled with epoxy-based fillers designed for tile repair. However, more significant cracks, especially those that indicate underlying structural issues, necessitate tile replacement. Ignoring cracks can result in the cracks propagating through the linoleum, leading to premature wear and tear.
Uneven tiles, even if firmly adhered, can create noticeable bumps and dips under the linoleum. The acceptable level of unevenness depends on the thickness and type of linoleum being installed. Thicker linoleum is more forgiving of minor imperfections, while thinner linoleum will more readily conform to the underlying surface, accentuating any unevenness. A general rule of thumb is that variations greater than 3/16 inch (approximately 5mm) over a 10-foot span should be addressed.
Another vital consideration is the type of tile. Ceramic and porcelain tiles are generally suitable as a subfloor for linoleum, provided they are properly installed and in good condition. However, tiles with heavily textured surfaces or deep grout lines may present challenges. These features can telegraph through the linoleum, creating an uneven and aesthetically unappealing surface. Addressing these features requires more extensive preparation, as described below.
Key Point 2: Preparing the Tile Surface for Linoleum Installation
Proper preparation is paramount for achieving a successful linoleum installation over tile. The goal is to create a smooth, clean, and level surface that will provide a stable base for the linoleum adhesive.
The first step is to thoroughly clean the tile surface. Remove all dirt, grime, grease, and wax using a strong alkaline cleaner specifically designed for tile. Rinse the surface thoroughly with clean water and allow it to dry completely. Any residual contaminants can interfere with the adhesion of the linoleum adhesive, leading to bond failure.
Once the surface is cleaned, attention must be given to the grout lines. Grout lines, particularly those that are wide or deep, can create visible indentations in the linoleum. To mitigate this, a cement-based leveling compound is typically used. This compound is applied over the entire tile surface, filling the grout lines and creating a smooth, level plane.
The choice of leveling compound is crucial. Self-leveling compounds are often preferred for their ease of application and ability to create a perfectly level surface. However, these compounds can be relatively expensive. Alternatively, a standard cement-based patching compound can be used, though it requires more skill and effort to achieve a smooth, even finish. Follow the manufacturer's instructions carefully when mixing and applying the leveling compound. Allow the compound to dry completely according to the manufacturer's recommendations before proceeding.
After the leveling compound has dried, lightly sand the surface to remove any imperfections or ridges. This creates a smooth and slightly textured surface that will promote better adhesion of the linoleum adhesive. Vacuum the surface thoroughly to remove any sanding dust.
Finally, a primer may be applied to the prepared surface. The primer enhances the adhesion of the linoleum adhesive and helps prevent moisture from migrating through the tile and leveling compound. Choose a primer that is specifically recommended for use with linoleum and the type of adhesive being used. Apply the primer according to the manufacturer's instructions and allow it to dry completely before proceeding with the linoleum installation.
Key Point 3: Linoleum Installation and Adhesive Selection
With the tile surface properly prepared, the linoleum can be installed. Careful attention to detail during this stage is critical for achieving a professional-looking and long-lasting result.
Before installing the linoleum, it is essential to ensure that it is properly acclimatized to the room. Unroll the linoleum and allow it to sit in the room for at least 24 to 48 hours before installation. This allows the linoleum to adjust to the room's temperature and humidity, minimizing the risk of shrinkage or expansion after installation.
Choosing the right adhesive is crucial for a successful installation. Select an adhesive that is specifically designed for linoleum and suitable for use over non-porous surfaces like tile. There are various types of linoleum adhesives available, including water-based and solvent-based options. Water-based adhesives are generally preferred for their low VOC (volatile organic compound) content and ease of cleanup. However, solvent-based adhesives may offer stronger initial tack and better resistance to moisture. Consult the linoleum manufacturer's recommendations for the most appropriate adhesive.
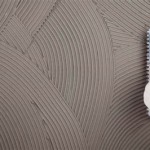
Apply the adhesive evenly to the prepared surface using a notched trowel. The size and shape of the notches on the trowel will determine the amount of adhesive applied. Follow the adhesive manufacturer's instructions for the recommended trowel size and application technique. Avoid applying too much adhesive, as this can lead to adhesive squeeze-out and bonding problems. Similarly, avoid applying too little adhesive, as this can result in poor adhesion and bubbling.
Carefully position the linoleum on the adhesive, ensuring that it is properly aligned and overlaps the edges of the room slightly. Use a flooring roller to press the linoleum firmly into the adhesive, starting from the center and working outwards. This will ensure that the linoleum is fully bonded to the surface and that any air pockets are eliminated. Pay particular attention to the seams, edges, and corners, ensuring that they are properly bonded.
Once the linoleum is installed, trim the excess material around the edges of the room using a utility knife or a specialized flooring knife. Leave a small expansion gap around the perimeter of the room to allow for any future expansion or contraction of the linoleum. Cover the expansion gap with baseboards or quarter-round molding to create a finished and professional look.
After the adhesive has fully cured, typically 24 to 72 hours, clean the linoleum surface with a neutral pH cleaner. Avoid using harsh chemicals or abrasive cleaners, as these can damage the linoleum finish. Regular cleaning and maintenance will help to prolong the life of the linoleum and keep it looking its best.
In summary, installing linoleum over tile is feasible, but it demands meticulous preparation and careful execution. Thorough assessment of existing tile conditions, comprehensive surface preparation involving cleaning, leveling, and priming, and careful linoleum installation with appropriate adhesive usage will yield favorable outcomes. Neglecting these steps could potentially lead to costly repairs and replacements in the long run.

Installing Luxury Vinyl Over Existing Tiles Choices Flooring New Zealand

How To Tile Over Linoleum Floors Correctly

Transform Your Home Installing Vinyl Flooring Over Ceramic Tiles City Wall And Floor

How To Install Vinyl Flooring Over Tiles Linoleum Thrift Diving

Can You Put Vinyl Flooring Over Tile Igloo Surfaces

Can You Lay Tile Over Linoleum Rubi Blog Usa

Can You Lay Vinyl Over Tiles Luxury Flooring Floorbay

How To Lay Vinyl Flooring Sheet Over Tiles

Can You Put Lvp Over Tile Wc Supply Whole Cabinet

Should You Tile Over Vinyl Flooring Builddirect
Related Posts