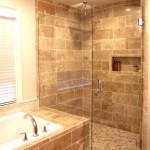
Can You Put Ceramic Tiles Onto Plasterboard? A Comprehensive Guide
The question of whether ceramic tiles can be adhered directly to plasterboard is a common one for both seasoned professionals and enthusiastic DIYers embarking on tiling projects. The short answer is yes, ceramic tiles can be applied to plasterboard. However, the success of such an installation hinges on several critical factors. These factors involve the condition of the plasterboard, the weight and type of tile being used, and the correct preparation and installation techniques. Ignoring these crucial considerations can lead to costly failures, including tiles detaching from the wall, cracked tiles, and ultimately, a complete re-tiling effort.
Plasterboard, also known as drywall or, in some regions, gypsum board, is a ubiquitous building material favored for its ease of installation and its ability to create smooth wall surfaces. While it offers a convenient substrate, its inherent properties differ significantly from those of a more robust substrate like cement board or a properly rendered masonry wall. Understanding these differences is paramount to ensuring a successful tile installation.
The suitability of plasterboard for tiling is largely determined by its ability to support the weight and absorb the minimal moisture. Plasterboard is significantly more porous and less structurally sound than cement boards. Therefore, it's essential to assess the plasterboard's condition and prepare it properly to maximize the chances of a long-lasting, aesthetically pleasing tiled surface.
Assessing the Plasterboard's Condition
Before even considering tile adhesive, a thorough inspection of the plasterboard is essential. The assessment begins with visually inspecting the surface for any signs of damage. This includes, but is not limited to, water stains, cracks, indentations, and loose or crumbling areas. These imperfections indicate underlying problems, such as moisture intrusion or structural weakness, which must be addressed before any tiling work commences.
Water damage is a particularly serious concern. Even seemingly minor water staining can indicate that the plasterboard has lost a significant portion of its structural integrity. If water damage is present, the affected section of the plasterboard must be removed and replaced with new, moisture-resistant plasterboard before tiling. Failure to do so will inevitably lead to tile failure as the weakened plasterboard is unable to adequately support the weight of the tiles.
In addition to visual inspection, it's crucial to check the plasterboard's stability. This can be done by gently pressing on the surface to feel for any soft spots or areas where the plasterboard feels loose or detached from the studs. Loose plasterboard represents a significant problem as it provides an unstable base for the tiles. Any loose sections must be re-secured to the studs using appropriate screws, or, if the damage is extensive, the entire section of plasterboard should be replaced.
Another important consideration is the thickness of the plasterboard. For tiling, thicker plasterboard (typically 12.5mm or 1/2 inch) is generally recommended as it provides better support than thinner options. If the existing plasterboard is thinner, it may be necessary to reinforce it with an additional layer of plasterboard to increase its weight-bearing capacity. This adds to the overall cost and labor, but it significantly improves the long-term stability of the tiled surface.
Choosing the Right Tiles and Adhesive
The type and weight of the ceramic tiles play a crucial role in determining the suitability of plasterboard as a substrate. Larger and heavier tiles place a greater strain on the plasterboard, increasing the risk of detachment and failure. As a general rule, smaller and lighter tiles are more suitable for plasterboard installations.
The weight limit for tiles on plasterboard is a critical factor. While specific recommendations may vary slightly depending on the manufacturer of the plasterboard and the adhesive, a general guideline is to keep the combined weight of the tiles and adhesive below 32 kg per square meter (approximately 6.5 lbs per square foot). Exceeding this weight limit significantly increases the risk of the tiles detaching from the wall. It's important to carefully calculate the weight of the tiles and adhesive to ensure that the weight limit is not exceeded. It’s always prudent to err on the side of caution and choose lighter tiles if there is any doubt.
The choice of adhesive is equally important. A high-quality, flexible tile adhesive specifically designed for use with plasterboard is essential. These adhesives are formulated to provide a strong bond while accommodating some degree of movement in the plasterboard, which is common due to changes in temperature and humidity. Standard tile adhesives may not provide sufficient flexibility and bonding strength, leading to tile failure over time.
Powdered adhesives that are mixed with water or latex additives are often a good choice for tiling onto plasterboard. These adhesives tend to offer better bonding strength and flexibility compared to ready-mixed options. It is essential to follow the manufacturer's instructions carefully when mixing the adhesive to ensure the correct consistency and performance.
It is important to also consider the use of a suitable primer on the plasterboard surface before applying the adhesive. A primer helps to seal the plasterboard and improve the adhesion of the adhesive. This is particularly important in areas that are prone to moisture, such as bathrooms and kitchens. A good quality acrylic primer that is compatible with the chosen adhesive should be applied in accordance with the manufacturer's instructions.
Preparation and Installation Techniques
Proper preparation of the plasterboard surface is paramount to achieving a successful and long-lasting tile installation. This preparation involves several key steps, starting with cleaning the surface thoroughly. Any dust, dirt, grease, or other contaminants must be removed from the plasterboard surface as these impurities can interfere with the adhesion of the tile adhesive. A damp sponge or cloth can be used to clean the surface, ensuring that it is completely dry before proceeding.
As mentioned previously, priming the plasterboard is a crucial step. A primer helps to seal the surface, reduce its absorbency, and improve the bond between the plasterboard and the tile adhesive. The primer should be applied evenly across the entire surface using a roller or brush, ensuring that all areas are adequately covered. The primer must be allowed to dry completely according to the manufacturer's instructions before applying the tile adhesive.
The application of the tile adhesive is another critical step. The adhesive should be applied using a notched trowel, ensuring that the notches are of the correct size for the size and type of tile being used. The adhesive should be applied in a consistent and uniform layer, avoiding any gaps or voids. The tiles should be pressed firmly into the adhesive with a slight twisting motion to ensure good contact and even distribution of the adhesive.
The use of tile spacers is essential to maintain consistent spacing between the tiles. This helps to create a professional-looking finish and ensures that the grout lines are uniform. The tile spacers should be inserted between the tiles as they are being laid, and they should be removed after the adhesive has dried but before grouting.
Grouting is the final step in the tile installation process. The grout fills the gaps between the tiles, providing a waterproof seal and preventing water from penetrating the plasterboard. The grout should be applied using a grout float, pressing it firmly into the grout lines. Excess grout should be wiped away with a damp sponge, and the surface should be cleaned thoroughly once the grout has dried.
When tiling in areas that are subject to high levels of moisture, such as bathrooms and kitchens, it is particularly important to use a waterproof grout and to seal the grout lines with a grout sealer. This will help to prevent water from penetrating the plasterboard and causing damage. It is also important to ensure that the room is well-ventilated to allow moisture to escape.
In summary, tiling onto plasterboard is feasible, but it demands meticulous attention to detail. By carefully assessing the condition of the plasterboard, selecting appropriate tiles and adhesive, and following proper preparation and installation techniques, a durable and aesthetically pleasing tiled surface can be achieved. Neglecting these factors can lead to costly and frustrating failures. Seek professional advice when uncertain.

Can You Tile Onto Plasterboard A Comprehensive Guide Tiles4less

How To Tile Onto Plasterboard Warehouse
Can You Tile Onto Plasterboard Straight
Can You Tile Onto Plasterboard Straight

How To Tile Onto Plasterboard Drywall

Can You Tile Onto Plasterboard Tips And Tricks

Solved Tiling Onto Gyprock Bunnings Work Community

How To Install Tiles On A Gypsum Wall Pma Imperio

Can You Tile Directly Onto Drywall Plasterboard
Can You Tile Onto Plasterboard Straight
Related Posts

