Can You Put Backsplash Tile On Painted Drywall Ceilings In Bathrooms?
The question of adhering backsplash tile to painted drywall ceilings, particularly in bathroom environments, is a multifaceted one. Bathrooms present unique challenges due to elevated humidity levels and fluctuating temperatures, which significantly impact the longevity and adhesion of any tiling project. While technically possible, directly tiling onto painted drywall ceilings requires meticulous preparation, appropriate materials, and a thorough understanding of the potential risks involved. This article explores the feasibility of this approach, highlighting crucial considerations and alternative methods to ensure a successful and durable outcome.
Drywall, also known as gypsum board, is a common building material used for interior walls and ceilings. It consists of a gypsum core sandwiched between layers of paper. While drywall is relatively inexpensive and easy to install, it is also porous and susceptible to moisture damage. Paint provides a degree of protection, but it does not render drywall waterproof. The presence of paint further complicates tiling, as it creates a barrier between the tile adhesive and the drywall substrate, potentially compromising the bond strength.
The primary concern when tiling any surface, but especially a ceiling, is the integrity of the bond between the tile and the substrate. A weak bond increases the risk of tiles detaching, which can lead to costly repairs and potential safety hazards, especially given the overhead nature of a ceiling installation in a bathroom.
Factors Affecting Tile Adhesion to Painted Drywall Ceilings
Several factors critically influence the success of tiling on painted drywall ceilings in bathrooms. These factors must be carefully assessed and addressed to mitigate potential problems and ensure a long-lasting result.
1. Type and Condition of Paint: The type of paint used on the drywall significantly influences adhesion. Glossy or semi-gloss paints, common in bathrooms due to their moisture resistance and ease of cleaning, present a smoother, less porous surface, making it more difficult for tile adhesive to grip. The condition of the paint is equally important. Peeling, flaking, or poorly adhered paint must be removed entirely before tiling, as it will compromise the overall bond strength. Even seemingly intact paint can harbor hidden weaknesses, which may lead to tile failure over time.
2. Moisture Levels and Ventilation: Bathrooms are inherently humid environments. Showers and baths release significant amounts of moisture into the air, which can penetrate the paint layer and affect the drywall underneath. Poor ventilation exacerbates this problem, creating a breeding ground for mold and mildew, further weakening the substrate. Before considering tiling, it is crucial to address any existing moisture issues and ensure adequate ventilation to minimize humidity levels. An exhaust fan is essential and should be used consistently during and after showers or baths.
3. Weight and Size of Tiles: The weight and size of the tiles used are critical considerations. Large, heavy tiles place a greater strain on the adhesive and the drywall ceiling. Smaller, lighter tiles are generally more suitable for ceiling applications, as they distribute the weight more evenly and reduce the risk of detachment. Mosaics are often a good option. It is imperative to select tiles that are appropriate for the structural capacity of the ceiling and the adhesive's bonding strength.
4. Type of Adhesive: The choice of adhesive is paramount for a successful tiling project on a painted drywall ceiling. Not all adhesives are created equal, and selecting the wrong type can lead to premature failure. Polymer-modified thin-set mortars are generally preferred for this type of application, as they offer superior bonding strength, flexibility, and water resistance compared to traditional mortars. It is essential to choose an adhesive specifically formulated for use on non-porous surfaces and follow the manufacturer's instructions precisely.
5. Preparation of the Surface: Proper surface preparation is arguably the most critical step in ensuring a strong and durable bond. This involves thoroughly cleaning the painted surface to remove any dirt, grease, or soap scum. Sanding the paint lightly can create a slightly rougher surface, improving the adhesive's grip. However, excessive sanding can damage the drywall paper. Applying a bonding primer specifically designed for non-porous surfaces is highly recommended, as it creates a chemical bond between the paint and the adhesive, enhancing adhesion and preventing moisture penetration. The primer must be allowed to dry completely before applying the tile.
Alternatives to Tiling Directly on Painted Drywall Ceilings
Given the inherent risks associated with tiling directly onto painted drywall ceilings in bathrooms, exploring alternative methods is often a more prudent approach. These alternatives provide a more stable and reliable substrate for tiling, minimizing the risk of failure and extending the lifespan of the installation.
1. Installation of Cement Board: Cement board, also known as concrete backer board, is a waterproof and durable substrate specifically designed for tiling in wet areas. It is significantly more resistant to moisture and mold than drywall, making it an ideal choice for bathroom ceilings. Installing cement board involves removing the existing drywall and replacing it with the cement board. The cement board is then screwed to the ceiling joists, creating a solid and stable base for the tiles. This method requires more labor and materials but provides a far superior and longer-lasting result.
2. Encapsulation with a Waterproof Membrane: Applying a waterproof membrane over the existing drywall can provide a barrier against moisture penetration and improve adhesion. These membranes are typically applied as a liquid or sheet and create a seamless, waterproof surface. While this method is less invasive than installing cement board, it is crucial to ensure that the existing drywall is in good condition and free from any moisture damage. The membrane must be compatible with the chosen adhesive and tiles.
3. Beadboard or PVC Ceiling Panels: As alternatives to ceramic or stone tiles, beadboard or PVC ceiling panels offer a decorative and moisture-resistant option for bathroom ceilings. These panels are typically easier to install than tiles and require less specialized tools and skills. They are also available in a variety of styles and finishes to complement different bathroom designs. While they may not provide the same aesthetic as traditional tile, they offer a practical and durable solution for bathroom ceilings.
Key Considerations for Choosing an Alternative
Selecting the best alternative depends on several factors, including the budget, skill level, and desired aesthetic. Cement board offers the most robust and waterproof solution but requires more extensive renovation. Waterproof membranes provide a less invasive option but require careful application and may not be suitable for severely damaged drywall. Beadboard or PVC panels offer a cost-effective and easy-to-install alternative, but may not appeal to those seeking a traditional tiled look.
Proper Installation Techniques
Regardless of whether you choose to tile directly onto painted drywall or opt for an alternative substrate, proper installation techniques are essential for a successful and long-lasting result. These techniques include:
1. Thorough Surface Preparation: As previously mentioned, proper surface preparation is paramount. This includes cleaning, sanding (if appropriate), and priming the surface. Ensure that the surface is completely dry before applying any adhesive or membrane.
2. Proper Mortar Application: When using thin-set mortar, apply it evenly to the back of the tile using a notched trowel. The notch size should be appropriate for the size and type of tile being used. Press the tile firmly into the mortar, using a slight twisting motion to ensure good contact. Use tile spacers to maintain consistent grout lines.
3. Adequate Support: Ceiling tiles require additional support while the mortar is curing. Use temporary bracing or shims to hold the tiles in place until the adhesive has fully set. This is especially important for larger or heavier tiles. Remove the supports carefully after the curing period, following the adhesive manufacturer's instructions.
4. Proper Grouting: After the mortar has cured, apply grout to fill the spaces between the tiles. Use a grout float to press the grout into the joints, ensuring that they are completely filled. Wipe away excess grout with a damp sponge. Allow the grout to cure according to the manufacturer's instructions before sealing it.
5. Sealing Grout: Sealing the grout is crucial to protect it from moisture and staining. Use a quality grout sealer to penetrate the grout lines and create a waterproof barrier. Reapply the sealer periodically to maintain its effectiveness. This step is often overlooked but contributes significantly to the longevity of the tiling project.
In conclusion, while technically feasible, tiling directly onto painted drywall ceilings in bathrooms is not generally recommended due to the inherent risks associated with moisture and adhesion. Exploring alternative methods, such as installing cement board or applying a waterproof membrane, provides a more reliable and durable solution. Regardless of the chosen method, meticulous preparation, proper materials, and careful installation techniques are essential for a successful and long-lasting result.

Can You Tile Over Drywall Master Building Materials Blog

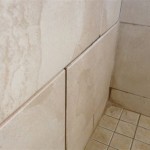
Transition Between Tile And Painted Wall

Nitpicky 6 Month Painted Tile Update House Mix

How To Tile Over Existing Brepurposed

Backsplash Advice For Your Bathroom Would You Tile The Side Walls Too Designed

How To Prep A Wall For Tile

The 6 Best Bathroom Ceiling Materials To Complete Your Makeover Decorative Tiles Inc

Backsplash Advice For Your Bathroom Would You Tile The Side Walls Too Designed

Ceiling Over Tile Shower Is Slanted

Tiling With Mussel Bound Honey Built Home
Related Posts