Essential Aspects of Installing Tile on Plywood Subfloor in Bathrooms
Transforming your bathroom with stylish and durable ceramic or porcelain tiles can be an exciting project, but it's essential to ensure a solid foundation for your tiling work. Plywood subfloors can provide a suitable base, offering strength and stability. However, the unique environment of bathrooms requires careful consideration to prevent moisture-related problems.
This article will delve into the critical aspects of installing tile on plywood subfloors in bathrooms, including:
- Subfloor Preparation
- Moisture Management
- Tile Installation
- Grouting and Sealing
- Maintenance and Care
Subfloor Preparation
Proper subfloor preparation is crucial for the longevity and performance of your tiled floor. Ensure the plywood subfloor is:
- Flat and level, with no more than 1/8-inch variation over 10 feet.
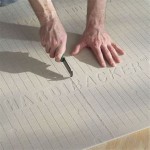
- Securely attached to the joists or underlayment with nails or screws spaced no more than 6 inches apart.
- Free of any defects such as cracks, rot, or loose joints.
Moisture Management
Bathrooms are inherently moist environments, so addressing moisture management is vital to prevent water damage and mold growth.
- Install a moisture barrier over the subfloor, such as a self-stick membrane or roofing felt.
- Ensure the moisture barrier extends up the walls at least 6 inches above the planned tile height.
- Use a cement-based backer board over the moisture barrier.
- Slope the floor slightly toward the drain to prevent water from pooling.
Tile Installation
When installing tile on a plywood subfloor, follow these steps:
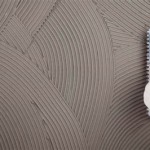
- Apply thin-set mortar to the backer board using a notched trowel.
- Place the tiles firmly into the mortar, aligning them with spacers for even spacing.
- Use a rubber float to remove any excess mortar and ensure the tiles are level.
- Allow the thin-set to cure for the manufacturer's recommended time.
Grouting and Sealing
Grout fills the spaces between tiles and prevents water from penetrating. Use a moisture-resistant grout specifically designed for bathrooms.
- Apply grout to the joints using a grout float.
- Work the grout into the joints until they are completely filled.
- Wipe away excess grout with a damp sponge.
- Once the grout has dried, seal it with a penetrating sealer to protect it from moisture.
Maintenance and Care
To preserve the beauty and longevity of your tiled floor, follow these maintenance tips:
- Clean the floor regularly with a mild detergent and a soft cloth.
- Avoid using abrasive cleaners or scouring pads.
- Fix any grout cracks or loose tiles promptly to prevent water damage.
- Consider using rugs or mats in areas where water is likely to splash.
By adhering to these essential aspects, you can achieve a stunning and durable tiled floor in your bathroom that will withstand the rigors of moisture and daily use.
:max_bytes(150000):strip_icc()/SPR-can-i-install-tile-on-plywood-1822594-step-01_53492-cfebcee9013a456eab01d7ef14c4bddf.jpg?strip=all)
How To Lay Tile On A Plywood Subfloor
:max_bytes(150000):strip_icc()/SPR-can-i-install-tile-on-plywood-1822594-hero_53499-a99b77cf72094c05a2b501c3ecec465e.jpg?strip=all)
How To Lay Tile On A Plywood Subfloor

How To Install Tile On Plywood Floor

How To Install Tile On Plywood Floor
:max_bytes(150000):strip_icc()/SPR-can-i-install-tile-on-plywood-1822594-step-07_53506-026b9e07724c41e4a0e9df54dde2509c.jpg?strip=all)
How To Lay Tile On A Plywood Subfloor

How To Lay Tile Over Plywood

Blog Expert Advice How To Tile Onto Wood Plywood Or Chipboard

Tiling Over Plywood Subfloors Jlc

How To Prepare Subfloor For Tile The Home Depot

How To Prepare A Subfloor For Tile Installation The Home Depot
Related Posts

