Can You Lay Tile on Backer Board? A Comprehensive Guide
The decision to lay tile involves careful consideration of the underlying substrate. The substrate, also known as the underlayment, directly impacts the longevity, stability, and overall aesthetic of the finished tile installation. Backer board, specifically designed for tile applications, is a common and generally recommended choice. This article will delve into the reasons why backer board is suitable for tile, exploring its advantages, proper installation techniques, and addressing potential considerations for its use.
While other materials may appear suitable at face value, backer board possesses characteristics specifically engineered to withstand the rigors of a tile environment. This includes resistance to moisture, dimensional stability under fluctuating temperatures and humidity, and a surface that promotes optimal adhesion for thin-set mortar. Consequently, understanding the role of backer board in tile installation is crucial for ensuring a durable and aesthetically pleasing result.
Key Point 1: The Superior Properties of Backer Board for Tile Installation
Traditional materials like plywood and drywall, while suitable for other construction applications, often fall short when used as a tile substrate. Plywood is susceptible to warping and expansion/contraction due to moisture absorption. Drywall, on the other hand, can disintegrate when exposed to prolonged dampness or water infiltration. These issues can lead to tile cracking, grout failure, and ultimately, the premature deterioration of the entire tile installation. Backer board is engineered to mitigate these risks.
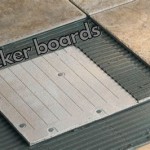
Backer board offers several crucial advantages over alternative underlayments. Firstly, its composition renders it largely impervious to water damage. Cementitious backer board, commonly used, is made from Portland cement, aggregates, and reinforcing fibers. This construction creates a dense, waterproof core that resists moisture absorption and prevents the substrate from swelling or degrading when exposed to water. Fiberglass-mat gypsum backer board, another option, features a gypsum core coated in a water-resistant fiberglass mat, offering similar protection against moisture.
Secondly, backer board exhibits excellent dimensional stability. This means it undergoes minimal expansion and contraction even with significant temperature and humidity changes. This stability is essential to prevent stress on the tile and grout, which can lead to cracking and failure. The rigid structure of backer board provides a stable platform that moves minimally, ensuring the tile remains firmly bonded and aligned.
Thirdly, backer board provides an excellent surface for thin-set mortar adhesion. The textured surface of most backer boards promotes a strong mechanical bond between the substrate and the mortar. This secure bond is critical for preventing tile slippage and ensuring the long-term integrity of the tile installation. The specific texture and porosity of the backer board are designed to work in harmony with various types of thin-set mortars, maximizing their bonding capabilities.
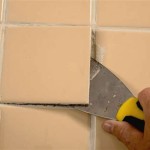
Finally, backer board is relatively easy to cut and install. It can be scored and snapped with a utility knife or cut with a circular saw equipped with a masonry blade. This ease of handling allows for efficient and precise installation, reducing the overall time and effort required for the tiling project. The availability of various sizes and thicknesses also allows for customization based on the specific requirements of the installation.
Key Point 2: Proper Installation Techniques for Backer Board
While backer board offers significant advantages, its performance is contingent upon proper installation. Neglecting recommended procedures can compromise its effectiveness and lead to tile failure. The following steps outline the key aspects of a successful backer board installation.
Subfloor Preparation: The subfloor, the structural layer beneath the backer board, must be sound, level, and free from debris. Any existing damage or irregularities in the subfloor should be addressed before installing the backer board. This might involve reinforcing joists, leveling uneven areas with self-leveling compound, or replacing damaged sections of the subfloor. A solid and level subfloor is paramount for providing a stable base for the backer board and tile.
Fastening the Backer Board: Backer board should be securely fastened to the subfloor using corrosion-resistant screws specifically designed for this purpose. The screw length should be sufficient to penetrate the subfloor and provide a firm grip. Screw spacing should adhere to manufacturer recommendations, typically around 6-8 inches along the edges and in the field of the board. Using the correct type and spacing of fasteners is crucial for preventing the backer board from shifting or flexing under load.
Sealing the Seams: The seams between backer board sheets should be properly sealed to prevent moisture from penetrating the substrate. This is typically achieved by applying a fiberglass mesh tape over the seams and embedding it in a layer of thin-set mortar. The thin-set should be feathered out smoothly to create a seamless transition between the boards. This process creates a continuous, waterproof barrier that protects the subfloor from moisture damage.
Staggering the Joints: Similar to installing drywall, staggering the joints between backer board sheets enhances the overall strength and stability of the installation. This prevents long, continuous seams that can be prone to cracking. By offsetting the joints, the stress is distributed more evenly across the substrate, minimizing the risk of future problems.
Considering Subfloor Deflection: Prior to installation, it’s essential to assess the subfloor deflection, which refers to the amount it bends under load. Excessive deflection can lead to tile cracking and grout failure. Building codes typically specify maximum allowable deflection limits for tiled floors. If the subfloor deflection exceeds these limits, reinforcement or stiffening measures may be necessary before installing the backer board and tile. This may involve adding additional joists or using thicker subfloor materials.
Using Appropriate Thin-Set Mortar: Selecting the correct type of thin-set mortar is essential for a successful tile installation. Modified thin-set mortars, designed for use with backer board, are generally recommended. These mortars contain polymers that enhance their bonding strength, flexibility, and water resistance. Carefully following the manufacturer's instructions for mixing and application is crucial for achieving optimal results.
Key Point 3: Addressing Specific Considerations and Common Mistakes
Even with a thorough understanding of backer board and its installation, certain considerations and potential pitfalls can arise. Being aware of these common issues allows for proactive mitigation and ensures a robust and enduring tile installation.
Incorrect Fastener Type: Using the wrong type of screws or nails can compromise the integrity of the backer board installation. Standard drywall screws, for example, are not designed for the alkaline environment of Portland cement and can corrode over time, leading to loosening and eventual failure. Corrosion-resistant screws, specifically designed for backer board, are essential for ensuring a secure and long-lasting attachment.
Insufficient Fastener Spacing: Failing to adhere to the recommended fastener spacing can result in the backer board flexing under load, leading to stress on the tile and grout. Insufficient fastener density can also create weak points along the edges and seams, increasing the risk of cracking and water infiltration. Following the manufacturer's guidelines for fastener spacing is critical for providing adequate support and preventing these issues.
Ignoring Subfloor Imperfections: Installing backer board over an uneven or damaged subfloor can transfer those imperfections to the finished tile surface, resulting in an unsightly and unstable installation. Addressing any issues with the subfloor prior to backer board installation is crucial for achieving a smooth, level, and durable tile surface.
Improper Seam Treatment: Neglecting to properly seal the seams between backer board sheets can create pathways for moisture to penetrate the substrate, leading to water damage and potential mold growth. Using fiberglass mesh tape and thin-set mortar to create a seamless, waterproof barrier is essential for protecting the subfloor from moisture and ensuring the longevity of the tile installation.
Choosing the Wrong Backer Board Thickness: Selecting an insufficient backer board thickness for the application can compromise its structural integrity and lead to deflection under load. The appropriate backer board thickness depends on factors such as the joist spacing, the type of tile being used, and the expected load on the floor. Consulting with a professional or referring to building codes can help determine the appropriate backer board thickness for a given application.
Failing to Acclimate the Backer Board: Allowing the backer board to acclimate to the environment prior to installation can help minimize expansion and contraction after the tile is installed. This is particularly important in areas with significant temperature or humidity fluctuations. Storing the backer board in the room where it will be installed for several days prior to installation allows it to adjust to the ambient conditions, reducing the risk of future problems.
In conclusion, backer board offers a superior substrate for tile installation due to its water resistance, dimensional stability, and excellent adhesion properties. Proper installation techniques, including subfloor preparation, secure fastening, and seam sealing, are essential for maximizing its effectiveness. By addressing specific considerations and avoiding common mistakes, a durable and aesthetically pleasing tile installation can be achieved. While this article offers a comprehensive overview, consulting with experienced professionals and adhering to local building codes is always recommended to ensure a successful tiling project.

How To Install Hardiebacker Cement Board On Floors James Hardie Pros

How To Install Cement Board The Home Depot

How To Install Tile Backer Board On A Wood Subfloor Diy

How To Install Cement Board The Home Depot

Tile Installers Select Hardiebacker Cement Board As Most Preferred Brand 2024 02 22 Stone World

6mm No More Ply Tile Backer Board

Tile Backerboard Material Options Fine Homebuilding

How To Install Cement Backer Board For Floor Tile Installation The Home Depot

Cement Backerboard Floor Tile Installation Flooring

Tiling On Wooden Floors Part 4 Overboarding Bathroom Guru
Related Posts