Can You Lay Lino On Top of Tiles? A Comprehensive Guide
The question of whether it is feasible to install linoleum, often shortened to "lino," directly over existing tiles is a common one for homeowners considering flooring renovations. While theoretically possible, the success of such an endeavor hinges upon several critical factors. Careful evaluation of the existing tile surface, proper preparation techniques, and an understanding of the potential drawbacks are essential for achieving a satisfactory and long-lasting result.
Choosing to lay lino over existing tiles presents a solution that avoids the often messy and labor-intensive process of tile removal. Demolishing existing tile can generate significant dust and debris, potentially impacting air quality and requiring extensive cleanup. Furthermore, tile removal can sometimes damage the subfloor, necessitating repairs before new flooring can be installed. Laying lino on top potentially circumvents these issues, offering a quicker and seemingly more convenient alternative. However, this approach is not without its challenges and potential pitfalls.
Improper installation can lead to a variety of problems, including uneven surfaces, telegraphing of grout lines through the lino, and premature wear and tear. Therefore, a thorough understanding of the necessary steps and potential complications is crucial before embarking on this project. This article will delve into the key considerations and procedures involved in laying lino over tiles, providing a comprehensive guide to help determine if this approach is suitable for a specific situation.
Evaluating the Existing Tile Surface
The condition of the existing tile surface is the most critical factor determining the viability of laying lino on top. Any imperfections in the tile will inevitably transfer through to the new linoleum, compromising its appearance and potentially its longevity.
Firstly, assess the tiles for any cracks, chips, or loose pieces. Any damaged tiles must be repaired or replaced before proceeding. Loose tiles should be re-adhered to the subfloor using an appropriate tile adhesive. Cracked or chipped tiles can be filled with a flexible patching compound designed for tile repair. Allow the patching compound to fully cure according to the manufacturer's instructions before moving on to the next step.
Secondly, evaluate the evenness of the tile surface. Significant variations in height between tiles, or lippage, will be visible through the lino. A long, straight edge can be used to identify any unevenness. Minor variations can often be addressed with a self-leveling compound, but larger discrepancies may necessitate more extensive repairs or even tile removal. Applying a self-leveling compound requires a clean, primed surface. The tile should be thoroughly cleaned and a suitable primer applied to ensure proper adhesion of the self-leveling compound.
Thirdly, inspect the grout lines. Grout lines, even when flush with the tile surface, can telegraph through the lino over time, creating an undesirable textured appearance. Filling the grout lines with a suitable patching compound is generally recommended to create a smooth, uniform surface. The patching compound should be allowed to fully cure and then sanded smooth to ensure a level transition between the tiles and the grout lines.
Failing to adequately address any of these issues will result in an unsatisfactory final product. The underlying imperfections will become visible over time, impacting the appearance and durability of the lino. Therefore, a meticulous evaluation of the existing tile surface is paramount.
Preparing the Tile Surface for Lino Installation
Once the existing tile surface has been evaluated and any necessary repairs have been completed, the next step is to prepare the surface for the lino installation. Proper preparation is crucial for ensuring adequate adhesion and a smooth, even finish.
The first step is thorough cleaning. Remove any dirt, grease, or debris from the tile surface using a strong degreasing cleaner. Rinse the surface thoroughly with clean water and allow it to dry completely. Any remaining contaminants can interfere with the adhesion of the linoleum adhesive, leading to bubbling or lifting of the lino over time.
Following cleaning, the surface should be lightly roughened to improve adhesion. This can be achieved by sanding the tile surface with a medium-grit sandpaper. Sanding creates a slightly textured surface that allows the adhesive to grip more effectively. Ensure that all sanding dust is thoroughly removed before proceeding.
The application of a primer is often recommended, especially on non-porous tile surfaces. A primer creates a bond between the tile and the linoleum adhesive, further enhancing adhesion. Choose a primer specifically designed for use with linoleum and follow the manufacturer's instructions carefully. Allow the primer to dry completely before applying the adhesive.
If a self-leveling compound has been used, ensure it is fully cured and properly feathered into the surrounding tile. Any abrupt transitions between the self-leveling compound and the tile can create visible imperfections in the lino. Sanding the edges of the self-leveling compound can help to create a smooth, seamless transition.
By following these preparation steps, a homeowner can create a solid foundation for the linoleum, minimizing the risk of adhesion problems and ensuring a smooth, even surface.
Potential Drawbacks and Considerations
While laying lino over tiles can offer a cost-effective and time-saving alternative to tile removal, it is essential to consider the potential drawbacks before proceeding. Ignoring these potential issues can lead to unforeseen problems and dissatisfaction with the final result.
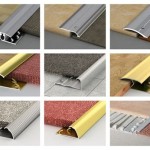
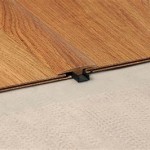
One key consideration is the increase in floor height. Adding linoleum on top of existing tiles raises the floor level, which can create tripping hazards at doorways and transitions to other rooms. This height difference may require adjustments to door thresholds or necessitate the use of transition strips to create a smooth and safe transition between different flooring types.
Another potential issue is the compression of the lino over time. If the underlying tile surface is not perfectly even or if there are any voids beneath the tiles, the linoleum may compress unevenly over time, leading to indentations or visible imperfections. This is particularly noticeable in high-traffic areas or under heavy furniture.
Moisture can also pose a significant problem. If the underlying tile surface is not properly sealed or if there are any existing moisture issues, moisture can become trapped between the tiles and the lino, leading to mold growth, mildew, and deterioration of the adhesive. This is especially concerning in bathrooms and kitchens, where moisture exposure is common. A moisture test should be conducted on the underlying subfloor before installation to identify any potential issues.
Furthermore, the long-term durability of linoleum installed over tiles may be compromised compared to linoleum installed directly on a properly prepared subfloor. The underlying tile surface can create stress points that accelerate wear and tear on the linoleum, potentially shortening its lifespan.
Finally, consider the aesthetic implications. While modern linoleum comes in a wide variety of styles and patterns, it may not offer the same level of visual appeal as other flooring options. The texture of the underlying tile surface, even when properly prepared, can sometimes subtly affect the appearance of the lino, creating a less-than-perfect finish.
These potential drawbacks should be carefully weighed against the benefits of avoiding tile removal before making a final decision. In some cases, the potential risks may outweigh the convenience of laying lino directly over tiles.
Ultimately, the decision of whether or not to lay linoleum over existing tiles depends on a careful assessment of the existing conditions, a thorough understanding of the preparation requirements, and a realistic evaluation of the potential drawbacks. By carefully considering all of these factors, homeowners can make an informed decision and achieve a satisfactory and long-lasting flooring solution.

Installing Luxury Vinyl Over Existing Tiles Choices Flooring New Zealand

Transform Your Home Installing Vinyl Flooring Over Ceramic Tiles City Wall And Floor

How To Tile Over Linoleum Floors Correctly

How To Install Vinyl Flooring Over Tiles Linoleum Thrift Diving

Can You Lay Vinyl Over Tiles Luxury Flooring Floorbay

Can You Put Vinyl Flooring Over Tile Igloo Surfaces

How To Lay Vinyl Flooring Sheet Over Tiles

Can You Lay Tile Over Linoleum Rubi Blog Usa

Can You Lay Vinyl Flooring Over Tile Mersey

Should You Tile Over Vinyl Flooring Builddirect
Related Posts