Can I Tile Over Concrete Slabs? A Comprehensive Guide
The question of whether tiling can be installed over concrete slabs is a frequent inquiry among homeowners and construction professionals alike. The answer is generally yes, tiling over concrete is possible and quite common. However, the success of such an installation hinges on meticulous preparation and adherence to best practices. Ignoring these factors can lead to costly failures, including cracked tiles, loose grout, and even detachment of the tiles from the substrate.
This article will delve into the crucial aspects of tiling over concrete slabs, providing a comprehensive guide to ensure a durable and aesthetically pleasing result. It will examine the necessary preparation steps, the suitable types of tile and bonding agents, and the common pitfalls to avoid. Understanding these elements is essential for both DIY enthusiasts and seasoned contractors aiming to achieve a long-lasting and professional-quality tile installation.
Assessing the Concrete Slab's Condition
Before even considering the tile selection or adhesive types, a thorough assessment of the concrete slab's condition is paramount. This evaluation will determine the necessary preparatory steps and ensure the slab is a suitable base for tiling. Several factors need careful examination.
Firstly, the slab's structural integrity must be evaluated. Look for any signs of significant cracking, crumbling, or shifting. Large cracks, especially those wider than 1/8 inch, indicate potential structural issues that need to be addressed before tiling. These cracks might suggest soil settlement, expansive soil conditions, or inadequate construction practices. Repairing these cracks is often critical, and may involve methods such as epoxy injection or crack bridging membranes. Ignoring structural cracks can lead to tile cracking even with the best installation techniques.
Next, the levelness and flatness of the slab are important. Concrete slabs are rarely perfectly level or flat. The acceptable deviation from a perfectly flat surface is typically specified by tile manufacturers and industry standards. Minor imperfections can often be addressed with a thicker mortar bed, but significant variations require more extensive leveling. Self-leveling compounds (SLCs) are commonly used to create a smooth, even surface. These compounds are poured onto the slab and spread evenly, self-leveling to create a consistent base for the tile. The choice of SLC depends on the depth of correction required and the type of tile being used.
Moisture content is another critical factor. Concrete is porous and can absorb moisture from the ground or the surrounding environment. Excessive moisture can interfere with the bond between the tile and the slab, leading to tile failure. A moisture meter can be used to measure the moisture content of the slab. Acceptable moisture levels vary depending on the type of tile and adhesive used, but generally, a moisture content below 5% is considered ideal. If the moisture content is too high, allowing the slab to dry thoroughly or installing a moisture barrier may be necessary. Moisture barriers are typically applied as a liquid or sheet membrane and prevent moisture from migrating up through the slab and affecting the tile installation.
Finally, the surface of the concrete slab must be clean and free from contaminants. Any existing paint, sealers, adhesives, or dirt must be removed. These contaminants can interfere with the bond between the tile and the slab. Mechanical methods, such as grinding or scarifying, are often used to remove these contaminants and create a profile on the concrete surface that promotes adhesion. Chemical methods, such as acid etching, can also be used, but must be done carefully to avoid damaging the concrete.
Choosing the Right Tile and Adhesives
Selecting the appropriate tile and adhesive is crucial for a successful tiling project over concrete. The type of tile, the intended use of the space, and the environmental conditions all play a significant role in the selection process.
Tile selection should consider the intended use of the space. For high-traffic areas, durable tiles like porcelain or ceramic are often preferred. Porcelain tiles are particularly resistant to wear and tear, making them ideal for commercial or high-traffic residential spaces. Natural stone tiles, such as granite or slate, can also be used, but they often require more maintenance and sealing. In wet areas, such as bathrooms or kitchens, tiles with a low water absorption rate are essential to prevent water damage. Glass tiles are often chosen for aesthetic reasons, but they may require special adhesives and installation techniques.
The size and shape of the tile also influence the choice of adhesive. Larger tiles generally require thicker mortar beds and adhesives with higher bond strength. Irregularly shaped tiles might require a more flexible adhesive to accommodate variations in the surface. The weight of the tile is also a factor; heavier tiles require adhesives that can support the added load.
When selecting adhesives, it's crucial to consider the type of concrete slab and the environmental conditions. Modified thin-set mortars are generally recommended for tiling over concrete. These mortars contain polymers that enhance their bond strength, flexibility, and water resistance. For slabs that are prone to movement or vibration, a flexible modified thin-set mortar is highly recommended. This type of mortar can accommodate slight movements in the slab without cracking or detaching the tile.
Epoxy mortars are another option, particularly in demanding environments. Epoxy mortars offer exceptional bond strength, chemical resistance, and water resistance. They are often used in commercial kitchens, industrial facilities, and other areas where spills and harsh chemicals are common. However, epoxy mortars are typically more expensive and can be more challenging to work with than modified thin-set mortars.
Always consult the tile and adhesive manufacturers' recommendations for compatibility and proper application techniques. Different adhesives may require different mixing ratios, curing times, and application methods. Following the manufacturer's instructions is essential for achieving a strong and durable bond.
Proper Installation Techniques and Common Pitfalls
Even with a properly prepared concrete slab and the right materials, improper installation can lead to tile failure. Adhering to best practices throughout the installation process is essential for a long-lasting and aesthetically pleasing result.
One of the most common pitfalls is inadequate thin-set mortar coverage. The mortar should be applied evenly to the back of the tile and the concrete slab, ensuring full contact between the two surfaces. Using the correct notched trowel size is crucial for achieving the desired mortar thickness and coverage. The size of the notch on the trowel is determined by the size and type of tile being used. For larger tiles, a larger notched trowel is needed to ensure adequate mortar coverage.
Another common mistake is neglecting the open time of the thin-set mortar. Open time refers to the amount of time the mortar remains workable after it has been applied. If the tile is not set within the open time, the mortar can begin to dry out and lose its adhesive properties. Working in small sections and avoiding spreading the mortar over too large an area at once can help prevent this issue.
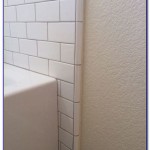
Proper tile alignment is also essential. Use spacers to maintain consistent grout lines and ensure that the tiles are level and plumb. Grout lines should be uniform in width and straight. Any misalignment or uneven spacing can detract from the overall appearance of the finished installation.
After the tiles have been set, allowing sufficient curing time is crucial. The curing time is the amount of time the mortar needs to fully harden and achieve its maximum bond strength. The curing time varies depending on the type of mortar used and the environmental conditions. Generally, it's recommended to wait at least 24 hours before walking on the tiles and at least 72 hours before grouting.
Grouting is the final step in the tile installation process. The grout fills the spaces between the tiles, providing a watertight seal and preventing dirt and debris from accumulating. Choose a grout that is appropriate for the type of tile and the intended use of the space. For wet areas, a waterproof grout is essential. Apply the grout evenly and remove any excess grout from the tile surface. Follow the grout manufacturer's instructions for mixing, application, and cleaning.
Avoiding these common pitfalls and adhering to best practices throughout the installation process will significantly increase the likelihood of a successful and long-lasting tile installation over concrete slabs.

Tiling Over A Ed Concrete Slab Fine Homebuilding
:max_bytes(150000):strip_icc()/can-you-install-tile-directly-on-concrete-1822600-04-458f7bb6c78348c1835cf8054ef36553.jpg?strip=all "How To Install Tile Over Concrete")
How To Install Tile Over Concrete

Covering Concrete Slab Installation Dektektile Luxury Tile Decking Material

Sound Dampening Ceramic Tile Over A Concrete Floor Fine Homebuilding
:max_bytes(150000):strip_icc()/can-you-install-tile-directly-on-concrete-1822600-01-8a89ceab1a274fb8ac81890ab7fc6b1b.jpg?strip=all "How To Install Tile Over Concrete")
How To Install Tile Over Concrete

How To Lay Tile On Concrete With Pictures Wikihow

How To Lay Floor Tiles On Concrete Stonesuper

How To Lay Floor Tiles On Concrete Welcome The Rubi Tools Blog

Leveling And Dry Fitting Tile In An Outdoor Area Young House Love

Ceramic Tile Installed Over Concrete Slab Indoor Thin Set
Related Posts