Can I Tile On Concrete Wall?
Tiling directly onto a concrete wall is possible, offering a durable and attractive finish. However, the success of this project depends on several factors, including the condition of the concrete, the type of tile being used, and the proper execution of the tiling process. Preparation is key to achieving a long-lasting and visually appealing tiled surface.
Assessing the Concrete Surface
Before embarking on a tiling project, a thorough assessment of the concrete wall is crucial. This assessment will determine the necessary preparatory steps and ensure proper adhesion of the tiles.
Several key points should be considered:
- Cleanliness: The concrete surface must be free of dust, dirt, grease, oil, and any other contaminants that could interfere with the bonding of the tile adhesive.
- Moisture Content: Excessive moisture within the concrete can weaken the bond between the tile and the substrate. The concrete should be allowed to cure fully and dry completely before tiling. Moisture levels can be tested with a moisture meter.
- Smoothness and Levelness: Large bumps or uneven surfaces will prevent tiles from adhering properly and create an uneven finished surface. Minor imperfections can be addressed with patching compounds, while significant irregularities may require a leveling screed.
- Structural Integrity: Cracks, crumbling, or other signs of structural damage should be addressed before tiling commences. These issues can compromise the integrity of the tiled surface and lead to premature failure.
- Previous Coatings: Any existing paint, sealant, or other coatings should be removed or treated appropriately to ensure proper adhesion of the tile adhesive. A test area can help determine the compatibility of the adhesive with any existing coatings.
Selecting Appropriate Tiles and Adhesives
The type of tile and adhesive selected play a significant role in the success of tiling on concrete. Choosing compatible materials is vital for long-term durability and aesthetic appeal.
Here are some factors to consider:
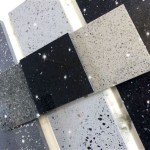
- Tile Suitability: Ceramic, porcelain, and natural stone tiles are generally suitable for concrete walls. However, specific tile properties, such as water absorption and porosity, should be considered based on the environment. For example, in wet areas, porcelain tiles with low water absorption are preferred.
- Adhesive Selection: Thin-set mortar specifically designed for concrete is recommended. Modified thin-set mortars offer enhanced bonding properties and flexibility, making them suitable for a wider range of tile types and environments. Always follow the manufacturer’s instructions regarding mixing and application.
- Grout Choice: The grout should be compatible with the chosen tiles and the environment. Sanded grout is generally suitable for wider grout joints, while unsanded grout is preferred for narrow joints. Epoxy grout offers excellent water resistance and stain resistance, making it ideal for wet areas.
Preparing the Concrete Wall for Tiling
Once the concrete surface is assessed and appropriate materials are selected, the wall must be adequately prepared for tiling.
Preparation steps typically involve:
- Cleaning: Thoroughly clean the concrete surface using a stiff brush, detergent, and water. Pressure washing may be necessary for heavily soiled surfaces. Allow the concrete to dry completely before proceeding.
- Repairing Imperfections: Fill any cracks, holes, or other imperfections using a suitable patching compound. Allow the patching compound to dry and cure according to the manufacturer’s instructions.
- Leveling: If the concrete surface is uneven, apply a leveling screed to create a smooth and flat substrate for the tiles. Ensure the screed is completely dry before tiling.
- Priming (If Necessary): A primer may be required to improve adhesion, particularly for smooth or dense concrete surfaces. Consult the adhesive manufacturer’s recommendations regarding primer usage.
The Tiling Process
The actual tiling process requires careful attention to detail to ensure a professional-looking finish.
Key aspects of the tiling process include:
- Applying Adhesive: Apply the thin-set mortar to the concrete surface using a notched trowel, ensuring an even layer. The size of the notches will depend on the size and type of tile being used.
- Placing Tiles: Firmly press the tiles into the adhesive, ensuring full contact and proper alignment. Use spacers to maintain consistent grout lines.
- Leveling and Adjusting: Check the levelness of the tiles as they are installed and make any necessary adjustments. Remove excess adhesive from the tile surface and grout lines.
- Grouting: After the adhesive has cured, apply grout to the joints using a grout float. Remove excess grout with a damp sponge and allow the grout to dry.
- Sealing (If Necessary): Apply a sealant to the grout lines to protect against staining and moisture penetration, particularly in wet areas.
Considerations for Different Concrete Surfaces
Different types of concrete surfaces may require specific considerations during the tiling process.
Some examples include:
- Precast Concrete: Precast concrete panels often have a smoother surface than poured-in-place concrete, which may require specific primers or adhesives to ensure proper bonding.
- Concrete Block: The porous nature of concrete block may require a thicker layer of adhesive and special attention to moisture control.
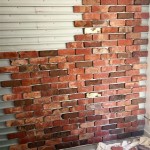
- Painted Concrete: Existing paint may need to be removed or treated with a bonding agent to ensure proper adhesion of the tile adhesive.

Techniques For Installing Decorative Ceramic Tiles On Concrete Wall Install Steps

Tile Over Blockwork Mike Haduck

Exterior Tile Installation On Walls Floor Trends

How To Prepare Uneven Walls And Floors Tile

How To Tile Outdoor Concrete Stairs Wall The Side

Tips For Installing Large Format And Thin Tiles Mapei

Wall Tile Installation Methods Doctor

A Bathroom Renovation With Concrete Walls And Marble Finishes

How To Install Wall Tiles A Step By Guide

The Ultimate Guide To Outdoor Wall Tiles Eurotiles Bathrooms
Related Posts