Can I Put Vinyl Plank Over Ceramic Tile? A Comprehensive Guide
The question of installing vinyl plank flooring over existing ceramic tile is a common one among homeowners looking to update their spaces efficiently. The answer, while generally affirmative, is nuanced and depends on several factors related to the condition of the existing tile, the type of vinyl plank being installed, and the desired aesthetic outcome. Approaching this project requires a thorough understanding of these considerations to ensure a successful and long-lasting flooring solution.
Vinyl plank flooring has gained popularity due to its durability, water resistance, ease of installation, and aesthetic versatility. It mimics the look of hardwood, stone, or ceramic at a fraction of the cost and with easier maintenance. Given its relatively thin profile compared to other flooring options, it is often considered a viable option for installation over existing hard surfaces like ceramic tile, minimizing the disruption associated with removing the old flooring.
However, directly installing vinyl plank over ceramic tile without proper preparation can lead to problems such as uneven surfaces, telegraphing of grout lines, and potential damage to the vinyl plank itself. Therefore, a careful assessment of the existing ceramic tile floor and appropriate preparatory steps are crucial for a successful installation.
Assessing the Existing Ceramic Tile Floor
The first and most critical step is to thoroughly inspect the existing ceramic tile floor. This assessment will determine the feasibility of installing vinyl plank directly over it and identify any necessary repairs or preparation that must be undertaken. Several factors need to be considered during this assessment.
Levelness: The floor must be as level as possible. Significant variations in height across the floor will be noticeable through the vinyl plank, creating an uneven and potentially uncomfortable surface. Use a long level (at least six feet) to check for dips and high spots. Minor imperfections can often be addressed with self-leveling compound, but more significant unevenness may necessitate more extensive repairs or even removal of the existing tile.
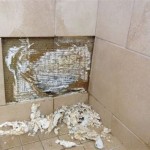
Condition of the Tiles: Check for cracked, loose, or missing tiles. Any unstable tiles must be repaired or replaced. Loose tiles can create voids beneath the vinyl plank, leading to instability and potential damage. Cracked tiles, even if seemingly intact, can worsen over time, affecting the integrity of the entire flooring system. Missing tiles need to be replaced with tiles of similar thickness to maintain a consistent plane.
Grout Lines: The depth and width of the grout lines are crucial considerations. Deep or wide grout lines can telegraph through the vinyl plank, creating an undesirable texture. Many manufacturers recommend filling in grout lines with a cementitious patching compound to create a smooth, even surface. The patching compound should be allowed to dry completely and then sanded smooth before installing the vinyl plank.
Cleanliness: The floor must be scrupulously clean before installation. Remove all dirt, debris, wax, and other contaminants that could interfere with the adhesion of the vinyl plank or compromise its appearance. A thorough cleaning with a suitable cleaner followed by rinsing and drying is essential. For particularly stubborn residues, a degreasing agent may be required.
Moisture: Excess moisture can cause issues with adhesion and can lead to mold or mildew growth beneath the vinyl plank. Test the moisture level of the subfloor using a moisture meter. Ensure that the moisture content is within the acceptable range specified by the vinyl plank manufacturer. If excessive moisture is present, identify and address the source of the moisture before proceeding with the installation.
Preparing the Ceramic Tile Floor for Vinyl Plank Installation
Once the assessment is complete, the next step is to prepare the ceramic tile floor. The specific preparation steps will vary depending on the condition of the existing tiles and the type of vinyl plank being installed. However, some common preparatory steps are generally recommended.
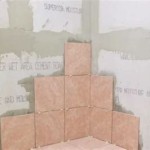
Repair or Replace Damaged Tiles: As mentioned earlier, any cracked, loose, or missing tiles must be addressed. Cracked tiles should be replaced if they are causing significant unevenness. Loose tiles should be re-adhered using a suitable bonding agent. Missing tiles should be replaced with tiles of matching thickness to maintain a level surface.
Fill Grout Lines: Filling the grout lines is often necessary to prevent telegraphing and ensure a smooth, even surface. Use a cementitious patching compound specifically designed for filling grout lines. Apply the compound according to the manufacturer's instructions, ensuring that it completely fills the grout lines. Allow the compound to dry thoroughly and then sand it smooth using a sanding block or orbital sander. Remove all dust and debris after sanding.
Apply Self-Leveling Compound (If Necessary): If the floor has significant unevenness, consider applying a self-leveling compound to create a perfectly flat surface. Follow the manufacturer's instructions carefully when mixing and applying the compound. Ensure that the compound is compatible with both the ceramic tile and the vinyl plank adhesive. Allow the compound to dry completely before proceeding with the vinyl plank installation.
Clean the Floor Thoroughly: Before installing the vinyl plank, clean the floor thoroughly to remove any remaining dust, debris, or sanding residue. Use a vacuum cleaner and a damp mop with a suitable cleaner. Ensure that the floor is completely dry before proceeding.
Consider an Underlayment: An underlayment can provide additional cushioning, sound insulation, and moisture resistance. While not always necessary, an underlayment can be particularly beneficial if the ceramic tile floor is hard or cold. Choose an underlayment that is compatible with both the ceramic tile and the vinyl plank. Install the underlayment according to the manufacturer's instructions.
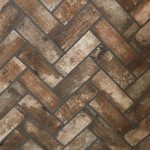
Choosing the Right Vinyl Plank and Installation Method
The type of vinyl plank and the chosen installation method will also influence the success of the project. Different types of vinyl plank have different thicknesses, wear layers, and installation methods. Selecting the appropriate product and method for the specific application is crucial.
Vinyl Plank Thickness: Thicker vinyl planks generally provide more cushioning and are less likely to telegraph imperfections from the subfloor. Consider opting for a thicker plank if the ceramic tile floor has noticeable grout lines or minor imperfections.
Wear Layer: The wear layer is the protective coating on the surface of the vinyl plank. A thicker wear layer provides greater resistance to scratches, scuffs, and stains. For high-traffic areas or homes with pets, choose a vinyl plank with a thicker wear layer.
Installation Method: There are primarily two types of vinyl plank installation methods: glue-down and click-lock. Glue-down vinyl plank requires the use of an adhesive to bond the plank to the subfloor. Click-lock vinyl plank, also known as floating vinyl plank, has interlocking edges that allow the planks to be connected without adhesive. While both methods can be used over ceramic tile, click-lock is often preferred because it is easier to install and allows for expansion and contraction of the flooring.
Acclimation: Before installation, allow the vinyl plank to acclimate to the room's temperature and humidity for at least 48 hours. This will help prevent warping or buckling after installation.
Following Manufacturer's Instructions: Always follow the vinyl plank manufacturer's instructions for installation. This includes recommendations for adhesive (if using glue-down), expansion gaps, and cutting techniques. Deviating from the manufacturer's instructions can void the warranty and lead to installation problems.
By carefully assessing the existing ceramic tile floor, properly preparing the surface, and selecting the appropriate vinyl plank and installation method, homeowners can successfully install vinyl plank over ceramic tile and achieve a beautiful and durable new floor without the hassle and expense of removing the old one. Remember that a thorough job in the preparation stage will yield the best and longest-lasting results.

New Vinyl Plank Flooring Over Tile Table And Hearth

New Vinyl Plank Flooring Over Tile Table And Hearth

New Vinyl Plank Flooring Over Tile Table And Hearth

New Vinyl Plank Flooring Over Tile Table And Hearth

Can You Put Vinyl Plank Flooring Over Ceramic Tile Floors Blvd

Can You Install Vinyl Plank Over Tile Flooring America

Transform Your Home Installing Vinyl Flooring Over Ceramic Tiles City Wall And Floor

Lvt Flooring Over Existing Tile The Easy Way Vinyl Floor Installation Diy

New Vinyl Plank Flooring Over Tile Table And Hearth

New Vinyl Plank Flooring Over Tile Table And Hearth
Related Posts