Can I Put Tile Over Concrete Floor? A Comprehensive Guide
The question of whether tile can be installed over a concrete floor is a common one, particularly for homeowners and contractors undertaking renovation or construction projects. The short answer is yes, tile can generally be installed over a concrete floor. However, the success and longevity of such an installation depend heavily on several factors, including the condition of the concrete, the appropriate preparation methods employed, and the correct selection of materials and techniques. This article will explore these critical aspects in detail, providing a comprehensive guide to ensure a successful tile installation over concrete.
Concrete provides a relatively stable and durable substrate for tile, making it an ideal choice in many situations. Unlike wood subfloors that can be more susceptible to moisture damage and movement, concrete offers a solid, non-organic base. This inherent stability, however, does not eliminate the need for careful assessment and preparation. Ignoring critical steps can lead to tile cracking, grout failure, and ultimately, a compromised and unattractive floor.
Before proceeding with any tile installation, a thorough evaluation of the existing concrete floor is essential. This assessment should encompass checking for cracks, any existing surface treatments, the presence of moisture, and the general flatness and levelness of the surface. Each of these factors plays a significant role in determining the appropriate preparation methods and materials required for a successful tile installation.
Key Considerations Before Tiling Over Concrete
Several key considerations must be addressed before initiating the tile installation process over a concrete floor. Neglecting these aspects can lead to various issues that can compromise the integrity and appearance of the finished floor.
1. Concrete Condition: The overall condition of the concrete slab is paramount. Cracks, regardless of their size, must be addressed. Hairline cracks (minor surface cracks) may be filled with a crack isolation membrane or a suitable epoxy crack filler. Larger cracks, however, may indicate structural problems and require professional evaluation and repair. A severely cracked concrete slab may not be a suitable substrate for tiling without significant and costly repairs. Evidence of crumbling or degradation also indicates a compromised concrete structure that needs professional attention before any tiling work begins.
2. Moisture Testing: Concrete is porous and can absorb moisture from the ground or surrounding environment. Excessive moisture beneath the tile installation can lead to adhesive failure, mold growth, and tile cracking. Therefore, a moisture test is crucial. Common methods include the calcium chloride test (ASTM F1869) or the relative humidity test (ASTM F2170). These tests provide quantifiable data on the moisture vapor emission rate (MVER) or the relative humidity within the concrete, respectively. The results should be compared to the adhesive manufacturer's recommendations to determine if a moisture mitigation system is necessary. Moisture mitigation systems typically involve the application of a specialized epoxy or membrane that acts as a barrier against moisture permeation.
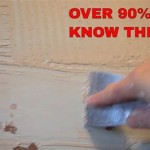
3. Surface Preparation: Proper surface preparation is crucial for ensuring adequate adhesion between the concrete and the tile adhesive (mortar). The concrete surface must be clean, free of dust, debris, paint, sealers, and any other contaminants that could interfere with bonding. Mechanical methods, such as grinding, scarifying, or shot blasting, are often necessary to remove surface coatings and create a profile that the mortar can grip. Acid etching is another method, but it requires careful execution and thorough rinsing to avoid leaving residue that could compromise adhesion. The chosen preparation method should be appropriate for the type of contamination present and the desired level of surface profile. After mechanical preparation, the surface should be thoroughly vacuumed to remove any remaining dust and debris.
Choosing the Right Materials
The selection of appropriate materials is just as important as the preparation of the concrete floor. Choosing the wrong adhesive, grout, or tile can lead to premature failure and costly repairs. Consider the following factors when selecting materials:
1. Tile Type: The type of tile being installed will influence the choice of mortar and the installation method. Porcelain tiles, for example, are dense and non-porous, requiring a modified thin-set mortar specifically formulated for porcelain. Natural stone tiles, such as marble or granite, may require special setting materials and sealers to prevent staining or discoloration. Certain large format tiles also demand specific mortar types to prevent lippage and ensure proper bonding.
2. Mortar (Adhesive): Selecting the correct mortar is crucial for achieving a strong and durable bond between the tile and the concrete. Modified thin-set mortars are generally recommended for most tile installations over concrete. These mortars contain polymers that enhance adhesion, flexibility, and water resistance. The mortar chosen should be compatible with the tile type, the substrate condition, and the anticipated environmental conditions (e.g., temperature and humidity fluctuations). Follow the manufacturer's instructions carefully regarding mixing ratios, open time, and curing time.
3. Grout: Grout fills the spaces between the tiles and provides a finished look while also preventing water from seeping beneath the tile. Cement-based grouts are the most common type, but epoxy grouts offer superior stain resistance and durability, particularly in high-traffic areas or areas prone to moisture exposure. The color and type of grout should be selected to complement the tile and suit the intended use of the floor. Sealing the grout after installation is essential to protect it from staining and moisture penetration.
4. Crack Isolation Membrane: As mentioned earlier, even minor cracks in the concrete can eventually propagate through the tile installation. A crack isolation membrane is a thin, flexible layer applied between the concrete and the tile to prevent cracks from telegraphing through to the tile surface. This membrane acts as a bridge, allowing the concrete to move slightly without affecting the tile. Various types of crack isolation membranes are available, including liquid-applied membranes and sheet membranes. The choice will depend on the size and frequency of cracks and the specific requirements of the installation.
Installation Best Practices
Following best practices during the tile installation process is critical for achieving a professional and long-lasting result. These practices encompass proper mortar application, tile layout, cutting techniques, and curing procedures.
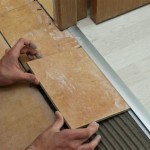
1. Mortar Application: The mortar should be applied using a notched trowel of the appropriate size, as recommended by the mortar manufacturer. The trowel creates ridges in the mortar that provide channels for air to escape and ensure complete coverage of the tile's back surface. The mortar should be applied in one direction, and the tiles should be pressed firmly into the mortar with a slight twisting motion to ensure good contact. "Back buttering" the tiles (applying a thin layer of mortar to the back of each tile) can further enhance adhesion, especially for large format tiles or tiles with textured surfaces. Avoid applying the mortar to too large an area at once, as it can dry out and lose its adhesive properties before the tiles are set.
2. Tile Layout: Planning the tile layout before beginning the installation is crucial for achieving a visually appealing and symmetrical result. Consider the location of doorways, walls, and fixtures when determining the starting point and the direction of the tile pattern. Use spacers to ensure consistent grout lines and maintain proper tile alignment. Avoid placing small cuts of tile near the edges of the room, if possible, to maintain a balanced and professional appearance. Dry-fitting the tiles before applying mortar can help visualize the layout and identify any potential issues.
3. Cutting Techniques: Accurate tile cutting is essential for achieving a clean and professional finish around edges, corners, and fixtures. A wet saw is the preferred tool for cutting most types of tile, as it provides clean, precise cuts and minimizes dust. For smaller cuts or intricate shapes, a tile nipper or a scoring tool can be used. Always wear safety glasses and a dust mask when cutting tile to protect yourself from injuries and dust inhalation.
4. Curing: The mortar and grout require adequate curing time to fully harden and develop their strength. Follow the manufacturer's recommendations for curing time, which typically ranges from 24 to 72 hours. During the curing period, protect the tile floor from heavy traffic and moisture exposure. Avoid cleaning the floor with harsh chemicals or excessive water until the curing process is complete.
By carefully considering the condition of the concrete, selecting the appropriate materials, and adhering to proper installation techniques, a durable and aesthetically pleasing tile floor can be successfully installed over concrete. While this process may seem straightforward, it is important to remember that attention to detail and adherence to manufacturer’s instructions are crucial for achieving optimal results.

How To Install Tiles On Concrete Floors Stonesuper

How To Tile Onto Concrete Floors Porcelain Super

Tiling Over A Ed Concrete Slab Fine Homebuilding
:max_bytes(150000):strip_icc()/can-you-install-tile-directly-on-concrete-1822600-04-458f7bb6c78348c1835cf8054ef36553.jpg?strip=all "How To Install Tile Over Concrete")
How To Install Tile Over Concrete

Can I Set Tile Directly Over A Concrete Floor

How To Lay A Tile Floor On Concrete Diy Homeimprovement

How To Lay Tile On Concrete With Pictures Wikihow

Tile Over Concrete Subfloor An Easy Diy Tutorial

Covering Concrete Slab Installation Dektektile Luxury Tile Decking Material

How To Install Ceramic Tiles On Concrete Floor Tile Installation
Related Posts