Can I Put Tile On Concrete Floor?
Tiling a concrete floor is a popular choice for its durability, aesthetics, and ease of maintenance. However, proper preparation and execution are crucial for a successful, long-lasting tile installation. This article will explore the essential aspects of tiling over concrete, from assessing the substrate to selecting appropriate materials.
Assessing the Concrete Substrate
Before laying tile, a thorough evaluation of the concrete surface is necessary. This assessment helps determine the suitability of the concrete for direct tiling and identifies any potential issues that need addressing.
- Moisture: Excess moisture can cause adhesive failure and tile damage. A moisture test should be conducted to ensure the concrete's moisture content is within acceptable limits.
- Cracks: Existing cracks should be repaired to prevent them from transferring to the tile surface. The type and severity of the crack will dictate the appropriate repair method.
- Levelness: An uneven floor can lead to lippage (uneven tile edges) and instability. Leveling compounds can be used to correct significant height variations.
- Cleanliness: The concrete surface must be free of dust, dirt, grease, and any other contaminants that could interfere with adhesion.
- Sealers: Existing sealers can prevent proper bonding. They may need to be removed by grinding or chemical stripping.
Choosing the Right Materials
Selecting appropriate materials is fundamental to the success of the project. The right tile and adhesive are crucial for long-term performance and aesthetics.
- Tile Type: Various tile types are suitable for concrete floors, including ceramic, porcelain, natural stone, and glass. Each material has different properties and installation requirements. Porcelain is generally preferred for its durability and resistance to moisture.
- Adhesive: Thin-set mortar is the standard adhesive for tiling over concrete. Modified thin-set is often recommended for larger format tiles or areas subject to moisture. The specific type of thin-set should be selected based on the tile type and substrate conditions.
- Grout: Grout fills the spaces between tiles and provides a finished look. Various grout types are available, including sanded, unsanded, and epoxy grout. The choice depends on the tile spacing and desired aesthetic.
Preparing the Concrete Surface
Once the concrete has been assessed and materials selected, proper surface preparation is essential for ensuring a strong bond between the tile and the concrete.
- Cleaning: Thoroughly clean the concrete surface using a stiff brush and a suitable cleaning solution to remove all dirt, debris, and contaminants.
- Repairing Cracks: Repair any cracks using an appropriate concrete patching compound, following the manufacturer's instructions.
- Leveling: Apply a self-leveling compound if necessary to create a smooth, even surface for tile installation.
- Priming: A primer can improve adhesion, particularly on porous concrete surfaces. Select a primer compatible with both the concrete and the chosen adhesive.
Installing the Tile
The tile installation process requires precision and attention to detail to ensure a professional finish.
- Layout: Plan the tile layout carefully to minimize cuts and create a visually appealing pattern. Dry-laying tiles can help visualize the final result and identify any potential issues.
- Applying Adhesive: Apply thin-set mortar to the concrete surface using a notched trowel, ensuring even coverage and the correct trowel size for the tile being used.
- Placing Tiles: Place the tiles firmly into the thin-set, ensuring proper alignment and spacing. Use spacers to maintain consistent grout lines.
- Cutting Tiles: Use a tile cutter or wet saw to cut tiles for edges and corners, ensuring accurate measurements and clean cuts.
Grouting and Sealing
After the tile adhesive has cured, grout is applied to fill the joints between tiles. Sealing the grout helps protect it from staining and moisture.
- Applying Grout: Apply grout using a grout float, pressing it firmly into the joints to ensure complete filling.
- Cleaning Excess Grout: Remove excess grout with a damp sponge, being careful not to pull grout out of the joints.
- Sealing: Once the grout has cured, apply a grout sealer to protect it from staining and moisture penetration.
Considerations for Specific Situations
Certain situations require additional considerations when tiling over concrete.
- Radiant Heating: If the concrete floor has radiant heating, specific tile and adhesive suitable for heated floors must be used.
- Exterior Applications: For outdoor installations, choose frost-resistant tiles and adhesives designed for exterior use.
- High-Moisture Areas: In bathrooms and other high-moisture areas, waterproofing membranes are recommended to prevent moisture damage.
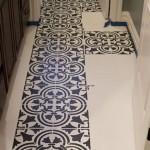
:max_bytes(150000):strip_icc()/can-you-install-tile-directly-on-concrete-1822600-04-458f7bb6c78348c1835cf8054ef36553.jpg?strip=all "How To Install Tile Over Concrete")
How To Install Tile Over Concrete

How To Tile Onto Concrete Floors Porcelain Super

Tiling Over A Ed Concrete Slab Fine Homebuilding

How To Lay A Tile Floor On Concrete Diy Homeimprovement

How To Install Ceramic Tiles On Concrete Floor Tile Installation

How To Install Tile Over Concrete Greenbuildingadvisor

How To Lay Floor Tiles On Concrete Stonesuper

How To Lay Floor Tiles On Concrete Welcome The Rubi Tools Blog
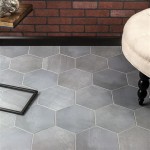
:max_bytes(150000):strip_icc()/can-you-install-tile-directly-on-concrete-1822600-01-8a89ceab1a274fb8ac81890ab7fc6b1b.jpg?strip=all "How To Install Tile Over Concrete")
How To Install Tile Over Concrete

Sound Dampening Ceramic Tile Over A Concrete Floor Fine Homebuilding
Related Posts