The Best Way to Remove Floor Tiles in a Bathroom
Remodeling a bathroom often involves removing existing floor tiles. Whether you're upgrading to a new look, addressing underlying issues, or preparing for a complete renovation, removing bathroom floor tiles can be a daunting task. However, with the right tools, techniques, and safety precautions, you can tackle this project successfully. This article will guide you through the process, providing step-by-step instructions and valuable tips to ensure a smooth and efficient tile removal experience.
1. Preparation and Safety
Before diving into the tile removal process, it's crucial to prioritize safety and proper preparation. This includes:
- Clear the Area: Remove all furniture, fixtures, and belongings from the bathroom to create a clear workspace.
- Protect Surrounding Areas: Cover adjacent surfaces, such as walls, cabinets, and flooring, with drop cloths to prevent damage from debris and dust.
- Wear Protective Gear: Always wear safety glasses, gloves, and dust masks to protect yourself from flying debris and dust. Consider using a respirator for extended periods of work.
- Turn Off Water and Gas: Before working near plumbing or gas lines, shut off the water supply and gas valve. This prevents accidental leaks or hazards during the removal process.
- Electrical Precautions: If you encounter electrical wiring, use caution. It's advisable to consult with a qualified electrician to disconnect or isolate any electrical wires in the area.
2. Assessing the Tile and Subfloor
Before starting the removal process, take some time to assess the existing tile and subfloor. This will help you determine the best approach and tools for the job:
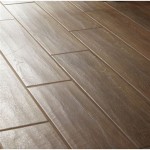
- Tile Type: Identify the type of tile you're dealing with. Ceramic, porcelain, and natural stone tiles have different removal methods. For instance, ceramic tiles are generally easier to remove than porcelain tiles, which tend to be more durable.
- Tile Adhesive: Determine the type of adhesive used to install the tiles. Thinset mortar is commonly used, while some older installations might have mastic adhesive. The adhesive type will influence the difficulty of removal.
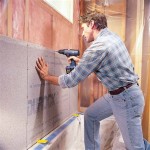
- Subfloor Condition: Inspect the subfloor underneath the tiles. If the subfloor is damaged or deteriorated, it will need to be repaired before installing new tiles. This might require additional steps during the removal process.
3. Tile Removal Techniques
Once you've prepared the area and assessed the tile and subfloor, you can proceed with the removal process. Here are some effective techniques for removing bathroom floor tiles:
3.1. Chipping and Prying
This method is suitable for ceramic and porcelain tiles, especially when they are bonded with thinset mortar. Start by using a chisel and hammer to break the tile into smaller pieces. Then, use a pry bar or scraper to lift the broken tile fragments and the adhesive from the subfloor. Ensure you apply pressure at a 45-degree angle to avoid damaging the subfloor.
3.2. Using a Tile Removal Tool
Tile removal tools are specifically designed for lifting and separating tiles from the subfloor. These tools typically have a sharp blade or a chisel-like edge that can be inserted between the tile and the subfloor. Leverage the tool to pry up the tile and adhesive. This method is generally more efficient than chipping and prying.
3.3. Using an Angle Grinder
An angle grinder with a diamond blade can be used to cut through the tile and adhesive. This method is particularly effective for removing large tiles or tightly bonded tiles. Be extremely cautious when using an angle grinder, as it can generate sparks and dust. Wear appropriate protective gear and ensure adequate ventilation.
3.4. Removing Grout Before Tiles
For some installations, removing the grout before tackling the tiles can simplify the removal process. This is especially helpful if the tiles are glued together with mastic adhesive. Using a grout removal tool, carefully remove the grout between the tiles, exposing the adhesive underneath. This allows for easier access to pry up the tiles without damaging surrounding tiles.
4. Cleaning and Preparation
Once the tiles are removed, it's essential to thoroughly clean the subfloor to remove any remaining adhesive, grout, or debris. This creates a clean and level surface for installing new tiles or other flooring options. You can use a scraper, a wire brush, or a heavy-duty floor cleaner to remove the residue. It's important to allow the subfloor to dry completely before proceeding with any further work.
Remember to dispose of the tile debris responsibly, either by recycling or discarding it in a designated waste container. By following these steps, you can successfully remove bathroom floor tiles, creating a clean and prepared surface for your next bathroom renovation project.

How To Remove Bathroom Tile Steps Prep Considerations

How To Remove Tile 19 Clever Tips

How To Remove Tile Diy Easy Ceramic Removal

How To Remove Old Tiles A Step By Guide Walls And Floors

How To Remove Tile Flooring The Navage Patch

How To Remove Tile 19 Clever Tips

How To Remove Tile Flooring Master Bath Update Part 3 Uniquely Yours Or Mine

How To Remove Tile Flooring The Navage Patch

Strat To Finish Replace Old Bath Tile Floor With New Porcelain

How To Clean Tile Floors The Home Depot
Related Posts