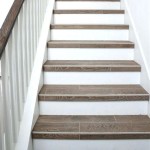
Adding Chevron Pattern Tile to Your Home Floor Plan: A Step-by-Step Guide
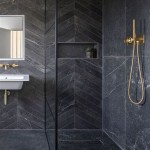
Chevron pattern tiles have become increasingly popular in recent years due to their elegant and timeless appeal. They can add a touch of sophistication to any room, whether it's a bathroom, kitchen, or living area. Installing chevron pattern tiles can seem like a daunting task, but with the right preparation and tools, you can achieve a professional-looking finish.
Choosing the Right Tiles
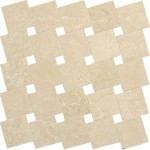
The first step in adding chevron pattern tiles to your home is to choose the right tiles. Chevron tiles come in a variety of materials, including ceramic, porcelain, and natural stone. Ceramic and porcelain tiles are durable and easy to maintain, making them a good choice for high-traffic areas. Natural stone tiles, such as marble or slate, offer a more luxurious look but require more care and maintenance.
Planning the Layout
Once you have chosen your tiles, you need to plan the layout. Chevron patterns can be laid in a variety of ways, so it's important to experiment until you find a layout that you like. You can use a piece of chalk or string to mark out the pattern on the floor before you start installing the tiles.
Preparing the Surface
Before you can install the tiles, you need to prepare the surface. This involves removing any existing flooring, leveling the surface, and applying a thin layer of mortar.
Installing the Tiles
The next step is to install the tiles. Start by laying out a row of tiles along the center line of the room. Then, using a notched trowel, apply mortar to the back of each tile and press it into place. Work your way out from the center, alternating the direction of the tiles to create the chevron pattern.
Grouting the Tiles
Once the tiles are installed, you need to grout the joints between them. Grout is a mixture of sand, cement, and water that fills the gaps between the tiles and helps to seal them. Apply the grout using a grout float or trowel, and work it into the joints. After the grout has dried, wipe off any excess with a damp sponge.
Sealing the Tiles
The final step is to seal the tiles. This will help to protect them from stains and wear. Apply a sealant to the tiles using a brush or roller, and let it dry completely. Once the sealant has dried, your chevron pattern tiles are complete.
Additional Tips
Here are a few additional tips for installing chevron pattern tiles:
With a little planning and effort, you can add a beautiful and stylish chevron pattern tile floor to your home.

How To Use Chevron Wall Tiles Elevate Your Home Design Tile Space
Tiles Talk How To Use Herringbone In Your Next Design Project Perini

Tile Patterns Arrangements Emser Blog

79 Floor Tile Pattern Ideas To Elevate Any Space
Herringbone Tile Pattern For Interior Design Projects
Herringbone Vs Chevron Which Pattern Is The One For You Tileist By Tilebar
Bathroom Tiling Patterns Explained Ronseal
Tile Patterns How To Create 20 Trendy Styles Flooring Inc

Chevron Pattern Tiles Black White More The Tile

Pin Page
Related Posts