Achieving a Professional-Grade Finish With Ceramic Tile Edgings
Ceramic tile is a ubiquitous material in residential and commercial construction, valued for its durability, aesthetic versatility, and ease of maintenance. While the proper installation of the tiles themselves is crucial for a successful project, the finishing touches, particularly the treatment of tile edges, significantly influence the overall appearance and longevity of the installation. Choosing and applying the correct ceramic tile edging is paramount to achieving a professional-grade result. This article will explore the various options for tile edging, their applications, and the techniques involved in their proper installation.
Tile edges, without proper treatment, are vulnerable to chipping, cracking, and water damage. They can also present a safety hazard due to their often sharp and unfinished nature. Furthermore, exposed tile edges can detract from the overall aesthetic appeal of the installation, making the space look incomplete or poorly executed. Consequently, selecting the appropriate edging solution is a critical decision that should be made in the planning stages of any tiling project.
Several factors should be considered when selecting a tile edging material. These include the type and thickness of the tile, the location of the installation (e.g., wall, floor, countertop), the intended use of the space (e.g., bathroom, kitchen, entryway), and the desired aesthetic. Different edging options offer varying levels of protection, durability, and visual impact. Understanding these differences is key to making an informed choice.
Understanding the Different Types of Tile Edging
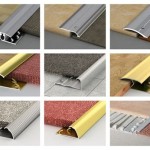
A variety of tile edging options are available, each with its own set of advantages and disadvantages. The most common types include metal profiles (aluminum, stainless steel), PVC profiles, bullnose tiles, and schluter profiles. Understanding the characteristics of each type is crucial for selecting the most suitable option for a given project.
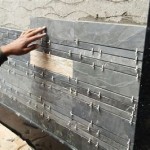
Metal Profiles: Metal profiles are a popular choice due to their durability, clean lines, and versatility. They are typically made from aluminum or stainless steel. Aluminum profiles are lightweight and relatively inexpensive, making them a suitable option for many applications. However, aluminum is softer than stainless steel and may be more prone to scratching or denting. Stainless steel profiles offer superior durability and corrosion resistance, making them ideal for high-traffic areas or environments exposed to moisture. Metal profiles are available in a wide variety of shapes, sizes, and finishes, allowing for a high degree of design flexibility. These profiles are typically installed by embedding them in the thin-set mortar during tile installation. They provide a clean, finished edge while simultaneously protecting the tile from damage.
PVC Profiles: PVC (polyvinyl chloride) profiles are a more cost-effective alternative to metal profiles. They are lightweight, easy to cut and install, and available in a range of colors. PVC profiles are resistant to water and chemicals, making them suitable for use in bathrooms and kitchens. However, PVC is less durable than metal and may be more susceptible to damage from impact or UV exposure. PVC profiles are typically installed using adhesive or thin-set mortar and are best suited for light-duty applications where aesthetics are less critical.
Bullnose Tiles: Bullnose tiles are ceramic tiles with a rounded edge. They are used to create a smooth, finished edge without the need for separate edging materials. Bullnose tiles are available in a variety of colors and sizes to match the field tiles. While offering a seamless and integrated look, they require careful planning and installation to ensure a consistent and aesthetically pleasing finish. Bullnose tiles are typically used in areas where a softer, more traditional aesthetic is desired.
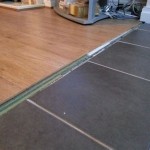
Schluter Profiles: Schluter profiles are a specialized type of metal or PVC edging designed to provide superior protection and functionality. They are often used to create transitions between different flooring materials or to protect the edges of tile installations in high-stress areas. Schluter profiles are typically more expensive than standard metal or PVC profiles but offer enhanced durability and a more sophisticated aesthetic. They include features such as integrated anchoring legs for secure installation and specialized shapes for specific applications. Schluter profiles are particularly useful in situations where movement is expected in the substrate or where a highly durable and waterproof edge is required.
Correct Installation Techniques for Tile Edging
The successful installation of tile edging is crucial for achieving a professional-grade finish. Improper installation can lead to a variety of problems, including loose or uneven edging, water damage, and an unsightly appearance. Adhering to best practices is essential for ensuring a durable and aesthetically pleasing result.
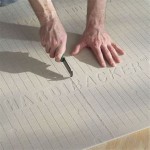
Preparation: The first step in installing tile edging is to prepare the surface. This involves ensuring that the substrate is clean, dry, and level. Any existing debris or imperfections should be removed. If necessary, the substrate should be primed to improve adhesion. Accurately measure and cut the tile edging to the required length. Use a miter saw for precise cuts, particularly when installing metal profiles. For PVC profiles, a utility knife or a fine-toothed saw can be used. Before applying any adhesive or mortar, dry-fit the edging to ensure a proper fit. Make any necessary adjustments to the cuts or the substrate.
Application of Adhesive or Mortar: The method of application depends on the type of edging being used. For metal and PVC profiles, thin-set mortar is the preferred adhesive. Apply a thin, even layer of mortar to the substrate where the edging will be installed. Press the edging firmly into the mortar, ensuring that it is flush with the surrounding tiles. Use spacers to maintain consistent grout lines. Remove any excess mortar with a damp sponge. For bullnose tiles, apply thin-set mortar to the back of the tile and press it firmly into place. Use spacers to maintain consistent grout lines. Ensure that the rounded edge of the bullnose tile is properly aligned with the edge of the installation.
Grouting and Sealing: Once the adhesive or mortar has cured, the grout can be applied. Choose a grout color that complements the tile and the edging. Apply the grout according to the manufacturer's instructions. Use a grout float to press the grout into the joints between the tiles and the edging. Remove any excess grout with a damp sponge. After the grout has cured, apply a sealant to protect it from staining and water damage. For metal profiles, ensure that the sealant is compatible with the metal to prevent corrosion. For PVC profiles, use a sealant specifically designed for plastics.
Specific Techniques for Different Edging Types: When installing metal profiles, take care to avoid scratching the surface of the metal. Use a protective film or tape to prevent damage during installation. When installing PVC profiles, use a solvent-based adhesive to ensure a strong bond. When installing bullnose tiles, pay close attention to the alignment of the rounded edge. Use a level to ensure that the bullnose tiles are installed evenly. When installing Schluter profiles, follow the manufacturer's instructions carefully. These profiles often require specialized tools and techniques.
Addressing Common Challenges in Tile Edge Finishing
Even with careful planning and meticulous execution, certain challenges may arise during the tile edge finishing process. Addressing these challenges effectively requires a proactive approach and a thorough understanding of the materials and techniques involved. Common challenges include uneven surfaces, water damage concerns, and aesthetic integration.
Uneven Surfaces: Uneven surfaces can make it difficult to achieve a smooth and consistent finish. If the substrate is uneven, it may be necessary to apply a leveling compound before installing the tile edging. If the tiles themselves are uneven, it may be necessary to use shims to create a level surface. When installing metal or PVC profiles, ensure that the profiles are properly supported along their entire length. Use shims or spacers to fill any gaps between the profiles and the tiles. When installing bullnose tiles, use a level to ensure that the rounded edges are properly aligned.
Water Damage Concerns: Water damage is a common concern in tiled areas, particularly in bathrooms and kitchens. To prevent water damage, it is essential to use waterproof adhesives and sealants. Ensure that the grout lines are properly sealed to prevent water from penetrating behind the tiles. When installing metal profiles, choose a corrosion-resistant material such as stainless steel. When installing PVC profiles, choose a PVC formulation that is resistant to water and chemicals. When installing Schluter profiles, use a profile that is specifically designed for waterproofing.
Aesthetic Integration: Achieving a seamless and aesthetically pleasing integration of the tile edging is crucial for a professional-grade finish. Choose a tile edging material and color that complements the tile and the overall design of the space. When installing metal profiles, choose a finish that matches the other metal fixtures in the room. When installing PVC profiles, choose a color that closely matches the tile. When installing bullnose tiles, ensure that the rounded edge is consistent and uniform. Consider the overall design of the space when selecting the tile edging material and color.
By carefully selecting the appropriate tile edging material, employing proper installation techniques, and addressing potential challenges, one can achieve a professional-grade finish that is both aesthetically pleasing and durable. The attention to detail in finishing the tile edges significantly elevates the overall quality and longevity of the tile installation.

5 Ways To Finish Shower Tile Edges For A Professional Look Designed

How To Achieve A Professional Finish When Tiling Bathroom Reader S Digest

5 Ways To Finish Shower Tile Edges For A Professional Look Designed

Do I Need To Use Trims For My Tile Edges Stonesuper

Tile Edge Trim How To Choose It And Install 2024 Update

Tile Edge And Trim Design Ideas For 2024 The

Tile Edge And Trim Design Ideas For 2024 The

Can You Install A Tile Edge Trim After Tiling Quora

Paint The Edge Of Tile In A Shower

How To Tile Like A Professional Erin Kestenbaum
Related Posts