A Step-by-Step Guide to Regrouting Your Shower Tile for a Brand-New Look
Regrouting is a cost-effective way to revitalize the appearance of a tiled shower and prevent water damage. Over time, grout can become stained, cracked, or chipped, diminishing the aesthetic appeal of the shower and potentially compromising its waterproofing. This guide provides a comprehensive, step-by-step approach to successfully regrouting shower tiles.
Gathering the Necessary Tools and Materials
Before beginning the regrouting process, gather all the necessary tools and materials to ensure a smooth and efficient workflow. This preparation will prevent interruptions and contribute to a successful outcome.
- Grout removal tool (manual or oscillating)
- Safety glasses and dust mask
- Shop vacuum
- Grout sealant
- Grout float
- Sponge and bucket of clean water
- Grout mixture (sanded or unsanded, depending on tile spacing)
- Caulk
- Caulk gun
- Utility knife
- Painter's tape (optional)
Removing the Old Grout
The first step involves carefully removing the existing grout. This process requires patience and precision to avoid damaging the tiles. Using the appropriate tools and techniques will minimize the risk of tile damage.
- Use a grout removal tool to carefully chip away at the old grout.
- For stubborn grout, an oscillating multi-tool with a grout removal blade can be helpful.
- Wear safety glasses and a dust mask to protect from debris.
- Thoroughly clean the joints with a shop vacuum to remove all loose debris.
Preparing the Shower for New Grout
After removing the old grout, proper preparation of the shower area is crucial for optimal grout adhesion and a long-lasting result. This step ensures the new grout adheres correctly and maintains its integrity.
- Inspect the tile for any loose or damaged pieces and repair or replace as needed.
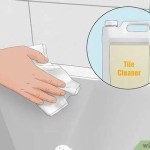
- Clean the tile surface with a mild detergent and water to remove any residue.
- Ensure the shower area is thoroughly dry before applying new grout.
Mixing the Grout
Proper mixing of the grout is essential for achieving the correct consistency and ensuring optimal performance. Following the manufacturer's instructions will ensure the best results.
- Follow the manufacturer's instructions carefully for the correct water-to-grout ratio.
- Mix the grout thoroughly until it reaches a smooth, peanut butter-like consistency.
- Allow the grout to slake (rest) for the recommended time specified by the manufacturer.
Applying the New Grout
Applying the grout carefully and evenly is essential for achieving a professional finish. Using the correct technique will ensure full coverage and a smooth, consistent appearance.
- Use a grout float to press the grout firmly into the tile joints, ensuring complete filling.
- Hold the float at a 45-degree angle and work in diagonal sweeps to avoid pulling the grout out of the joints.
- Remove excess grout from the tile surface with the edge of the float.
Cleaning Up the Excess Grout
Cleaning the excess grout promptly and effectively is vital for achieving a clean and professional look. This step prevents grout haze and ensures a polished finish.
- After the grout has begun to firm up (approximately 15-20 minutes), use a damp sponge to wipe away excess grout from the tile surface.
- Rinse the sponge frequently in clean water and wring it out thoroughly to avoid leaving grout residue.
- Repeat this process until the tile surface is clean and free of grout haze.
Sealing the Grout
Sealing the grout protects it from staining and moisture, prolonging its lifespan and maintaining the shower's appearance. This final step is crucial for protecting the grout and preserving the shower's aesthetic.
- Allow the grout to cure for the recommended time specified by the manufacturer before sealing.
- Apply a grout sealant according to the manufacturer's instructions to protect the grout from stains and moisture.
Applying Caulk
Applying caulk to the change-of-plane areas prevents water from seeping behind the tiles and causing damage. This crucial step ensures a watertight seal and protects the shower's integrity.
- Remove any existing caulk using a utility knife.
- Clean the areas where caulk will be applied.
- Apply a bead of caulk along all corners and where the tiles meet the shower pan or tub.
- Smooth the caulk with a wet finger or caulk tool for a neat and professional finish.

Revive Your Shower A Step By Guide To Regrouting Like Pro Aspen Services

How To Regrout A Shower And Make It Look Like New Angi

How To Regrout Shower Tiles A Step By Guide Wale

A Step By Guide On How To Regrout Bathroom Tiles

How To Regrout A Shower Wall Step By Guide

A Step By Guide On How To Regrout Bathroom Tiles Barretts Of Maynooth

A Step By Guide On How To Regrout Shower Wall

How To Regrout A Shower Wall Step By Guide

How To Make Your Bath Shower Surround Grout Look New Again

Benefits Of Shower Regrouting A Guide To Maintaining Healthy And Beautiful Bathroom Aspen Services
Related Posts