A Step-By-Step Guide for Installing Wood Flooring Over Tile
Installing wood flooring over existing tile can be a cost-effective and time-saving alternative to removing the tile entirely. This approach is particularly appealing when the existing tile is securely bonded to the subfloor and level. However, success hinges on meticulous preparation and adherence to specific installation guidelines. This article provides a comprehensive, step-by-step guide to installing wood flooring over tile, ensuring a professional and durable result.
Before embarking on this project, it is crucial to assess the suitability of the existing tile as a subfloor. Several factors play a significant role in determining whether installation is possible. Evaluate the tile for loose, cracked, or uneven sections. Any instability in the tile will translate to the wood flooring, potentially leading to squeaking, movement, and ultimately, failure. Furthermore, consider the overall height of the added flooring. Doors, transitions to other rooms, and appliances often have height restrictions. Adding wood flooring on top of tile can significantly raise the floor level, potentially creating accessibility issues or requiring modifications to doors and trim.
The type of wood flooring selected is also crucial. Engineered wood flooring is generally preferred for installation over tile due to its dimensional stability. Solid wood flooring is more susceptible to expansion and contraction in response to changes in humidity and can be problematic when installed over a non-porous surface like tile. Engineered wood flooring is constructed from multiple layers of wood bonded together, providing greater resistance to warping and cupping. Therefore, it is imperative to carefully evaluate the existing tile and the intended wood flooring material to determine the feasibility of this installation method.
Preparing the Tile Surface
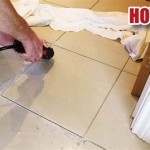
Proper preparation of the existing tile surface is paramount for a successful wood flooring installation. This involves cleaning, leveling, and potentially creating a suitable bonding surface for the adhesive or underlayment. The initial step is a thorough cleaning of the tile. Vacuum the entire surface to remove loose debris, dust, and dirt. Subsequently, scrub the tile with a degreasing cleaner to remove any grease, oil, or wax residue. Stubborn stains can be removed with appropriate cleaning solutions formulated for tile and grout. After cleaning, rinse the tile thoroughly with clean water to remove any remaining cleaner residue. Allow the tile to dry completely before proceeding to the next step.
Once the tile is clean and dry, a thorough inspection for any imperfections is necessary. Check for loose or cracked tiles and repair them accordingly. Loose tiles should be removed and re-set with thin-set mortar. Cracked tiles can be repaired with epoxy-based crack fillers. If the damage is extensive, replacing the cracked tiles is the best option. Ensure that the repair material is flush with the surrounding tile surface. Any unevenness in the tile surface needs to be addressed to create a level subfloor for the wood flooring. Minor imperfections can be filled with self-leveling compound. For more significant unevenness, a concrete grinder can be used to grind down high spots. Always follow the manufacturer's instructions when using self-leveling compound or grinding tools.
Finally, consider roughening the tile surface to improve adhesion. Tile is generally a smooth, non-porous surface, which can hinder the bonding of adhesives or underlayment. Roughening the surface involves lightly sanding the tile with coarse-grit sandpaper. This creates a mechanical bond between the tile and the adhesive, enhancing the overall strength and durability of the installation. After sanding, vacuum the tile thoroughly to remove any dust created by the sanding process. The tile surface is now prepared for the installation of an underlayment or the direct application of adhesive.
Selecting and Installing an Underlayment
The selection and installation of an underlayment is a critical step in installing wood flooring over tile. An underlayment provides several benefits, including moisture protection, sound insulation, and added cushioning. It also helps to bridge minor imperfections in the tile surface, creating a smoother and more even base for the wood flooring. Several types of underlayment are suitable for this application, each with its own advantages and disadvantages.
One popular option is a foam underlayment. Foam underlayments are available in various thicknesses and densities, offering excellent sound insulation and cushioning. They are relatively inexpensive and easy to install. However, foam underlayments are not as effective at moisture protection as other options. Another option is a cork underlayment. Cork underlayment is a natural and sustainable material that provides excellent sound insulation and moisture resistance. It is also more durable than foam underlayment. However, cork underlayment is generally more expensive than foam underlayment. A third option is a rubber underlayment. Rubber underlayments are highly durable and provide excellent sound insulation and moisture protection. They are often used in commercial applications but can also be used in residential settings. Rubber underlayments are typically the most expensive option.
The installation process for most underlayments is relatively straightforward. Begin by unrolling the underlayment material and cutting it to fit the room's dimensions. Allow for a small expansion gap around the perimeter of the room. Adhere the underlayment to the prepared tile surface using a construction adhesive recommended by the underlayment manufacturer. Apply the adhesive in a consistent pattern, ensuring full coverage. Overlap the seams of the underlayment slightly and secure them with seam tape. Roll the underlayment with a heavy roller to ensure proper adhesion to the tile surface. Allow the adhesive to cure completely before proceeding to the next step. The underlayment now provides a smooth and stable base for the installation of the wood flooring.
Installing the Wood Flooring
With the tile surface prepared and the underlayment installed (if used), the installation of the wood flooring can commence. Before beginning, it is important to acclimate the wood flooring to the room's environment. This involves storing the flooring in the room for several days prior to installation, allowing it to adjust to the temperature and humidity levels. Acclimation helps to minimize expansion and contraction after installation, preventing warping and gapping.
There are primarily two methods for installing wood flooring over tile: gluing or floating. Gluing involves adhering the wood flooring directly to the prepared tile surface or underlayment using a construction adhesive specifically designed for wood flooring. Floating involves interlocking the wood flooring planks together without adhering them to the subfloor. The floating method is generally preferred for engineered wood flooring because it allows for expansion and contraction. However, the gluing method can provide a more stable and solid feel to the floor.
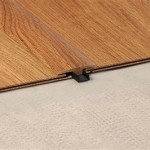
If using the gluing method, apply the adhesive to the back of each plank and carefully position it on the prepared surface. Use a tapping block and hammer to ensure a tight fit between the planks. Remove any excess adhesive immediately with a damp cloth. Follow the manufacturer's instructions for adhesive application and drying time. If using the floating method, begin by installing the first row of planks along the perimeter of the room, leaving an expansion gap. Interlock the planks using the tongue-and-groove system. Use a tapping block and hammer to ensure a tight fit. Continue installing the planks row by row, ensuring that the end joints are staggered for a more visually appealing and structurally sound floor. Once the entire floor is installed, install baseboards and trim to cover the expansion gap and provide a finished look.
Throughout the installation process, it is essential to maintain a consistent working height and ensure that the planks are properly aligned. Use spacers to maintain the expansion gap and check the floor's levelness regularly. Pay close attention to the manufacturer's instructions for the specific wood flooring product being installed. Correct installation techniques will contribute to a long-lasting and beautiful wood floor that will enhance the aesthetics and value of the living space. Following these guidelines carefully will result in a professionally installed wood floor over tile.

Install Hardwood Flooring Over Tile Floor Double Glue Down Method

Step By Installation Guide For Wood Floor Tiles

How To Prepare A Subfloor For Tile Installation The Home Depot

We Installed Hardwood Flooring On Top Of Tiles Step By Diy Tutorial

How To Install Laminate Flooring For Beginners
:strip_icc()/101206833-2e499ef612434b6b8ab6e5b62422a78f.jpg?strip=all "How To Install Hardwood Floors")
How To Install Hardwood Floors

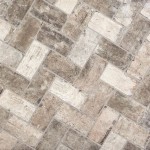
Wood Look Tile Flooring How To Lay That Looks Like

How To Lay Engineered Timber Floor Guide Fantastic Handyman Au

How To Prepare A Subfloor For Tile Installation The Home Depot

How To Install Lock Engineered Hardwood Flooring
Related Posts