A Guide To Faux Foam Tiles For Ceiling
Faux foam tiles have emerged as a popular and cost-effective alternative to traditional ceiling materials. They offer numerous benefits, including aesthetic appeal, ease of installation, and acoustic insulation. This guide provides a comprehensive overview of faux foam tiles for ceilings, covering their types, advantages, installation process, maintenance, and factors to consider before purchasing.
Faux foam tiles, also known as polystyrene or expanded polystyrene (EPS) tiles, are lightweight panels designed to mimic the look of various ceiling materials, such as pressed tin, wood, or plaster. They are typically manufactured from a mold, creating intricate patterns and textures. A key advantage of faux foam is its ability to transform the look of a room quickly and affordably.
Types of Faux Foam Ceiling Tiles
The market offers a diverse range of faux foam ceiling tiles, each with its own distinct style and characteristics. Understanding the different types can aid in selecting the most suitable option for a specific project.
Pressed Tin Look: These tiles replicate the classic designs of traditional pressed tin ceilings. They often feature ornate patterns and geometric shapes, adding a touch of vintage charm to any space. Pressed tin effect tiles are available in various finishes, including metallic, painted, and antiqued.
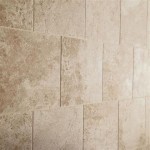
Wood Look: Faux wood tiles mimic the texture and grain of real wood. They provide a rustic and natural aesthetic, suitable for creating a warm and inviting atmosphere. These tiles are available in various wood tones, from light birch to dark walnut.
Plaster Look: These tiles simulate the appearance of traditional plaster ceilings, often featuring raised patterns and decorative moldings. They offer a sophisticated and elegant look, suitable for formal living rooms and dining areas. Plaster effect tiles are frequently paintable, allowing for customization to match existing décor.
Geometric Patterns: These tiles feature modern and abstract designs, providing a contemporary and stylish look. They are available in a wide range of shapes and patterns, from simple squares and rectangles to intricate interlocking designs. Geometric patterns are often chosen for their visual impact and ability to create focal points.
Acoustic Tiles: While often similar in appearance to other faux foam tiles, these are specifically designed to absorb sound. They usually have a textured surface to increase the sound absorption coefficient. Acoustic tiles are ideal for rooms where noise reduction is desired, such as home theaters, offices, and music rooms.
Advantages of Using Faux Foam Ceiling Tiles
Faux foam ceiling tiles offer several advantages over traditional ceiling materials, making them an attractive option for homeowners and contractors alike.
Cost-Effectiveness: Compared to materials like wood, tin, or plaster, faux foam tiles are significantly more affordable. This makes them a budget-friendly option for renovating or updating ceilings without incurring substantial expenses.
Easy Installation: Faux foam tiles are lightweight and easy to cut, making them simple to install. Many installations can be done with basic tools and adhesive, often eliminating the need for professional assistance. This DIY-friendly nature can save on labor costs.
Lightweight: The lightweight nature of faux foam tiles simplifies handling and installation, especially on ceilings. This reduces the risk of strain or injury during the installation process. It also minimizes the load on the ceiling structure, which can be important in older buildings.
Acoustic Insulation: Faux foam tiles can help to improve the acoustics of a room by absorbing sound and reducing echo. This is particularly beneficial in rooms with hard surfaces, such as tile or hardwood floors. The acoustic properties vary depending on the thickness and density of the foam.
Thermal Insulation: Faux foam tiles provide a degree of thermal insulation, helping to reduce heat loss in the winter and heat gain in the summer. This can lead to lower energy bills and a more comfortable indoor environment.
Paintable: Many faux foam tiles are paintable, allowing for customization to match the existing décor or create a desired aesthetic. This provides flexibility in design and enables homeowners to update the look of their ceilings easily.
Water Resistant: While not entirely waterproof, faux foam tiles are generally water-resistant. This makes them suitable for use in areas with high humidity, such as bathrooms and kitchens. They are less susceptible to mold and mildew growth compared to traditional ceiling materials.
Installation Process for Faux Foam Ceiling Tiles
Proper installation is crucial for ensuring the longevity and aesthetic appeal of faux foam ceiling tiles. The following steps outline the general installation process.
Preparation: Before beginning the installation, ensure that the ceiling surface is clean, dry, and free of any loose debris. Repair any cracks or imperfections in the ceiling before applying the tiles. If the ceiling is textured, consider smoothing it out for a more uniform surface. Priming the ceiling may also improve adhesion.
Planning and Layout: Plan the layout of the tiles before applying any adhesive. Determine the center point of the ceiling and work outwards from there. This will help to ensure a symmetrical and balanced appearance. If necessary, cut the tiles to fit around edges and corners. A sharp utility knife or saw can be used for this purpose.
Applying Adhesive: Use a suitable adhesive specifically designed for foam tiles. Apply the adhesive to the back of the tile according to the manufacturer's instructions. Typically, this involves applying a thin, even layer of adhesive to the entire surface or applying dabs of adhesive to strategic points.
Installing the Tiles: Carefully position the tile on the ceiling and press it firmly into place. Hold the tile in place for a few seconds to allow the adhesive to bond. Repeat this process for each tile, ensuring that they are aligned properly and that there are no gaps between the tiles. Use spacers if needed to maintain consistent spacing.
Cutting and Fitting: As you approach the edges and corners of the ceiling, you will likely need to cut the tiles to fit. Measure the required dimensions accurately and use a sharp utility knife or saw to cut the tiles to size. Ensure that the cuts are clean and precise for a professional finish.
Finishing Touches: Once all the tiles are installed, inspect the ceiling for any gaps or imperfections. Fill any gaps with caulk or sealant that is paintable. If desired, paint the tiles to match the existing décor or create a desired aesthetic. Apply multiple coats of paint for a more durable and uniform finish.
Safety Precautions: During the installation process, wear appropriate safety gear, such as gloves and eye protection. Ensure that the work area is well-ventilated to avoid inhaling fumes from the adhesive or paint. Follow the manufacturer's instructions carefully when using adhesives and paints.
Adhesive Selection: Selecting the right adhesive is critical for a successful installation. Use an adhesive specifically designed for foam tiles, as other adhesives may damage the foam or not provide sufficient bonding strength. Consider factors such as drying time, bond strength, and compatibility with paint when choosing an adhesive.
Tile Alignment: Maintaining proper alignment is essential for a professional-looking finish. Use a level or straight edge to ensure that the tiles are aligned properly. If necessary, use spacers to maintain consistent spacing between the tiles. Periodically check the alignment as you progress with the installation to avoid cumulative errors.
Ventilation: Proper ventilation is important during the installation process, especially when using adhesives and paints. Open windows and doors to ensure adequate airflow. Consider using a fan to circulate the air. This will help to reduce the concentration of fumes and create a more comfortable working environment.
Edge Treatment: Consider how the edges of the ceiling will be treated. Options include using decorative moldings, caulk, or simply painting the edges to blend with the walls. Choose an edge treatment that complements the overall aesthetic of the room.
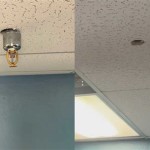
Lighting Considerations: If installing recessed lighting, plan the placement of the lights before installing the tiles. Cut the tiles to fit around the light fixtures, ensuring that there is sufficient clearance for ventilation. Consider using LED lighting, as it produces less heat than traditional incandescent bulbs.

Ceiling Tiles Guide Decorative Inc

How To Install Styrofoam Ceiling Tiles At Home With Ashley

Common Foam Ceiling Tile Questions Answers Decorative Tiles Inc

Decorative Foam Ceiling Tiles Installation Overview With Tips And Tricks

Why Invest In Styrofoam Ceiling Tiles Decorative Inc

Say Goodbye To Messy Popcorn Ceilings Diy Guide Covering With Glue Up Ceiling Tiles

Faux Tin Ceiling Tile How To

Why Invest In Styrofoam Ceiling Tiles Decorative Inc

A Homeowner S Guide To Ceiling Tile

Authentic Look Faux Tin Ceiling Tiles Decorative
Related Posts