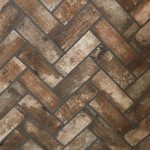
Porcelain tile is a popular choice for flooring, as it is durable and easy to maintain. But did you know that porcelain tile can also give you the look of natural wood? With the right installation and choice of porcelain tile, you can create a stunning and natural looking wood finish in your home.
The first step in achieving a wood look with porcelain tile is to choose the right tile. Look for porcelain tiles that have a textured surface and a realistic wood grain. Be sure to choose porcelain tiles that are rated for use in your area and can handle the wear and tear of daily life.
Once you have chosen the right tile, it’s time to begin the installation process. Start by laying out the tiles in the desired pattern. You may want to use a chalk line to mark the edges of the tiles and ensure they are properly aligned. Once the tiles are laid out, use a trowel to spread adhesive on the back of each tile. Then, press each tile into place and use a rubber mallet to ensure they are securely in place.
Once the tiles are in place, you must grout the gaps between them. Use a grout float to spread the grout evenly among the tiles, making sure to work it into the joints. Use a damp sponge to remove any excess grout, and allow the grout to dry for at least 24 hours before applying a sealer. Once the grout is dry, you can apply a sealer to help protect and maintain the tiles.
With the right tile and installation, you can achieve a beautiful and natural wood look with porcelain tile. The key is to take your time and carefully install the tile, and make sure to choose a tile that is rated for use in your area. With the right tile and installation, you can enjoy the natural beauty of wood in your home for years to come.


Related Posts


