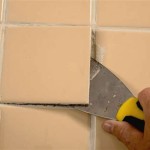
Removing tile is a project that can be completed by most do-it-yourselfers. Before beginning, however, it is important to understand the process and to take the necessary safety precautions. In this article, we will cover the basics of removing tile, including the necessary tools and safety measures.
The first step in removing tile is to prepare the work area. This involves removing any furniture or other objects that are in the way and covering any exposed surfaces with a drop cloth. Once the area is prepared, you will need to use a hammer and chisel to break up the tile. Start by tapping the chisel with the hammer to break the tile at the grout lines. Work your way around the tile, breaking it into smaller pieces until it can be easily removed.
Once the tile has been removed, use a utility knife to scrape off any remaining adhesive or mortar. Be sure to wear safety glasses and work gloves when doing this. Once all the adhesive and mortar is gone, you can use an aggressive cleaner to remove any remaining residue. When the cleaning is complete, use a scrub brush to make sure the area is clean and free of any debris.
The next step is to prepare the area for new tile. Use a tile saw or grinder to remove any lippage from the subfloor. Then, use a level to check for any dips or high spots in the surface and use a patching compound to fill in any imperfections. Once the area is level and smooth, you can begin to lay the new tile.
Finally, you will need to grout the new tile. Start by spreading the grout mixture over the tile using a grout float. Work your way across the tile until all the grout lines are filled. When the grout has dried, use a damp sponge to remove any excess grout. Finally, use a sealer to help protect the grout lines and to give the tile a finished look.


Related Posts


