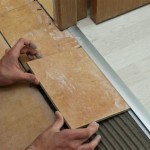
Tile is a great flooring option for any home. It is durable, easy to clean, and adds a beautiful touch to any room. Installing tile can be a bit of a challenge, however. It requires a certain level of skill and expertise. In this article, we will walk you through the process of installing tile so that you can have the beautiful flooring you desire.
The first step in installing tile is to measure the area where you plan to install it. Measure the length and width of the area. Make sure to measure carefully, as even the slightest miscalculation can throw off the entire process. Once you have the measurements, you can begin to buy the tile that you want.
Once you have the tile, you will need to prepare the surface that you are laying it on. Make sure the surface is level, clean, and dry. If there are any holes or cracks, you will need to fill them in with appropriate materials. Once the surface is ready, you can begin to lay the tiles.
When laying the tile, you will also need to use a thin set mortar to adhere the tiles to the surface. You can purchase this mortar at any home improvement store. Make sure to spread the mortar evenly and carefully, as any mistakes can lead to uneven tiles or air pockets. Once the mortar is spread and the tiles are in place, you can use a wet sponge to clean up any excess mortar.
The final step in installing tile is to grout the tiles. Grout is a mixture of sand, cement, and water that is used to fill in the spaces between the tiles. Make sure to mix the grout according to the instructions on the package. Once the grout is mixed and applied, use a wet sponge to clean up any excess grout and then allow it to dry. Once the grout is dry, your tile installation is complete!


Related Posts


