Tiling a tub surround is a great way to spruce up a bathroom and give it a more luxurious look. Tiling a tub surround is not a difficult job, but it does require a bit of patience and attention to detail. In this article, we’ll go over the basics of tiling a tub surround and provide some tips for getting a professional finish.
Before getting started, you need to gather all the materials you will need for the project. You will need tile, tile adhesive, a tile saw, grout, a grout float, a sponge, and a sealer. You may also want to get a plastic trowel to help spread the adhesive onto the walls.
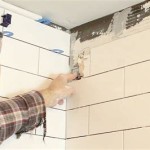
Once you have all the materials, you can begin to tile the tub surround. Start by measuring the area to be tiled and marking the walls with a pencil. Make sure to take into account any outlets or other fixtures that may be in the way. Next, use the tile saw to cut the tiles to the desired size. Then, begin spreading the tile adhesive onto the walls using the plastic trowel. Use the trowel to spread the adhesive evenly and to make sure that the tiles will stick to the wall.
Once the adhesive is in place, you can begin to lay the tiles. Start at one corner of the wall and work your way around the room. Make sure to press each tile firmly into place, and to use spacers to make sure the tiles are even and evenly spaced.
Once the tiles are in place, you can grout them. Use the grout float to spread the grout over the tiles. Make sure to use a damp sponge to clean off any excess grout. Finally, apply a sealer to the grout to protect it from water damage. Once the sealer is dry, your tub surround is ready to use.


Related Posts

