Creating a tile shower in your home is a great way to add beauty and functionality to your bathroom. Whether you’re looking to upgrade your existing shower or are installing a new one, tile is an excellent option. However, the process of building a tile shower can be intimidating. Here are some tips to help you get started.
First, make sure you’re using the right materials for the job. You’ll need to purchase waterproof tile, a waterproof sealer, and a tiling adhesive. Additionally, you’ll need to purchase a tile cutter, trowel, grout, and grout sealer. Make sure you have all the necessary materials before you begin.
Once you have all your materials, it’s time to begin tiling. Start by measuring and marking the walls for where the tiles will go. Make sure the measurements are accurate and that the tiles won’t be too close together or too far apart. Once you’ve marked the walls, use the tile cutter to cut the tiles to size.
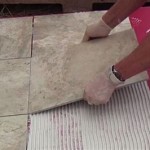
Next, spread the tiling adhesive on the wall, making sure to cover all the areas where the tiles will be placed. Once the adhesive is in place, press the tiles into the wall, making sure they are lined up properly. When all the tiles are in place, allow the adhesive to dry overnight.
Once the adhesive has dried, it’s time to grout. Spread the grout between the tiles, making sure to fill in all the cracks and crevices. Once the grout is dry, apply a sealer to protect it from water damage. Finally, enjoy your new tile shower!


Related Posts


