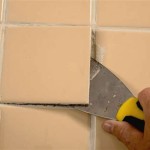
Tile grout can easily become stained and dingy over time, taking away from the beauty of a room and making it look dirty. But don’t despair – you can bring tile grout back to life with the right supplies and a bit of elbow grease. This article will show you how to whiten tile grout with a few simple steps.
The first step to whitening tile grout is to gather all the necessary supplies. You will need a scrub brush, a bucket, some dish soap, a mildew remover, a sealant, and a grout whitener. You may also need safety gear such as gloves, protective eyewear, and a mask to protect yourself from inhaling any dangerous fumes.
Once you have all the supplies, it’s time to get to work. Start by filling the bucket with warm water and adding a few drops of dish soap. Dip the scrub brush into the soapy water and scrub the grout lines until they are free of dirt and mildew. For stubborn stains, use a mildew remover in place of the dish soap.
Once the grout is clean, it’s time to apply the grout whitener. Follow the directions on the package, and make sure to wear safety gear if necessary. Once the whitener is dry, it’s time to seal the grout. This will help protect it from future staining and will make it easier to clean in the future.
That’s it – in just a few simple steps, you can breathe new life into your old tile grout. Just remember to clean and re-seal the grout regularly to keep it looking its best. With the right supplies and a bit of elbow grease, you can make your tile grout look like new again.


Related Posts


