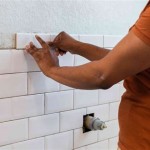
Self-stick tiles are an easy and inexpensive way to add a little flair and personality to your home. Whether you’re looking to spruce up a kitchen backsplash, bathroom walls, or even a feature wall in your living room, self-stick tiles have you covered. Below, we’ve put together a comprehensive guide to help you install self-stick tiles like a professional.
Before you begin, it’s important to make sure your surface is clean and dry. Any dirt or moisture could prevent the tiles from sticking properly. If you’re concerned about the surface not being smooth enough, you can always use a sandpaper to lightly buff it.
Next, you’ll want to measure the area you’re planning to tile. This will help ensure you purchase the right amount of tiles. Once you have the correct measurements, you can begin laying them out to get an idea of how they’ll look.
When you’re ready to start applying the tiles, begin with a full tile at the corner of the room. This will ensure a straight line and help you measure the rest of the tiles accurately. If you’re working in an area with a lot of curves or angles, it’s best to measure and cut the tiles to fit.
Once you have the tiles laid out and ready to go, peel off the backing and press them firmly into place. You don’t need any adhesive, as the tiles are self-stick. You can use a rubber roller to make sure the tiles are firmly attached to the surface.
And that’s it! With a little patience and attention to detail, you can easily install self-stick tiles like a professional. So go ahead and give it a try – you’ll be glad you did!


Related Posts

