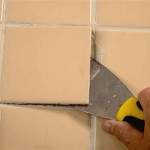
Vinyl tiles can be an easy and affordable way to spruce up your floors. With a few simple tools and a bit of patience, you can have a beautiful new floor in no time. Here are the steps you need to take to properly install vinyl tiles.
Start by preparing the surface you are laying the tiles on. Make sure it is clean and free of dust, dirt, and debris. If you are installing on wood, make sure the wood is level and free of nails, screws, or other protrusions. If you are installing on concrete, make sure it is free of cracks or other imperfections.
Next, lay out the tiles in the design you want. Make sure to give yourself enough space to cut the tiles to fit. You may also need to trim some tiles to fit around obstacles such as a sink or a doorway. Now it’s time to begin the installation.
Start in the corner of the room and begin laying the tiles. Use a roller or a rubber mallet to press down the tiles firmly. Make sure the tiles are lined up correctly and that the edges are flush. As you continue to lay the tiles, use a level to check that the floor is even.
Once the tiles are all laid, you can grout the seams. Use a grout that is designed for vinyl tiles and apply it with a trowel. Smooth the grout with a damp sponge and then allow it to dry for at least 24 hours. Finally, apply a coat of sealer to protect the tiles and grout from dirt and moisture.
Now you have a beautiful new floor that is easy to clean and maintain. With a few simple steps, you can have a new floor in no time. Vinyl tiles are a great way to update your home and add value to your home.


/cdn.vox-cdn.com/uploads/chorus_image/image/65891755/howto_vinylfloor_05.0.jpg)


Related Posts


