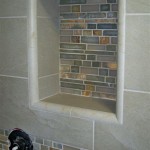
Installing a tile shower floor can be a daunting task for someone who is new to home improvement projects. However, with a bit of preparation, the right tools, and a little bit of patience, installing a tile shower floor can be a relatively easy project.
The first step in installing a tile shower floor is to prepare the area. This means removing any existing tiles, as well as any debris or other objects that may be in the way. Once the area is cleared, the next step is to measure the area and make sure that the tiles will fit. This is important to ensure that the tiles will be properly installed and will not become loose after the installation is complete.
After the area is measured and the tiles are purchased, the next step is to install a waterproof membrane. This membrane is essential as it will keep water from seeping through the tiles and onto the floor below. Some types of waterproof membrane can be purchased in pre-measured sheets, while others must be cut to the correct size for the area.
Once the waterproof membrane is installed, the next step is to lay the tiles. This should be done in a way that ensures that the tiles are properly aligned. After laying the tiles, the grout should be applied using a special grout trowel. This will help ensure that the grout is properly sealed and that the tiles are properly adhered to the shower floor.
The final step in installing a tile shower floor is to seal the grout. This will help keep moisture from seeping through the grout and on to the floor below. A grout sealer should be applied to the grout in order to ensure that it is properly sealed. Once the sealer is dry, the shower floor is ready to be used.


Related Posts


