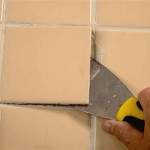
Installing ceramic plank tile is not as difficult as it may seem. With the right tools and a bit of patience, you can achieve a professional finish in your home. Here are the steps to properly install ceramic plank tile.
Begin by laying out your tiles in the desired design and pattern. Use a level and a straight edge to ensure the pattern is even. Use tile spacers to create even grout lines between the tiles. After the tiles are laid out, use a tile saw to cut the tiles to the proper size and shape.
Once the tiles are cut, begin applying the adhesive to the substrate. Lay the tiles in the pattern you have chosen, being sure to press down firmly on each tile. Allow the adhesive to dry for at least 24 hours before grouting.
Mix the grout according to the manufacturer’s instructions. Apply the grout in between the tiles with a rubber grout float. Use a damp sponge to wipe off any excess grout. Allow the grout to dry for at least 24 hours before sealing the grout.
Finally, seal the grout with a water-based sealer. This will help protect the grout from moisture and make it easier to clean. With proper care and maintenance, your ceramic plank tile installation will look great for years to come.


/LayingCeramicFloorTile-5b75cedc46e0fb00507045bd.jpg)

Related Posts


