How To Tile A Cement Bathroom Floor
Tiling a cement bathroom floor is a common home improvement project that can significantly enhance the aesthetic appeal and functionality of the space. A properly tiled floor not only provides a durable and water-resistant surface but also adds value to the property. This article provides a comprehensive guide on how to successfully tile a cement bathroom floor, covering the necessary preparation, installation, and finishing steps.
Preparation: Assessing and Preparing the Cement Floor
The success of any tiling project hinges on thorough preparation. The condition of the cement floor is paramount. It must be structurally sound, clean, and level. Any existing cracks or imperfections need to be addressed before tiling commences.
Begin by thoroughly inspecting the cement floor. Look for cracks, holes, or areas of unevenness. Small cracks can often be filled with a cement-based patching compound. Larger cracks may require professional attention to ensure the structural integrity of the floor. Use a level to assess the floor's flatness. Any significant dips or high spots will need to be addressed to ensure a level tiling surface. Self-leveling compound can be used to correct minor unevenness.
Once the floor's structural integrity is confirmed, cleaning is the next critical step. The floor must be free of dirt, debris, grease, and any other contaminants that could interfere with the adhesion of the tile mortar. Start by sweeping or vacuuming the floor to remove loose debris. Then, use a degreasing cleaner and a scrub brush to thoroughly clean the surface. Rinse the floor thoroughly with clean water and allow it to dry completely before proceeding. Ensure the cleaner used is compatible with cement surfaces.
Priming the cement floor is often recommended, especially if the floor is porous or dusty. A primer helps to improve the adhesion of the tile mortar and can also seal the surface, preventing moisture from being drawn out of the mortar too quickly. Apply the primer according to the manufacturer's instructions, typically using a paint roller or brush. Allow the primer to dry completely before moving on to the next step.
A key consideration is the existing floor's height relative to other surfaces in the bathroom, such as doorways and fixtures. Adding tile will increase the floor height, which could create a tripping hazard or interfere with the operation of doors. Carefully measure the existing floor height and the thickness of the tile you plan to use to ensure that the finished floor height will be acceptable. Adjustments may be necessary to doorways or thresholds.
Before laying any tile, it is advisable to dry-fit the tiles to plan the layout. This involves placing the tiles on the floor without mortar to determine the best arrangement and identify any potential problems. Start by finding the center of the room. Use a chalk line to create a grid that represents the layout of the tiles. Check for symmetry and balance and make adjustments as necessary. This step helps to avoid small slivers of tile along the edges of the room, which can be visually unappealing. Consider the placement of fixtures, such as toilets and vanities, when planning the layout.
Installation: Applying Mortar and Laying Tiles
After the preparation phase, the actual tiling process begins. This involves applying mortar to the floor and carefully setting the tiles in place. Choosing the right mortar is crucial for a successful tiling project. The mortar must be specifically designed for use with the type of tile being installed and the substrate (cement floor). Thin-set mortar is commonly used for tiling bathroom floors, but it is essential to read the manufacturer's instructions and choose a mortar that is compatible with the tile being used and the specific conditions of the bathroom environment.
Mix the mortar according to the manufacturer's instructions. Use a mixing drill and a mixing paddle to ensure that the mortar is thoroughly combined and has a smooth, consistent consistency. Avoid adding too much water, as this can weaken the mortar and affect its adhesion. Allow the mortar to slake (rest) for the recommended time before using it.
Using a notched trowel, apply the mortar to the floor in small sections, typically no more than a few square feet at a time. The size and shape of the notches on the trowel will determine the amount of mortar that is applied and the depth of the ridges that are created. Hold the trowel at a 45-degree angle and apply even pressure to create consistent ridges in the mortar. These ridges help to ensure that the tiles are properly bedded in the mortar and that there are no voids underneath.
Carefully place the tiles onto the mortar bed, aligning them with the layout lines that were established during the dry-fitting process. Use tile spacers to maintain consistent spacing between the tiles. Gently press each tile into the mortar to ensure that it is properly bedded. Avoid sliding the tiles into place, as this can smear the mortar and create uneven surfaces. Use a rubber mallet to gently tap the tiles into place, if necessary. Check the tiles for levelness using a level and make adjustments as needed.
As you work, periodically clean any excess mortar from the surface of the tiles with a damp sponge. This will prevent the mortar from hardening on the tiles and making them difficult to clean later. Pay particular attention to the grout lines, as excess mortar in these areas can make grouting more difficult.
For tiles that need to be cut to fit around fixtures or along walls, use a tile cutter or wet saw. A tile cutter is suitable for straight cuts, while a wet saw is necessary for more complex cuts or for cutting harder tiles, such as porcelain or stone. Always wear safety glasses when cutting tiles.
Allow the mortar to cure completely before proceeding to the grouting stage. The curing time will vary depending on the type of mortar used and the ambient temperature and humidity. Typically, it is recommended to wait at least 24 to 48 hours before walking on the tiled floor. Ensure the curing area is free from extreme temperatures and humidity changes.
Grouting and Sealing: Finishing the Tiled Floor
Once the mortar has cured, the next step is to grout the tiled floor. Grouting fills the spaces between the tiles, providing a water-resistant seal and enhancing the overall appearance of the floor. Selecting the appropriate grout is important. Different types of grout are available, including sanded grout, unsanded grout, and epoxy grout. Sanded grout is typically used for grout lines that are 1/8 inch wide or wider, while unsanded grout is used for narrower grout lines. Epoxy grout is more resistant to stains and chemicals and is often used in high-moisture areas, such as bathrooms. Consider the tile type, grout joint width, and exposure to moisture when choosing the right grout.
Mix the grout according to the manufacturer's instructions. As with mortar, it is important to achieve a smooth, consistent consistency. Apply the grout to the tile surface using a grout float. Hold the float at a 45-degree angle and work the grout into the grout lines, using firm, even pressure. Make sure to fill all of the grout lines completely.
After the grout has been applied, use a damp sponge to remove excess grout from the surface of the tiles. Rinse the sponge frequently in clean water. Work diagonally across the tiles to avoid pulling grout out of the grout lines. Allow the grout to set for the recommended time, then use a clean, dry cloth to buff the tiles and remove any remaining grout haze.
Sealing the grout is often recommended, especially in bathrooms where the floor is exposed to moisture. A grout sealer helps to protect the grout from stains, mildew, and water damage. Apply the sealer according to the manufacturer's instructions, typically using a brush or applicator. Allow the sealer to dry completely before using the bathroom.
Finally, clean the tiled floor thoroughly with a mild detergent and water. Inspect the floor for any imperfections or areas that need to be touched up. With proper care and maintenance, a tiled cement bathroom floor can provide years of beauty and functionality.
Proper ventilation and personal protective equipment should be used throughout the tiling process. This includes wearing gloves, eye protection, and a dust mask. Consult local building codes and regulations before starting any tiling project.

How To Install Cement Board On A Floor Diy Family Handyman

How To Tile A Cement Floor Bathroom Laundry Room One Challenge Week 3 My Love 2 Create

How To Tile A Cement Floor Bathroom Laundry Room One Challenge Week 3 My Love 2 Create

How Tiles Can Mimic Concrete Flooring Tile Wizards

Tiling Over A Ed Concrete Slab Fine Homebuilding

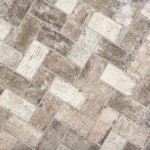
Benefits Of Using Cement Tiles For Bathroom Floors And Walls

Splish Splash Cement Tiles For Your Shower Floor Zia Tile

How To Use Concrete For Designing A Bathroom Shower Exchange

How To Install Wood Tile Concrete Floor In The Bathroom Diy

Porcelain Tile Cement Looks Performance W O Hassle
Related Posts