How to Remove Tile From Concrete Subfloor
Removing tile from a concrete subfloor is a common home improvement project that, while demanding, can be successfully completed by a determined individual. The process involves breaking the bond between the tile and the concrete, a task that can range from relatively simple to incredibly challenging depending on the type of adhesive used, the age of the installation, and the condition of the concrete itself. This article provides a comprehensive guide to the tools, techniques, and considerations necessary for effectively removing tile from a concrete subfloor.
Before embarking on this project, it is crucial to understand the potential risks and prepare accordingly. Dust and debris generated during tile removal can contain silica, a known carcinogen, therefore, adequate respiratory protection is paramount. Additionally, flying tile shards pose a risk to eyes and skin, necessitating appropriate personal protective equipment (PPE). Finally, the process can be physically demanding, requiring the use of repetitive motions and potentially heavy tools. Careful planning and a methodical approach are essential to minimize these risks and ensure a safe and efficient tile removal process.
Preparation and Safety Measures
Prior to commencing any physical work, the work area should be thoroughly prepared. This involves removing all furniture, rugs, and other obstructions from the room. Cover any remaining fixtures, such as cabinets or appliances, with plastic sheeting to protect them from dust and debris. Seal off doorways and vents with plastic sheeting and tape to prevent dust from spreading to other areas of the house. This step is particularly important if the house is occupied during the tile removal process.
Safety is of utmost importance throughout the entire project. Essential PPE includes a respirator mask (N95 or higher), safety glasses or goggles, work gloves, and knee pads. The respirator mask will protect against inhalation of dust and silica particles. Safety glasses will shield the eyes from flying debris. Work gloves will protect hands from cuts and abrasions. Knee pads will provide comfort and support while working on the floor.
Consider the possibility of asbestos if the tile was installed before the 1980s. In such cases, professional testing and abatement are strongly recommended. Disturbing asbestos-containing materials can release harmful fibers into the air, posing a significant health risk. Avoid any demolition until the presence of asbestos has been ruled out by a certified professional.
After ensuring the work area is properly prepared and the necessary safety precautions are in place, gather all the required tools and materials. Having everything readily available will streamline the process and minimize interruptions.
Tools and Materials
The selection of tools will depend on the tile type, the strength of the adhesive bond, and the size of the project. A basic toolkit includes:
- Hammer and Chisel: This is a fundamental tool for breaking up tiles and chipping away at stubborn adhesive. Several chisel sizes can be helpful.
- Scraper: A floor scraper with a long handle provides leverage for removing tiles and adhesive.
- Grout Removal Tool: This tool is used to remove grout around the tiles, facilitating easier removal. Manual grout saws or power tools with grout removal attachments can be used.
- Shop Vacuum: A shop vacuum is essential for cleaning up dust and debris throughout the project. A HEPA filter is recommended to capture fine particles.
- Floor Scraper/Razor Scraper: After tile removal, residue of mortar or adhesive may remain. A floor scraper can be used remove this.
- Putty Knife: A putty knife can sometimes dislodge loose tiles or remove thin layers of adhesive.
- Angle Grinder with Diamond Grinding Wheel (Optional): An angle grinder can be used to grind away stubborn adhesive, but it generates a significant amount of dust and requires extreme caution.
- Tile Removal Machine (Optional): For larger projects, a tile removal machine can significantly speed up the process. These machines are available for rent at many tool rental centers.
- Sledgehammer (Optional): For extremely persistent tiles, a sledgehammer may be necessary to break them into smaller pieces. Exercise caution when using a sledgehammer to avoid damaging the subfloor.
- Moisture Meter: A moisture meter is important to check the moisture content of the concrete subfloor before starting the new tile installation.
In addition to tools, the following materials will be needed:
- Plastic Sheeting: For covering fixtures and sealing off doorways.
- Duct Tape: For securing plastic sheeting.
- Garbage Bags: For disposing of tile debris.
- Safety Glasses/Goggles: To protect eyes from debris.
- Respirator Mask (N95 or higher): To protect lungs from dust.
- Work Gloves: To protect hands from cuts and abrasions.
- Knee Pads: For comfort and support while working on the floor.
The Tile Removal Process: A Step-by-Step Guide
With the preparation complete and the necessary tools and materials gathered, the tile removal process can begin. It is important to proceed methodically and patiently, as rushing the process can lead to damage to the subfloor and increased risk of injury.
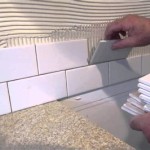
1. Grout Removal: The first step is to remove the grout surrounding the tiles. Use a grout removal tool to carefully scrape away the grout. Apply consistent pressure and avoid gouging the surrounding tiles. For larger areas, a power tool with a grout removal attachment can be used to expedite the process.
2. Tile Removal: Once the grout is removed, begin removing the tiles. Start by identifying a loose or damaged tile as your starting point. If no loose tiles are present, select a tile in an inconspicuous area to minimize potential damage. Position the chisel at a 45-degree angle to the tile, near one of the corners. Strike the chisel firmly with the hammer to break the bond between the tile and the concrete. Work your way around the tile, gradually loosening it from the subfloor.
3. Addressing Stubborn Tiles: Some tiles may be more difficult to remove than others. If a tile resists removal, try using a floor scraper to pry it up. Position the scraper blade under the edge of the tile and apply downward pressure to break the bond. If the tile still remains stubbornly attached, consider using a sledgehammer to break it into smaller pieces. Cover the tile with a cloth or towel to contain the debris. Strike the tile firmly with the sledgehammer, being careful not to damage the subfloor. Once the tile is broken into smaller pieces, they can be more easily removed with the chisel or scraper.
4. Adhesive Removal: After the tiles are removed, adhesive residue will likely remain on the concrete subfloor. This adhesive must be removed before installing new flooring. Start by scraping away any loose or crumbly adhesive with a floor scraper. For tougher adhesive, an angle grinder with a diamond grinding wheel can be used. Exercise extreme caution when using an angle grinder, as it generates a significant amount of dust. Wear a respirator mask and safety glasses, and ensure adequate ventilation. Move the grinder in a slow, steady motion to avoid gouging the concrete. Alternatively, chemical adhesive removers can be used, but these often require careful application and ventilation. Always follow the manufacturer's instructions when using chemical removers. It is imperative to test the remover in an inconspicuous area first to ensure compatibility with the subfloor.
5. Concrete Repair: After removing the adhesive, inspect the concrete subfloor for any damage, such as cracks or holes. Repair any damage with a concrete patching compound. Follow the manufacturer's instructions for mixing and applying the patching compound. Allow the patching compound to dry completely before proceeding. Verify that the repaired areas are level with the existing subfloor.
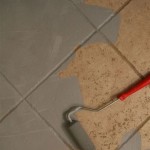
6. Cleaning and Preparation for New Flooring: Thoroughly clean the subfloor using a shop vacuum to remove all dust and debris. A final cleaning with a damp mop can help remove any remaining residue. Allow the subfloor to dry completely before installing new flooring.
7. Moisture Testing: Before proceeding with the installation of new flooring, it is essential to test the moisture content of the concrete subfloor. Excess moisture can lead to problems with adhesion, mold growth, and structural damage. A moisture meter can be used to measure the moisture content. Acceptable moisture levels will vary depending on the type of flooring being installed. Consult the flooring manufacturer's instructions for specific moisture requirements.
The successful removal of existing tile and preparation of the concrete subfloor is a crucial step toward any flooring project. A careful and methodical execution ensures long-lasting results.

Removing Tile And Thinset From Concrete Sawdust Girl

How To Remove Floor Tiles From Concrete Our Guide

How To Remove Tile Mortar And Lathe From A Subfloor

Removing Tile And Thinset From Concrete Sawdust Girl

How To Remove A Tile Floor Complete Step By Guide Apollo

Dust Free Thinset Removal

How To Remove Tile Diy Easy Ceramic Removal

How To Remove Floor Tiles From Concrete Superior

Costs To Remove Floor Tiles A Complete Guide

How To Remove Old Floor Tile Adhesive All Stripped
Related Posts