Can You Tile Over Cement Board in Shower Walls? A Comprehensive Guide
The question of whether tile can be installed over cement board in shower walls is a common one for both professional contractors and homeowners undertaking bathroom renovations. The short answer is yes, tiling over cement board in shower walls is a widely accepted and recommended practice. However, the success of this method hinges on proper installation techniques, material selection, and adherence to industry best practices. This article will delve into the intricacies of tiling over cement board in shower walls, providing a comprehensive understanding of the process and its critical aspects.
Cement board, also known as cement backer board, is a composite material primarily composed of cement and reinforcing fibers. It is designed specifically for use as a substrate for tile in areas exposed to moisture, such as showers and bathrooms. Its resistance to water damage, mold growth, and dimensional instability makes it a superior choice compared to traditional gypsum drywall in wet environments.
The primary function of cement board in a shower wall assembly is to provide a stable, waterproof, and tile-compatible surface. It acts as a buffer between the framing structure and the tile, preventing moisture from penetrating the wall cavity and causing structural damage. The rough texture of cement board also offers an excellent bonding surface for thin-set mortar, ensuring a strong and durable tile installation.
Understanding the Advantages of Using Cement Board in Shower Walls
There are several compelling reasons why cement board is the preferred substrate for tile in shower walls. These advantages contribute to a longer-lasting, more resilient, and ultimately more cost-effective bathroom installation.
Water Resistance: This is perhaps the most critical advantage. Cement board is inherently resistant to water damage. Unlike gypsum-based drywall, it will not disintegrate, crumble, or foster mold growth when exposed to moisture. This property protects the underlying wall structure from water penetration, preventing rot, decay, and potential structural failures.
Dimensional Stability: Cement board exhibits minimal expansion and contraction when exposed to changes in temperature and humidity. This dimensional stability is crucial for preventing tile cracking and grout failure. When the substrate remains stable, the tile installation is far less likely to experience stress-related damage.
Mold Resistance: The inorganic composition of cement board makes it an unsuitable host for mold and mildew growth. This resistance to microbial growth is essential in a high-moisture environment like a shower, contributing to a healthier and more hygienic bathroom.
Impact Resistance: While not indestructible, cement board offers greater impact resistance than drywall. This increased strength helps to prevent damage from accidental bumps or impacts, safeguarding the tile installation.
Tile Adhesion: The textured surface of cement board provides an excellent bonding surface for thin-set mortar. This superior adhesion ensures that the tile adheres firmly to the substrate, preventing loose tiles and potential water intrusion.
Essential Steps for Tiling Over Cement Board in Shower Walls
Proper preparation and installation are paramount for ensuring a successful and long-lasting tile installation over cement board in shower walls. Neglecting any of these steps can compromise the integrity of the entire system and lead to costly repairs down the line.
Framing Inspection: Before installing any cement board, it is crucial to inspect the framing for plumb, square, and level. Uneven framing can create challenges during the cement board installation and ultimately affect the finished tile surface. Ensure that the studs are properly spaced (typically 16 inches on center) to provide adequate support for the cement board and tile.
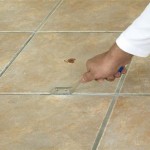
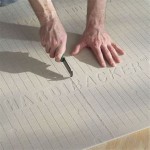
Cement Board Installation: Cut the cement board to the required size using a utility knife and scoring tool or a cement board saw. Secure the cement board to the studs using cement board screws. These screws are specifically designed to resist corrosion and provide a strong, reliable connection. Ensure that the screws are countersunk flush with the surface of the cement board to avoid interference with the tile installation.
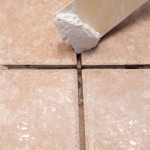
Seam Treatment: The seams between the cement board sheets are potential weak points for water penetration. These seams must be properly treated with fiberglass mesh tape and thin-set mortar. Apply a layer of thin-set mortar over the seams, embed the fiberglass mesh tape into the mortar, and then apply a second coat of thin-set to completely cover the tape. Allow the thin-set to cure according to the manufacturer's instructions.
Waterproofing Membrane Application: While cement board is water-resistant, it is not inherently waterproof. Applying a waterproofing membrane over the cement board is crucial for creating a watertight barrier. There are several types of waterproofing membranes available, including liquid-applied membranes and sheet membranes. Follow the manufacturer's instructions carefully when applying the selected membrane.
Thin-Set Mortar Selection: The type of thin-set mortar used for tile installation in showers is critical. Choose a modified thin-set mortar specifically designed for use in wet environments. These mortars typically contain polymers that enhance water resistance and adhesion. Always follow the manufacturer's instructions for mixing and application.
Tile Installation: Apply the thin-set mortar to the cement board using a notched trowel. Press the tile firmly into the mortar, ensuring full contact. Use tile spacers to maintain consistent grout lines. Allow the thin-set to cure according to the manufacturer's instructions before grouting.
Grouting: Select a grout that is appropriate for shower applications. Epoxy grout is highly resistant to water and stains, making it an excellent choice for showers. Cement-based grouts can also be used, but they typically require sealing to prevent water penetration. Apply the grout according to the manufacturer's instructions and clean off any excess grout from the tile surface.
Sealing: After the grout has cured, apply a sealant to the grout lines. This sealant will help to prevent water penetration and staining. Reapply the sealant periodically as needed to maintain its effectiveness.
Key Considerations for a Successful Shower Tile Installation
Beyond the basic installation steps, several other factors can significantly impact the success and longevity of a tiled shower. Addressing these considerations proactively will contribute to a more robust and reliable installation.
Ventilation: Adequate ventilation is crucial for preventing moisture buildup in the shower. A properly functioning exhaust fan will help to remove moisture-laden air, reducing the risk of mold and mildew growth. Ensure that the exhaust fan is sized appropriately for the size of the bathroom and that it is used regularly during and after showering.
Drainage: Proper drainage is essential for preventing water from pooling in the shower. Ensure that the shower floor has a sufficient slope towards the drain to allow water to flow freely. A well-designed shower drain will also help to prevent clogs and backups.
Expansion Joints: Expansion joints are necessary to accommodate movement in the tile and substrate. These joints are typically filled with a flexible sealant and are located in areas where movement is likely to occur, such as corners and where the shower walls meet the floor. Expansion joints help to prevent tile cracking and delamination.
Material Compatibility: Ensure that all materials used in the shower installation are compatible with each other. For example, use a thin-set mortar that is compatible with both the cement board and the tile. Using incompatible materials can lead to adhesion problems and premature failure.
Professional Consultation: For complex or challenging shower installations, it is advisable to consult with a qualified tile contractor. A professional contractor can assess the specific requirements of the project and provide expert guidance on material selection, installation techniques, and waterproofing methods.
In conclusion, tiling over cement board in shower walls is a sound practice when executed correctly. Paying meticulous attention to each step, from framing inspection to grout sealing, will ensure a durable, waterproof, and aesthetically pleasing tiled shower that will stand the test of time. The combination of water-resistant cement board, proper waterproofing, and careful installation techniques is the key to a successful and long-lasting shower installation.

Installing Cement Board In The Bathroom

Drywall And Cement Board For The Downstairs Bathroom Blog Homeandawaywithlisa

Installing Cement Board In The Bathroom

How To Install Cement Board For Tile Bower Power

Diy Bathroom Remodeling Part 4 Cement Board For Shower Walls

How To Install Cement Board For Tile Projects Diy Family Handyman

Here S How Install A New Shower Stall With Tile Floor

Our First Bathroom Tiling Fibre Cement Boards Small Scale Engineering

Managing Transition From Cement Board To Plasterboard In Bathroom Tilers Forums

How To Install Backer Board Around A Bathtub
Related Posts