Can You Install Vinyl Flooring On Top of Tiles? A Comprehensive Guide
The question of whether vinyl flooring can be installed over existing tile is a common one for homeowners looking to update their spaces. The answer, while generally affirmative, requires careful consideration of several factors. The success of laying vinyl over tile hinges on proper preparation, understanding the existing tile's condition, and selecting the appropriate type of vinyl flooring.
Installing vinyl flooring over tile can be a cost-effective and time-saving alternative to removing the existing tile. Removing tile can be a messy, laborious, and potentially expensive process, generating significant dust and requiring specialized tools. Avoiding this process by installing directly over the tile seems attractive. However, problems can arise if the underlying preparation is not thorough.
This article provides a comprehensive guide to understanding the feasibility and best practices for installing vinyl flooring on top of existing tile. It covers key considerations, necessary preparation steps, and potential challenges.
Key Point 1: Assessing the Suitability of the Existing Tile
Before embarking on any installation project, a thorough assessment of the existing tile is paramount. The condition of the tile will directly impact the performance and longevity of the vinyl flooring installed above it.
Firstly, evaluate the flatness and evenness of the tile surface. Significant variations in height between tiles, or lippage, will telegraph through the vinyl flooring, creating an uneven and unattractive appearance. This unevenness can also lead to premature wear and tear on the vinyl, particularly in high-traffic areas. Ideally, the tile surface should be as level as possible. If significant lippage exists, consider options such as grinding down the raised tiles or applying a leveling compound to create a smooth, uniform surface.
Secondly, inspect the tile for cracks, chips, or loose pieces. Any damaged tiles must be repaired or replaced before installing the vinyl. Loose tiles will create voids beneath the vinyl, which can lead to flexing and potential cracking of the vinyl over time. Cracks in the tile can also worsen, potentially transferring to the vinyl surface. Repairing these imperfections ensures a stable and solid base for the new flooring.
Thirdly, consider the type of grout used between the tiles. Wide or deeply recessed grout lines can also telegraph through the vinyl flooring. These grout lines can create an uneven surface and affect the adhesion of the vinyl. Filling the grout lines with a cementitious grout filler is often necessary to create a smooth, consistent subfloor. Choosing a grout filler that is compatible with both the tile and the vinyl flooring adhesive is essential.
Finally, assess the overall stability of the tiled subfloor. If the subfloor beneath the tile is unstable or prone to movement, it will ultimately affect the vinyl flooring. Addressing any subfloor issues is critical before proceeding with the vinyl installation.
Key Point 2: Preparing the Tile Surface for Vinyl Installation
Proper preparation of the tile surface is arguably the most critical step in the installation process. It ensures that the vinyl flooring adheres properly and provides a smooth, durable, and long-lasting finish. Neglecting proper preparation can lead to a variety of problems, including bubbling, peeling, and premature wear.
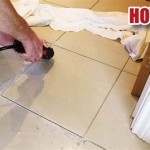
The initial step is a thorough cleaning of the tile surface. Use a heavy-duty cleaner to remove any dirt, grease, wax, or other contaminants. These substances can interfere with the adhesion of the vinyl flooring adhesive. Rinse the surface thoroughly with clean water and allow it to dry completely before proceeding. For stubborn stains, consider using a specialized tile cleaner or degreaser.
Next, address the grout lines. As mentioned earlier, deep or wide grout lines can telegraph through the vinyl. Fill these lines with a cementitious grout filler, applying it according to the manufacturer's instructions. Allow the filler to dry completely and then sand it smooth to create a flush surface with the surrounding tile. Ensure the area is dust-free after sanding. Vacuum the area adequately.
After filling the grout lines, consider applying a leveling compound over the entire tile surface. This is particularly important if there are slight variations in height between the tiles or if the grout lines are not perfectly flush. A self-leveling compound will create a perfectly smooth and even surface for the vinyl flooring. Follow the manufacturer's instructions carefully when applying the leveling compound, paying attention to the recommended thickness and drying time.
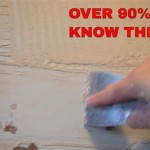
Once the leveling compound is fully cured and dry, lightly sand the surface to create a slightly roughened texture. This will improve the adhesion of the vinyl flooring adhesive. Remove all dust and debris from the surface before applying the adhesive.
Prime the prepared tile surface with a suitable primer. Select a primer that is specifically designed for use with vinyl flooring adhesives and that is compatible with the leveling compound and the existing tile. The primer will enhance adhesion and prevent the adhesive from being absorbed into the porous tile or leveling compound. Apply the primer evenly according to the manufacturer's instructions and allow it to dry completely before installing the vinyl flooring.
Key Point 3: Selecting the Right Type of Vinyl Flooring
Choosing the appropriate type of vinyl flooring is crucial for achieving a successful and long-lasting installation over tile. Different types of vinyl flooring have varying thicknesses, construction methods, and adhesive requirements, all of which can impact their performance when installed over tile.
Sheet vinyl is a popular choice for its seamless installation and water resistance. When installing sheet vinyl over tile, it's essential to choose a thicker gauge to minimize the telegraphing of grout lines. Opt for a sheet vinyl with a cushioned backing, as this will provide an extra layer of comfort and help to conceal any minor imperfections in the tile surface. Full-spread adhesive is generally recommended for sheet vinyl installations, ensuring a strong and uniform bond to the prepared tile surface.
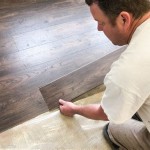
Luxury vinyl plank (LVP) and luxury vinyl tile (LVT) are also viable options, offering a wide range of styles and realistic wood and tile looks. These products are typically thicker than sheet vinyl and often feature embossed textures that further help to disguise the underlying tile surface. LVP and LVT are available in both glue-down and click-lock versions. Glue-down LVP and LVT require the application of a suitable adhesive, while click-lock versions feature interlocking edges that allow for a floating installation. When installing click-lock LVP or LVT over tile, ensure that the subfloor is exceptionally flat and even to prevent the planks or tiles from shifting or separating over time.
Peel-and-stick vinyl tiles are another option, offering a relatively easy and quick installation. However, these tiles are typically thinner and less durable than sheet vinyl, LVP, or LVT. They are also more prone to telegraphing grout lines and imperfections in the tile surface. Peel-and-stick vinyl tiles may be suitable for low-traffic areas or temporary installations, but they are generally not recommended for high-traffic areas or where a long-lasting flooring solution is desired.
Regardless of the type of vinyl flooring chosen, it is crucial to select a product that is specifically designed for installation over existing hard surfaces. Some vinyl flooring products may not be suitable for installation over tile due to their thickness, flexibility, or adhesive requirements. Always consult the manufacturer's instructions and recommendations before proceeding with the installation.
Moreover, the type of adhesive is critical. Always use an adhesive recommended by the vinyl flooring manufacturer and suitable for use over non-porous surfaces like tile. Apply the adhesive evenly and according to the manufacturer’s instructions, paying close attention to the open time and working time.
In conclusion, while installing vinyl flooring over existing tile is a viable option, it requires careful planning and execution. Thoroughly assessing the existing tile, preparing the surface properly, and selecting the right type of vinyl flooring are essential for achieving a successful and long-lasting installation. By following these guidelines, homeowners can transform their spaces with beautiful and durable vinyl flooring without the hassle and expense of removing the existing tile.

Installing Luxury Vinyl Over Existing Tiles Choices Flooring

Transform Your Home Installing Vinyl Flooring Over Ceramic Tiles City Wall And Floor

How To Install Vinyl Flooring Over Tiles Linoleum Thrift Diving

How To Install Luxury Vinyl Plank Over Tile Flooring

New Vinyl Plank Flooring Over Tile Table And Hearth

Should You Install Vinyl Floor Over Tile

Should You Tile Over Vinyl Flooring Builddirect

Can You Put Lvp Over Tile Wc Supply Whole Cabinet

How To Tile Over Linoleum Floors Correctly

How To Install Vinyl Plank Floors In A Bathroom Over Tile
Related Posts