Can You Lay Lino On Top of Ceramic Tiles? A Comprehensive Guide
Laying new flooring can significantly transform the look and feel of a room. When considering options, homeowners often explore the possibility of installing new flooring directly over existing surfaces to save time and reduce demolition costs. One common question arises: can linoleum (lino) be laid on top of ceramic tiles? The answer is yes, but with several crucial considerations to ensure a successful and long-lasting installation. This article provides a detailed guide to understanding the process, evaluating the suitability of the existing tile floor, preparing the surface, and executing the lino installation.
Linoleum is a durable and versatile flooring material made from natural ingredients such as linseed oil, rosin, cork dust, wood flour, pigments, and a jute backing. Its resilience, stain resistance, and relatively low cost make it an attractive choice for kitchens, bathrooms, and other high-traffic areas. Laying lino directly over ceramic tiles can offer several advantages, including reducing the disruption associated with tile removal and minimizing the overall project timeline. However, the success of this approach hinges on meticulous preparation and adherence to best practices.
Evaluating the Existing Ceramic Tile Floor
Before proceeding with any installation, a thorough assessment of the existing ceramic tile floor is essential. The condition of the tiles, their stability, and the evenness of the surface will significantly impact the final outcome. The following aspects should be carefully evaluated:
Tile Integrity: Inspect each tile for cracks, chips, or other damage. Any loose or broken tiles must be repaired or replaced before laying the lino. Loose tiles will create voids beneath the lino, leading to potential cracking and unevenness over time. Small chips can often be filled with a suitable patching compound, but larger cracks may necessitate tile replacement. Listen for hollow sounds when tapping on the tiles, which can indicate detachment from the subfloor.
Surface Levelness: Ceramic tile floors are rarely perfectly level. Even slight variations in height can be noticeable under linoleum, particularly with thinner gauges of lino. Use a long spirit level or straight edge to identify any high or low spots. Significant unevenness will require leveling using a self-leveling compound. Minor imperfections, such as grout lines, can be addressed during the preparation phase.
Grout Condition: The condition of the grout lines is critical. Cracked, crumbling, or missing grout will create depressions that telegraph through the lino surface. All grout lines should be thoroughly cleaned and repaired. Loose grout should be removed and replaced with fresh grout, ensuring a smooth and even surface. Remember that the grout lines, even in perfect condition, can still be visible under thinner types of lino.
Moisture Content: Check for any signs of moisture intrusion, such as discoloration, mildew, or efflorescence. Moisture can damage both the lino and the underlying tile, leading to adhesive failure and potential mold growth. Address any leaks or sources of moisture before proceeding with the installation. A moisture meter can be used to assess the moisture content of the subfloor and tiles.
Preparing the Ceramic Tile Floor
Proper preparation is paramount for a successful lino installation over ceramic tiles. This process involves cleaning, leveling, and applying a suitable underlayment if necessary. Neglecting these steps can lead to a compromised finished product.
Thorough Cleaning: Begin by thoroughly cleaning the entire tile floor. Remove any dirt, dust, grease, or debris. A combination of vacuuming, scrubbing with a mild detergent, and rinsing with clean water is usually sufficient. For stubborn stains, a specialized tile cleaner may be necessary. Ensure the floor is completely dry before proceeding to the next step. Any residual dirt or contaminants can prevent the adhesive from bonding properly.
Leveling the Surface: As mentioned earlier, unevenness must be addressed to prevent imperfections from telegraphing through the lino. For minor variations, a thin layer of patching compound can be applied to the grout lines and any low spots. Use a wide taping knife to spread the compound smoothly and evenly. Allow the compound to dry completely according to the manufacturer's instructions, and then lightly sand it to create a perfectly smooth surface. For more significant unevenness, a self-leveling compound may be required. Follow the manufacturer's instructions carefully, ensuring proper ventilation and temperature control. Self-leveling compounds typically need to be applied in multiple thin layers to achieve the desired result.
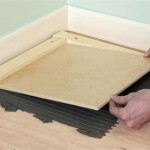
Application of Underlayment (Optional but Recommended): While not always necessary, an underlayment can significantly improve the performance and longevity of the lino installation. An underlayment helps to create a smooth, even surface, cushions the lino, and provides additional insulation. Consider using a thin layer of plywood or a specialized underlayment designed for resilient flooring. Secure the underlayment to the tile floor with appropriate fasteners or adhesive. Plywood should be screwed into the subfloor through the grout lines to avoid damaging the tiles. Seams in the underlayment should be filled with patching compound and sanded smooth.
Priming the Surface: Applying a primer to the prepared surface can further enhance the adhesion of the lino adhesive. Choose a primer that is compatible with both the lino adhesive and the existing tile or underlayment. Follow the manufacturer's instructions regarding application and drying time. A primer creates a better bonding surface, preventing the adhesive from being absorbed into the porous tile or grout.
Installing the Lino
Once the surface is properly prepared, the lino can be installed. This process involves measuring, cutting, applying adhesive, and carefully positioning the lino.
Accurate Measurement and Cutting: Measure the room accurately and transfer the dimensions to the lino sheet. Allow for extra material around the perimeter to account for any irregularities in the walls. Use a sharp utility knife and a metal straightedge to cut the lino to the required size. It is always better to cut the lino slightly larger than necessary and then trim it to fit precisely. For complex shapes or cutouts, create a template using cardboard or paper and transfer it to the lino.
Adhesive Application: Choose an adhesive specifically designed for linoleum flooring. Follow the manufacturer's instructions regarding application method, open time, and coverage rate. Apply the adhesive evenly using a notched trowel, ensuring complete coverage of the prepared surface. Avoid applying too much adhesive, which can cause the lino to bubble or wrinkle. Allow the adhesive to tack up slightly before laying the lino, as per the manufacturer's recommendations.
Laying the Lino: Carefully position the lino sheet over the adhesive-covered surface. Start at one corner and gradually unroll the lino, smoothing it out as you go. Use a floor roller to thoroughly press the lino into the adhesive, ensuring full contact and eliminating any air pockets. Pay particular attention to the edges and corners. Work methodically to ensure the lino is properly aligned and wrinkle-free. Clean any excess adhesive from the surface with a damp cloth.
Seam Treatment (if applicable): If the room is larger than the width of the lino sheet, seams will be necessary. Overlap the edges of the adjacent sheets and use a seam cutter to create a clean, tight seam. Apply a seam sealer to prevent moisture from penetrating the seam and causing damage. Some lino products may require heat welding for a seamless finish. Follow the manufacturer's instructions for seam treatment.
Trimming and Finishing: After the adhesive has fully cured, trim any excess lino around the perimeter of the room using a sharp utility knife. Install baseboards or quarter-round molding to cover the edges and create a finished look. Ensure the baseboards are securely attached to the wall and not to the lino itself. Clean the lino surface thoroughly to remove any remaining debris or adhesive residue.
Curing Time: Allow the adhesive to fully cure according to the manufacturer's instructions before placing furniture or heavy objects on the floor. This typically takes 24 to 72 hours. Avoid walking on the floor during the curing period to prevent any disruption of the bonding process.
By carefully evaluating the existing tile floor, preparing the surface meticulously, and following the recommended installation procedures, homeowners can successfully lay linoleum over ceramic tiles, achieving a durable and aesthetically pleasing result. While the process requires attention to detail and adherence to best practices, it can be a cost-effective and time-saving alternative to tile removal.

Installing Luxury Vinyl Over Existing Tiles Choices Flooring

Transform Your Home Installing Vinyl Flooring Over Ceramic Tiles City Wall And Floor

How To Tile Over Linoleum Floors Correctly

How To Lay Vinyl Flooring Sheet Over Tiles

Can You Lay Tile Over Linoleum Rubi Blog Usa

How To Install Vinyl Flooring Over Tiles Linoleum Thrift Diving

Can You Lay Vinyl Flooring Over Tile Mersey

Should You Tile Over Vinyl Flooring Builddirect

What Type Of Flooring Can You Install Over Ceramic Tile

Can You Put Vinyl Flooring Over Tile A Complete Guide Teka
Related Posts


