Can You Use Floor Tiles On Shower Walls?
The question of whether floor tiles can be used on shower walls is a common one in bathroom renovation projects. The answer isn't a simple yes or no, as several factors influence the suitability of using floor tiles in this specific application. Understanding these factors is crucial for ensuring a safe, durable, and aesthetically pleasing shower enclosure.
Using the wrong type of tile or failing to account for the specific demands of a shower environment can lead to issues such as water damage, tile detachment, and potential safety hazards. This article will delve into the key considerations when deciding whether to use floor tiles on shower walls, examining the characteristics of floor and wall tiles, installation requirements, and relevant building codes.
The Differences Between Floor and Wall Tiles
While both floor and wall tiles are typically made from materials like ceramic, porcelain, or stone, their construction and intended use differ significantly. These differences directly impact their suitability for various applications, especially in a moisture-rich environment like a shower.
Floor tiles are generally designed to withstand higher levels of stress and abrasion. They must be durable enough to handle foot traffic, weight, and potential impacts from dropped objects. As a result, floor tiles are often thicker and denser than wall tiles. This increased density contributes to their strength and resistance to cracking or chipping. The manufacturing process often involves higher firing temperatures, further enhancing their durability.
Wall tiles, on the other hand, are typically thinner and lighter. This design makes them easier to install on vertical surfaces, reducing strain on the wall structure. While wall tiles still need to be water-resistant, they don't require the same level of abrasion resistance as floor tiles. Consequently, wall tiles are often less expensive and available in a wider variety of decorative designs and finishes.
The water absorption rate is another critical difference. Floor tiles intended for wet areas, like bathrooms, are often manufactured with very low water absorption rates to prevent water from penetrating the tile and causing damage. Wall tiles may have a slightly higher water absorption rate because they are not subjected to the same level of direct water exposure.
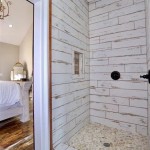
Finally, the surface texture is also a key differentiator. Floor tiles often have a textured or slip-resistant surface to provide traction and prevent falls, particularly when wet. Wall tiles, however, are often smooth and glossy, prioritizing aesthetics over slip resistance.
Factors Affecting Suitability of Floor Tiles on Shower Walls
Several factors must be considered when deciding if a particular floor tile is appropriate for use on shower walls. These factors relate to the tile's physical properties, the installation process, and the overall design of the shower enclosure.
Weight: Floor tiles are heavier than wall tiles. The weight of the tile is a primary concern when installing on walls, especially if the wall structure is not robust enough to support the added load. Before installing heavy floor tiles on shower walls, it's essential to assess the wall's structural integrity. Consider the type of wall framing (wood or metal studs), the spacing of the studs, and the substrate material (cement board, drywall, etc.). Reinforcement may be necessary to ensure the wall can handle the increased weight without bowing or cracking over time. The manufacturer specifications for the tile will provide weight per square foot, allowing accurate calculations.
Water Absorption Rate: The water absorption rate of the tile is crucial in a shower environment. Tiles with high water absorption rates are more prone to water damage, including cracking, staining, and mold growth. Porcelain tiles are generally preferred for shower walls because they have a very low water absorption rate (typically less than 0.5%). Ceramic tiles can also be used, but it's important to choose a tile specifically designed for wet areas and with a low water absorption rate. Natural stone tiles, such as marble or granite, can be used in showers, but they require sealing to prevent water absorption and staining. Regular resealing is necessary to maintain their integrity.
Size and Shape: The size and shape of the tile can also affect its suitability for shower walls. Larger tiles can be more difficult to install on vertical surfaces, especially if the walls are not perfectly plumb. The weight of large tiles can also be a concern, requiring stronger adhesives and potentially more support during installation. Small mosaic tiles, on the other hand, can be easier to work with on walls, but they have more grout lines, which can increase the risk of water penetration if not properly sealed. Using epoxy grout can help to minimize water absorption through the grout lines.
Surface Texture: While slip resistance is crucial for floor tiles, it's less of a concern for wall tiles. However, highly textured floor tiles can be more difficult to clean on shower walls, as soap scum and mildew can accumulate in the crevices. Smooth or slightly textured floor tiles are generally preferred for shower walls to facilitate easy cleaning. Consider the ease of maintenance when making your tile selection.
Adhesive Compatibility: Choosing the right adhesive is critical for ensuring that floor tiles adhere securely to shower walls. The adhesive must be strong enough to support the weight of the tiles and resistant to moisture. Modified thin-set mortar is generally recommended for setting tiles in wet areas. It's important to follow the manufacturer's instructions for mixing and applying the adhesive, as incorrect techniques can compromise its effectiveness. Consider using a high-quality, waterproof adhesive specifically designed for shower applications.
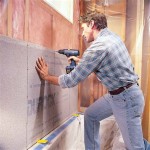
Substrate Preparation: Proper substrate preparation is essential for a successful tile installation. The substrate must be clean, level, and structurally sound. Cement board is the preferred substrate for shower walls because it's water-resistant and provides a stable surface for tiling. Drywall is not recommended for shower walls, as it's highly susceptible to water damage. Before tiling, apply a waterproof membrane to the cement board to further protect the wall from moisture penetration. Ensure the membrane is properly installed and covers all seams and corners.
Grout and Sealant: Grout fills the spaces between tiles and helps to prevent water penetration. Epoxy grout is a superior choice for shower walls because it's waterproof, stain-resistant, and mold-resistant. Cement-based grout can also be used, but it requires sealing to protect it from water damage. Apply a high-quality sealant to all grout lines and corners to create a waterproof barrier. Regularly inspect the grout and sealant for cracks or damage, and reapply as needed.
Installation Considerations and Best Practices
Even if a floor tile is deemed suitable for shower walls based on its characteristics, proper installation is paramount to ensuring its long-term performance and preventing water damage. Adhering to industry best practices and considering specific installation challenges is essential.
Professional Installation: While DIY tiling projects can be rewarding, installing floor tiles on shower walls is often best left to experienced professionals. Professional tile installers have the knowledge, skills, and tools necessary to ensure a proper installation. They can assess the structural integrity of the walls, prepare the substrate correctly, and use the appropriate adhesives and grouts. They also understand the nuances of working with different types of tiles and can handle any unexpected challenges that may arise during the installation process. Professional installation often comes with a warranty, providing added peace of mind.
Planning and Layout: Careful planning and layout are crucial for achieving a visually appealing and functional shower enclosure. Before starting the installation, create a detailed layout plan that shows the placement of each tile. Consider the location of fixtures, such as showerheads, faucets, and shelves, and plan the tile layout accordingly. Use a level and a measuring tape to ensure that the tiles are installed straight and evenly spaced. Proper layout planning minimizes cuts and waste, resulting in a cleaner and more professional-looking installation.
Cutting and Shaping: Cutting tiles to fit around fixtures and corners can be challenging, especially with thicker floor tiles. Use a wet saw to make precise cuts and avoid chipping or cracking the tiles. For curved cuts, a tile nipper or a specialized cutting tool may be necessary. Always wear safety glasses and gloves when cutting tiles to protect yourself from flying debris and sharp edges. Practice cutting on scrap tiles before working on the actual installation to develop your technique and minimize mistakes.
Adhesive Application Techniques: The technique used to apply the adhesive can significantly impact the bond between the tile and the substrate. Use a notched trowel to create ridges in the adhesive, which will help to create a strong mechanical bond. Apply the adhesive evenly and in the correct thickness, following the manufacturer's instructions. Press the tiles firmly into the adhesive, using a slight twisting motion to ensure full contact. Remove any excess adhesive from the tile surfaces with a damp sponge. Avoid applying adhesive to large areas at once, as it can dry out before the tiles are set.
Grouting and Sealing Techniques: Proper grouting and sealing techniques are essential for creating a waterproof barrier in the shower enclosure. Clean the tile surfaces thoroughly before grouting to remove any adhesive residue. Mix the grout according to the manufacturer's instructions and apply it evenly to the grout lines. Use a grout float to press the grout firmly into the joints, ensuring that they are completely filled. Remove any excess grout from the tile surfaces with a damp sponge. Allow the grout to cure fully before applying a sealant. Apply the sealant evenly to all grout lines and corners, using a brush or applicator. Regularly inspect the grout and sealant for damage and reapply as needed to maintain the waterproof barrier.
In summary while technically possible, the suitability of using floor tiles on shower walls depends heavily on the specific tile's properties, the quality of installation, and adherence to building codes. Carefully consider the weight, water absorption rate, size, surface texture, and adhesive compatibility before making a decision. Prioritize proper substrate preparation, professional installation techniques, and regular maintenance to ensure a safe, durable, and aesthetically pleasing shower enclosure.

Can You Use Porcelain Floor Tiles On Shower Walls Stone Tile Depot

What Happens If You Use Floor Tiles On A Shower Wall Ceramic City And

6 Mistakes To Avoid With Shower Tile Daltile

What Happens If You Use Floor Tiles On A Shower Wall Ceramic City And

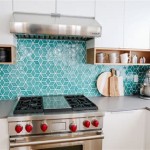
Bathroom Tile Idea Use The Same On Floors And Walls

What Happens If You Use Floor Tiles On A Shower Wall Ceramic City And

Can You Use Porcelain Floor Tiles On Shower Walls Stone Tile Depot

Can You Use Porcelain Floor Tiles On Shower Walls

How To Choose The Best Tile For Your Shower A Bathroom Remodel Guide

5 Reasons Ceramic Tiles Work In Bathrooms Direct
Related Posts