How To Install Concrete Backer Board For Floor Tile
Installing concrete backer board is a crucial step in preparing a subfloor for tile installation. It provides a stable, moisture-resistant surface that tile can adhere to effectively, preventing cracks and other issues that can arise with alternative underlayments. This article details the process of installing concrete backer board for floor tile, covering the necessary tools, materials, and step-by-step instructions.
Understanding the Importance of Concrete Backer Board
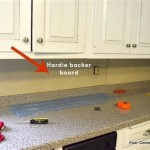
Concrete backer board, often referred to by brand names like HardieBacker or Durock, serves as a superior underlayment compared to plywood or drywall when installing tile in wet areas like bathrooms or kitchens. Traditional wood products are susceptible to moisture damage, which can lead to warping, mold growth, and tile failure. Concrete backer board, however, is composed of cement, aggregates, and reinforcing fibers, making it highly resistant to water damage and providing a more dimensionally stable surface for tile adhesion.
The primary benefit lies in its ability to maintain its integrity even when exposed to moisture. This stability is essential for preventing the expansion and contraction that can cause tiles to crack or become loose over time. Furthermore, the rough surface of concrete backer board provides an excellent bonding surface for thin-set mortar, ensuring a strong and durable tile installation.
Choosing the correct backer board thickness is also important. For most floor tile applications, a 1/4-inch or 1/2-inch thick board is typically used. The thickness should be chosen based on the spacing between the floor joists and the anticipated load the floor will bear. For joists spaced 16 inches on center, a 1/2-inch board is generally recommended. When using 1/4-inch board, ensure the subfloor is adequately stiff to prevent deflection. Stiffening the subfloor may involve adding additional supports or reinforcement to the existing joists.
Tools and Materials Required
Before commencing the installation, gather the necessary tools and materials. Having everything readily available will streamline the process and ensure a more efficient installation.
Tools:
- Measuring tape
- Pencil
- Utility knife
- T-square or framing square
- Circular saw or backer board saw
- Drill or impact driver
- Concrete backer board screws
- Notched trowel (size appropriate for the tile being installed)
- Mixing bucket
- Margin trowel
- Grout float
- Sponge
- Safety glasses
- Dust mask
- Gloves
Materials:
- Concrete backer board
- Thin-set mortar (modified with latex polymer)
- Alkali-resistant mesh tape
- Water
The specific type of thin-set mortar is crucial. Modified thin-set, containing latex polymers, provides enhanced adhesion and flexibility, which is essential for accommodating slight movements in the subfloor. Using a non-modified thin-set can result in a weaker bond and potential tile failure.
Step-by-Step Installation Process
Following these steps will help ensure a successful installation of concrete backer board for floor tile:
- Preparation of the Subfloor: Begin by thoroughly cleaning the existing subfloor. Remove any debris, loose nails, or staples. Inspect the subfloor for any signs of damage, such as rot or water stains. Address any structural issues before proceeding. If the subfloor is uneven, use a self-leveling compound to create a smooth and level surface. Ensure the subfloor is dry and free of any coatings or sealants that may interfere with the adhesion of the thin-set mortar.
- Measuring and Cutting the Backer Board: Accurately measure the area where the backer board will be installed. Transfer these measurements to the backer board using a measuring tape and pencil. Use a T-square or framing square to ensure cuts are straight and accurate. There are several methods for cutting backer board. A utility knife can be used to score the board deeply along the cut line. Then, the board can be snapped along the score. Alternatively, a circular saw equipped with a backer board blade or a specialized backer board saw can be used. When using a power saw, always wear safety glasses and a dust mask to protect against dust and debris. Cut the boards to fit snugly, leaving a small gap (approximately 1/8 inch) between the boards and at the walls to allow for expansion and contraction.
- Applying Thin-Set Mortar: Mix the thin-set mortar according to the manufacturer's instructions. Use a mixing bucket and margin trowel to ensure a consistent and lump-free mixture. The consistency should be similar to peanut butter. Apply a generous layer of thin-set mortar to the subfloor using the flat side of a notched trowel. Then, use the notched side of the trowel to create ridges in the mortar. The depth of the notches should match the recommendations for the specific thin-set being used. This provides an adequate surface area for the backer board to bond with the subfloor.
- Installing the Backer Board: Carefully place the cut backer board onto the thin-set mortar, ensuring it is properly aligned. Press firmly to embed the board into the mortar. Work in small sections to prevent the thin-set from drying out before the backer board is installed. Use concrete backer board screws to secure the board to the subfloor. Space the screws approximately 8 inches apart along the edges and 12 inches apart in the field of the board. The screws should penetrate the subfloor adequately without stripping. Avoid over-tightening the screws, as this can damage the backer board.
- Taping the Seams: Once all the backer board is installed and secured, tape the seams between the boards with alkali-resistant mesh tape. This helps to prevent cracks from forming in the grout lines. Apply a thin layer of thin-set mortar over the tape using a margin trowel, ensuring the tape is completely embedded. Feather the edges of the mortar to create a smooth transition. Allow the thin-set to dry completely according to the manufacturer's instructions before proceeding with tile installation.
Proper subfloor preparation is paramount for the success of the entire project. Failure to address any existing issues with the subfloor can lead to problems later on, such as tile cracking or detachment. Taking the time to ensure the subfloor is clean, level, and structurally sound is a worthwhile investment.
Addressing Common Issues and Challenges
During the installation process, certain challenges may arise. Understanding how to address these issues will help to ensure a successful outcome.
Uneven Subfloors: If the subfloor is significantly uneven, using a self-leveling compound is necessary. Follow the manufacturer's instructions for mixing and applying the compound. Allow the compound to dry completely before installing the backer board. In some cases, shimming the backer board may be necessary to compensate for minor irregularities in the subfloor. Use plastic shims to avoid moisture absorption.
Working Around Obstacles: When installing backer board around pipes, drains, or other obstacles, precise measuring and cutting are essential. Use a jigsaw or hole saw to create the necessary openings in the backer board. Ensure the fit is snug but not too tight, allowing for slight expansion and contraction. Seal any gaps around pipes or drains with a waterproof sealant.
Dust Management: Cutting backer board can generate a significant amount of dust. To minimize dust exposure, work in a well-ventilated area. Use a shop vacuum to collect dust as it is generated. Wear a dust mask and safety glasses to protect your respiratory system and eyes. Consider using a wet saw, which can significantly reduce dust production.
Board Thickness Adjustments: Encountering transitions in floor height between rooms or at doorways often requires adjustments to the backer board thickness. Using a combination of 1/4-inch and 1/2-inch backer board can help to achieve a smooth transition. Feathering the thin-set mortar can also help to blend the transition seamlessly.
Screwing Difficulties: Sometimes, screws may strip or fail to fully penetrate the subfloor. Using a drill with a clutch can help to prevent stripping. Pre-drilling pilot holes can also make it easier to drive the screws. If a screw strips, remove it and insert a new screw slightly offset from the original hole.
Maintaining a Safe Working Environment
Safety should be a top priority throughout the installation process. Take the necessary precautions to protect yourself and others from potential hazards.
Personal Protective Equipment (PPE): Always wear safety glasses to protect your eyes from dust and debris. A dust mask is essential for preventing inhalation of harmful particles. Gloves will protect your hands from cuts and abrasions. Consider wearing knee pads to protect your knees when working on the floor.
Tool Safety: Follow the manufacturer's instructions for operating power tools. Use the appropriate blades and accessories for cutting backer board. Keep tools clean and well-maintained. Never operate power tools while fatigued or under the influence of drugs or alcohol.
Work Area Safety: Keep the work area clean and free of obstructions. Clear away any clutter that could pose a tripping hazard. Ensure adequate lighting to prevent accidents. If working in a confined space, provide proper ventilation.
Lifting Techniques: Backer board can be heavy and awkward to handle. Use proper lifting techniques to avoid back injuries. Bend your knees and keep your back straight. Ask for assistance when lifting heavy boards. Consider using a dolly or hand truck to transport materials.
By following these guidelines, the installation of concrete backer board can be completed safely and efficiently, providing a solid foundation for a long-lasting and beautiful tile floor.

How To Install Cement Board On A Floor Diy Family Handyman

How To Install Cement Backer Board For Floor Tile Installation The Home Depot

Installing Cement Backerboard For Tile Flooring Hometips

How To Install Hardie Backer Cement Board On Floors James Pros

Durock Cement Board Do S And Dont

Cement Backerboard Floor Tile Installation Uncookie Cutter

Easily Install Cement Board To Prep For Tile Installation

Cement Backerboard Floor Tile Installation Uncookie Cutter

How To Install Concrete Backer Board Tile Installation Part 2 Thetile Simply Designing With Ashley

How To Install Cement Board Cbu For Floor Tile
Related Posts