How To Install Ceramic Tile In Shower
Installing ceramic tile in a shower requires meticulous planning, careful preparation, and adherence to best practices to ensure a durable, waterproof, and aesthetically pleasing result. This process involves several stages, from substrate preparation to final sealing, each demanding attention to detail. Proper installation not only enhances the shower's appearance but also prevents water damage, mold growth, and costly repairs in the future. This article provides a comprehensive guide to effectively installing ceramic tile in a shower.
Planning and Preparation
Before beginning the actual installation, a thorough planning phase is crucial. This involves assessing the existing shower space, selecting appropriate materials, and ensuring all necessary tools are readily available. Failure to adequately plan can lead to delays, increased costs, and a less satisfactory final outcome.
The initial step is to inspect the existing shower area. Determine the dimensions of the shower walls and floor to calculate the amount of tile required. Add an extra 10-15% to the tile quantity to account for cuts, breakage, and potential errors during installation. Note the location of plumbing fixtures, such as showerheads, faucets, and drain, as these will influence the tile layout.
Choosing the correct type of ceramic tile is paramount. Consider factors such as water absorption rate, slip resistance, and aesthetic preferences. Porcelain tiles, which are technically a type of ceramic tile, are often favored for showers due to their low water absorption and durability. Select a tile size and shape that complements the shower's dimensions and desired design. Smaller tiles generally offer better grip underfoot, while larger tiles reduce the number of grout lines, simplifying cleaning.
Gather all necessary tools and materials before commencing the installation. Essential tools include a tile saw (wet saw preferred), notched trowel, rubber grout float, grout sponge, level, measuring tape, utility knife, safety glasses, gloves, and a dust mask. Required materials include ceramic tile, thin-set mortar, grout, sealant, backer board (if applicable), screws, and waterproofing membrane.
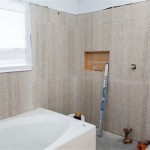
Verify the condition of the existing shower structure. If the existing substrate is damaged or unsuitable for tiling, it must be replaced. Common substrates for shower tile include cement backer board and waterproof drywall. Ensure the substrate is clean, level, and structurally sound. Remove any loose debris, old adhesive, or crumbling grout. Repair any cracks or imperfections with appropriate patching compounds.
Install cement backer board if necessary. Cement backer board provides a stable and water-resistant surface for tile installation. Cut the backer board to size using a utility knife and score-and-snap technique. Attach the backer board to the shower studs using corrosion-resistant screws, spacing them approximately 8 inches apart. Ensure the seams between the backer board panels are properly sealed with backer board tape and thin-set mortar.
Apply a waterproofing membrane over the backer board. This membrane acts as a barrier to prevent water from penetrating the shower walls and floor. Several types of waterproofing membranes are available, including liquid-applied membranes and sheet membranes. Follow the manufacturer's instructions for application. Ensure all seams, corners, and penetrations are properly sealed to create a continuous waterproof barrier.
Tile Installation
With the substrate properly prepared, the tile installation process can begin. This involves applying thin-set mortar, setting the tiles, and ensuring proper alignment and spacing. Accuracy and attention to detail are crucial to achieve a professional-looking and long-lasting result.
Determine the tile layout before applying any mortar. Begin by establishing a central starting point on the shower floor and walls. Dry-fit the tiles to visualize the layout and identify any potential issues with alignment or spacing. Adjust the layout as needed to minimize cuts and ensure a symmetrical appearance. Consider the placement of accent tiles or decorative features during the layout phase.
Mix the thin-set mortar according to the manufacturer's instructions. Use a clean bucket and a mixing drill to ensure the mortar is thoroughly blended and free of lumps. The consistency of the mortar should be similar to that of peanut butter. Allow the mortar to slake (rest) for the recommended duration before using it.
Apply the thin-set mortar to the substrate using a notched trowel. Select the appropriate size of notched trowel based on the size and type of tile being used. Hold the trowel at a 45-degree angle and apply the mortar in a consistent, even layer. Comb the mortar with the notched edge of the trowel to create ridges that will provide a mechanical bond with the tile. Only apply mortar to a small area at a time to prevent it from drying out.
Set the tiles onto the mortar, pressing them firmly into place. Use a slight twisting motion to ensure good contact between the tile and the mortar. Maintain consistent spacing between the tiles using tile spacers. This will create uniform grout lines and contribute to the overall aesthetic appeal. Periodically check the tiles with a level to ensure they are properly aligned and plumb. Adjust the tiles as needed before the mortar sets.
Cut tiles as necessary to fit around corners, edges, and plumbing fixtures. Use a tile saw (wet saw preferred) for accurate and clean cuts. Ensure the edges of the cut tiles are smooth and free of sharp edges. Consider using a tile nipper for small or intricate cuts. Always wear safety glasses and gloves when cutting tiles.
Allow the thin-set mortar to cure for the recommended duration. This is typically 24-48 hours, but refer to the manufacturer's instructions for specific curing times. Avoid walking on or disturbing the tiles during the curing process. Remove the tile spacers after the mortar has cured.
Grouting and Sealing
After the thin-set mortar has fully cured, the next step is to apply grout to fill the spaces between the tiles. Grouting provides a waterproof seal and enhances the overall appearance of the tiled surface. The final step involves applying a sealant to protect the grout and tile from stains and moisture.
Select the appropriate type of grout for the shower environment. Epoxy grout is highly resistant to water, stains, and mold, making it an excellent choice for showers. However, epoxy grout can be more difficult to work with than cement-based grout. Cement-based grout is a more economical option, but it requires regular sealing to prevent water absorption and staining.
Mix the grout according to the manufacturer's instructions. Use a clean bucket and a mixing drill to ensure the grout is thoroughly blended and free of lumps. The consistency of the grout should be similar to that of a thick paste. Allow the grout to slake (rest) for the recommended duration before using it.
Apply the grout to the tile surface using a rubber grout float. Hold the float at a 45-degree angle and spread the grout diagonally across the tile surface, forcing it into the grout lines. Ensure the grout lines are completely filled and free of voids. Remove excess grout from the tile surface with the edge of the grout float.
Clean the tile surface with a damp grout sponge. Wring out the sponge frequently to avoid oversaturating the grout lines. Use a circular motion to remove the haze of grout from the tile surface. Rinse the sponge thoroughly between each wipe. Repeat the cleaning process several times until the tile surface is clean and free of grout residue.
Allow the grout to cure for the recommended duration. This is typically 24-72 hours, but refer to the manufacturer's instructions for specific curing times. During the curing process, mist the grout lines with water periodically to prevent them from drying out too quickly. This will help to ensure a strong and durable grout joint.
Apply a sealant to the grout lines after the grout has fully cured. This will protect the grout from water absorption, stains, and mold growth. Use a brush or applicator to apply the sealant to the grout lines, following the manufacturer's instructions. Allow the sealant to dry completely before using the shower.
Clean and polish the tile surface to remove any remaining grout haze or sealant residue. Use a clean, dry cloth to buff the tile surface to a shine. Inspect the tiled surface for any imperfections or areas that require touch-up. Address any issues promptly to ensure a professional-looking and long-lasting result.

How To Install A Shower Tile Wall Bathroom

How To Tile A Shower At Home Diy Guide For Beginners

How To Install Inexpensive Ceramic Tile In Your Shower

The Complete Guide To Installing Tile On Shower Or Bathtub Walls

Step By How To Install 12x12 Ceramic Tile In A Shower Rubi Blog Usa

Here S How Install A New Shower Stall With Tile Floor

How To Lay Tile Install A Ceramic Floor In The Bathroom Diy

Lay Shower Tile Like An Expert Crazy Good Pro Tips

How To Tile A Bathroom Shower Walls Floor Materials 100 Pics Pro Tips

How To Tile A Bathroom Shower Walls Floor Materials 100 Pics Pro Tips
Related Posts


