How to Lay Ceramic Tile on a Kitchen Floor Without Grout
The installation of ceramic tile in a kitchen floor is a common home improvement project. Traditionally, grout is used to fill the spaces between the tiles, providing stability, preventing moisture penetration, and contributing to the overall aesthetic. However, a grout-free installation offers an alternative approach. This method, while not suitable for all situations, can result in a sleek, modern look and potentially reduce maintenance requirements. Achieving a successful grout-free ceramic tile installation requires meticulous planning, precise execution, and careful material selection. This article outlines the process involved in laying ceramic tile on a kitchen floor without grout, highlighting key considerations and providing a step-by-step guide.
I. Planning and Preparation: The Foundation of a Successful Installation
Proper planning and preparation are crucial for any tile installation, but they are especially important for a grout-free application. Any errors in the initial stages will be magnified by the absence of grout, making imperfections more noticeable and potentially compromising the integrity of the floor. Key elements to consider during this phase include subfloor preparation, tile selection, and layout design.
A. Subfloor Assessment and Preparation: The subfloor’s condition is paramount. It must be structurally sound, level, and free of any debris, dust, or existing adhesives. A deflection test should be conducted to ensure the subfloor meets industry standards for tile installation. Excessive deflection can lead to tile cracking and failure, particularly in the absence of grout to absorb movement. If the subfloor exhibits excessive deflection, reinforcement or replacement is necessary. Common subfloor materials include plywood, concrete, and cement board. Plywood subfloors should be a minimum of ¾ inch thick and exterior grade. Concrete subfloors should be thoroughly cleaned and leveled using a self-leveling compound if necessary. Cement board provides an excellent substrate for tile, offering both stability and moisture resistance. Regardless of the subfloor material, ensure it is securely fastened to the floor joists or slab and that all seams and transitions are properly addressed to prevent movement.
B. Tile Selection: The choice of tile is critical for a grout-free installation. Rectified tiles, also known as calibrated tiles, are specifically designed for this purpose. These tiles undergo a manufacturing process that ensures precise dimensions and consistent edges. This dimensional accuracy is essential for achieving tight, uniform joints without grout. Non-rectified tiles typically exhibit slight variations in size and shape, making them unsuitable for grout-free applications. In addition to rectification, consider the tile material. Porcelain tiles are generally preferred over ceramic tiles due to their greater density, strength, and water resistance. Look for tiles with a high PEI (Porcelain Enamel Institute) rating, indicating their durability and resistance to abrasion. Finally, select tiles with a consistent color and pattern. Variations in these attributes will be more apparent without grout.
C. Layout Design: Careful planning of the tile layout is essential to minimize cuts and create a visually appealing pattern. Begin by determining the focal point of the room, such as the center of the floor or a prominent architectural feature. Snap chalk lines to establish a grid, ensuring that the lines are perfectly square. Dry-lay the tiles to confirm the layout and identify any potential issues. Pay close attention to the placement of tiles along the perimeter of the room. Uneven walls or obstructions may require adjustments to the layout. Aim to minimize the size of any cut tiles, ideally avoiding slivers that are less than half the width of a full tile. Consider using a tile saw to make precise cuts, ensuring clean edges. If the layout requires intricate cuts around pipes or fixtures, create templates to ensure accuracy.
II. Installation Process: Precision and Attention to Detail
Once the planning phase is complete, the actual installation process begins. This stage requires meticulous attention to detail and the use of appropriate tools and materials. Selecting the right adhesive, applying it correctly, and ensuring proper tile alignment are crucial for a successful grout-free installation.
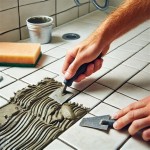
A. Adhesive Selection and Application: The choice of adhesive is critical for bonding the tiles to the subfloor. Modified thin-set mortar is generally recommended for ceramic and porcelain tiles. This type of mortar contains polymers that enhance its flexibility, adhesion, and water resistance. Select a thin-set mortar specifically designed for large-format tiles, as these mortars typically offer greater sag resistance. Before applying the mortar, ensure the subfloor is clean and free of any loose particles. Mix the mortar according to the manufacturer’s instructions, adding water gradually until a smooth, creamy consistency is achieved. Allow the mortar to slake for the recommended time before mixing again. Use a notched trowel to apply the mortar to the subfloor. The size of the notch depends on the size of the tiles and the type of mortar. Apply the mortar in a consistent direction, ensuring that it is evenly distributed. Avoid applying too much mortar, as this can lead to uneven tile placement and difficulty in achieving tight joints. Work in small sections to prevent the mortar from drying out before the tiles are installed.
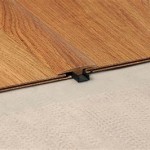
B. Tile Placement and Alignment: Carefully position each tile onto the mortar bed, ensuring that it is aligned with the layout lines. Press the tile firmly into the mortar, using a rubber mallet to tap it into place. Use a leveling system to ensure that the tiles are perfectly level with one another. Leveling systems typically consist of clips and wedges that are inserted between the tiles. These systems help to eliminate lippage, which is the unevenness between adjacent tiles. Maintain a consistent joint width between the tiles. While the goal is to minimize the joint width, it is generally not possible to achieve a perfectly seamless installation. A hairline gap of 1/16 inch or less is acceptable. Use spacers, if needed, to maintain uniform joint widths. Regularly check the alignment of the tiles with a level and adjust as necessary. Remove any excess mortar from the joints promptly, using a damp sponge or a utility knife. Allow the mortar to cure completely according to the manufacturer’s instructions before walking on the floor.
C. Edge Treatment and Sealing: Once the tiles are installed, the edges of the installation need to be addressed. Depending on the design, this might involve leaving an expansion gap around the perimeter of the room, which is then covered by baseboards or a similar trim. This gap is essential to accommodate the natural expansion and contraction of the floor due to temperature and humidity changes. Neglecting this gap can lead to stress fractures in the tiles. Silicone caulk, color-matched to the tiles, can be used to seal the expansion gap. It allows for movement while preventing moisture intrusion. After the adhesive has fully cured, cleaning the tile surface is also important. A mild detergent and water should be sufficient to remove any residual adhesive or dirt. Depending on the type of tile, a sealant may be applied to protect the surface from stains and water damage. Consult the tile manufacturer's recommendations for the appropriate sealant.
III. Considerations and Potential Challenges: Addressing the Limitations
While a grout-free ceramic tile installation can offer aesthetic advantages, it is important to acknowledge its limitations and potential challenges. This method is not suitable for all applications, and careful consideration should be given to the specific requirements of the project.
A. Suitability and Application Limitations: Grout-free installations are best suited for areas with minimal foot traffic and exposure to moisture. Kitchens, with their high levels of activity and potential for spills, may not be the ideal environment for this type of installation. Bathrooms and laundry rooms, where water exposure is significant, are generally not recommended for grout-free tile floors. Furthermore, grout-free installations require a perfectly level subfloor and precise tile alignment. Any imperfections in the subfloor or tile placement will be more noticeable without grout to mask them. For larger areas or complex layouts, the difficulty of achieving a perfectly grout-free installation increases significantly.
B. Maintenance and Cleaning: While grout-free installations can potentially reduce maintenance requirements, regular cleaning is still essential. The small gaps between the tiles can accumulate dirt and debris, particularly in high-traffic areas. Regular vacuuming and damp mopping are necessary to keep the floor clean. Avoid using abrasive cleaners, as these can scratch the tile surface. For stubborn stains, use a mild detergent and a soft brush. In areas with heavy foot traffic, consider applying a sealant to protect the tile surface from scratches and stains. The absence of grout means there is also no grout to protect the edges of the tiles. This can make the edges more vulnerable to chipping. This is especially true for tiles that are not rectified. Regular maintenance will help to mitigate edge damage.
C. Potential for Moisture Intrusion: One of the primary functions of grout is to prevent moisture from penetrating the subfloor. In a grout-free installation, this protection is absent. If water penetrates the small gaps between the tiles, it can damage the subfloor, lead to mold growth, and compromise the integrity of the floor. To mitigate this risk, ensure that the subfloor is properly waterproofed before installing the tiles. Use a high-quality waterproofing membrane or a waterproof cement board. Pay close attention to the seams and transitions, ensuring that they are properly sealed. Regularly inspect the floor for any signs of moisture damage, such as discoloration or efflorescence. Address any issues promptly to prevent further damage.
In conclusion, installing ceramic tile on a kitchen floor without grout presents both opportunities and challenges. The potential for a sleek, modern aesthetic must be weighed against the increased demands for precision, the limitations in application, and the potential maintenance concerns. Careful planning, meticulous execution, and diligent maintenance are paramount for achieving a successful and long-lasting grout-free tile floor.

Large Tiles Without Grout Continuous Flooring Atlas Plan

Large Tiles Without Grout Continuous Flooring Atlas Plan

The Pros And Cons Of Groutless Tile Is It Right For Your Home

Groutless Tile Installation Can You Without Grout

Laying Wood Look Tile Everywhere Grout Or No

6 Tips For Laying Floor Tile With No Experience

How To Tile A Floor Part 1 Preparation

Tips For Installing A Kitchen Vinyl Tile Floor Merrypad

Groutless Tile Installation Can You Without Grout

The Best Wood Look Porcelain Tile No Grout Looks Stone Depot
Related Posts