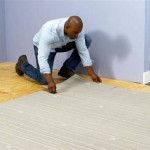
How to Install a Transition Strip Between Tile and Laminate Flooring
Transition strips are essential elements in flooring installations where two different types of flooring meet. They serve several critical functions, including creating a smooth and safe transition between surfaces of varying heights, protecting the edges of the flooring materials from damage, and adding an aesthetically pleasing finished look to the installation. In particular, installing a transition strip between tile and laminate flooring requires careful consideration and proper technique to ensure a durable and visually appealing result. This article offers a comprehensive guide to successfully installing a transition strip between tile and laminate flooring.
Planning and Preparation
Before commencing the installation process, proper planning and preparation are crucial. This involves assessing the specific requirements of the installation, gathering the necessary tools and materials, and preparing the subfloor to ensure a stable and level surface. Neglecting these initial steps can lead to problems later in the installation, impacting the overall quality and longevity of the finished transition.
First, accurately measure the width of the doorway or opening where the transition strip will be installed. This measurement determines the length of the transition strip required. It is advisable to add a small amount of extra length, typically an inch or two, to allow for trimming and adjustments during the installation process.
Next, consider the height difference between the tile and laminate flooring. Transition strips are available in various profiles designed to accommodate different height variations. Select a transition strip profile that effectively bridges the gap between the two flooring surfaces, ensuring a smooth and even transition. In instances of significant height differences, specialized transition strips with sloping or ramped profiles may be necessary.
Gather the necessary tools and materials, including: * Transition strip (of the appropriate length and profile) * Measuring tape * Pencil * Saw (miter saw or hand saw with a fine-toothed blade) * Drill * Drill bits (appropriate size for the screws provided with the transition strip) * Screws (typically included with the transition strip) * Construction adhesive (optional, for added stability) * Safety glasses * Dust mask * Hammer (optional, for tapping the transition strip into place)
Ensure that the subfloor is clean, level, and free of debris. Any existing adhesive residue, dirt, or imperfections should be removed to provide a solid and even surface for the transition strip. If necessary, use a floor scraper or sandpaper to smooth out any uneven areas. A level subfloor is essential for a professional-looking and durable transition.
Carefully inspect the edges of both the tile and laminate flooring where the transition strip will be installed. Ensure that the edges are clean and free of any loose pieces or chipped areas. If necessary, use a utility knife or sandpaper to trim or smooth the edges for a clean and precise fit. This step is crucial for preventing damage to the flooring and ensuring a seamless transition.
Installation Procedure
The installation of the transition strip involves several key steps, including cutting the strip to the correct length, positioning it accurately, securing it to the subfloor, and ensuring a smooth and even transition between the flooring surfaces. Following these steps carefully will result in a professional-looking and durable installation.
Using the measurements taken during the planning phase, cut the transition strip to the required length. A miter saw is recommended for making precise and clean cuts, but a hand saw with a fine-toothed blade can also be used. When cutting the strip, it is important to wear safety glasses and a dust mask to protect your eyes and respiratory system from debris.
Position the transition strip in the doorway or opening, aligning it with the edges of the tile and laminate flooring. Ensure that the strip is centered and that it effectively bridges the gap between the two surfaces. Before securing the strip, double-check the alignment and fit to ensure that it is aesthetically pleasing and provides a smooth transition.
Most transition strips are secured to the subfloor using screws. The transition strip typically has pre-drilled holes for the screws. Using a drill with the appropriate size drill bit, pre-drill pilot holes in the subfloor through the pre-drilled holes in the transition strip. This step is essential for preventing the wood from splitting and ensuring that the screws are properly seated. When drilling the pilot holes, be careful not to drill too deep, as this could damage any utilities located beneath the subfloor.
Insert the screws through the pre-drilled holes in the transition strip and into the pilot holes in the subfloor. Tighten the screws until the transition strip is securely fastened to the subfloor. Avoid overtightening the screws, as this could damage the transition strip or strip the screw heads. The screws should be tightened just enough to hold the strip firmly in place.
For added stability, construction adhesive can be applied to the underside of the transition strip before securing it with screws. Apply a thin bead of construction adhesive to the subfloor where the transition strip will be positioned. This will help to bond the strip to the subfloor and prevent it from shifting or moving over time. When using construction adhesive, follow the manufacturer's instructions regarding application and drying time.
Once the transition strip is secured, carefully inspect the transition between the tile and laminate flooring. Ensure that the strip is flush with both surfaces and that there are no gaps or uneven areas. If necessary, use a hammer and a tapping block to gently tap the transition strip into place. A tapping block will protect the surface of the transition strip from damage during the hammering process.
Remove any excess construction adhesive that may have squeezed out from under the transition strip. Use a damp cloth or sponge to wipe away the adhesive before it dries. Cleaning up any excess adhesive will ensure a clean and professional-looking finish.
Addressing Potential Issues and Troubleshooting
Even with careful planning and execution, certain issues may arise during the installation of a transition strip. Understanding these potential problems and knowing how to address them is essential for achieving a successful outcome. Common issues include uneven subfloors, gaps between the transition strip and the flooring, and squeaking or movement of the transition strip.
Uneven subfloors can present a significant challenge during the installation process. If the subfloor is not level, the transition strip may not sit flush with both the tile and laminate flooring, resulting in an uneven and unsightly transition. To address this issue, it may be necessary to level the subfloor before installing the transition strip. This can be achieved by using a self-leveling compound or by applying shims to raise the lower areas of the subfloor. Ensure that the self-leveling compound is fully cured before proceeding with the installation.
Gaps between the transition strip and the flooring can occur if the transition strip is not cut to the correct length or if the edges of the flooring are not perfectly aligned. To address this issue, carefully measure the size of the gap and cut a small piece of filler material, such as wood or plastic, to fill the gap. The filler material should be the same color as the transition strip or flooring to ensure a seamless blend. Secure the filler material in place using construction adhesive.
Squeaking or movement of the transition strip can indicate that the strip is not securely fastened to the subfloor. This issue can be addressed by tightening the screws that hold the transition strip in place. If the screws are stripped or damaged, replace them with new screws of the same size and type. In addition, applying construction adhesive to the underside of the transition strip can help to prevent squeaking and movement.
In cases where the height difference between the tile and laminate flooring is significant, a standard transition strip may not be sufficient to create a smooth and safe transition. In these situations, consider using a ramped transition strip, which is designed to gradually slope between the two surfaces. Ramped transition strips are available in various materials and profiles to suit different flooring types and styles.
If the transition strip is damaged during the installation process, it may be necessary to replace it. Carefully remove the damaged transition strip by unscrewing it from the subfloor. Measure the length of the damaged strip and cut a new transition strip to the same length. Install the new transition strip following the steps outlined above.
Regular maintenance can help to extend the life of the transition strip and prevent future problems. Clean the transition strip regularly with a damp cloth to remove dirt and debris. Avoid using harsh chemicals or abrasive cleaners, as these can damage the surface of the strip. Inspect the transition strip periodically for any signs of damage or wear, and repair or replace it as needed.

How To Install Transition Strip Up 1 Inch Tall On Tile Vinyl Lvp Laminate And Wood Flooring

How To Install A Transition Strip

Transition From Tile To Laminate Howtospecialist How Build Step By Diy Plans

How To Install Transition Strips In Doorways Angi

How To Install A Transition Strip Tile Wood Step By Guide Awisdom

Your Complete Guide To Flooring Transition Strips Builddirect

How To Install T Molding Transition Strip Knowledge

How To Install Vinyl Flooring Transition Strip Lvp Moulding

Guide To Flooring Transition Strips Nufloors

How To Transition Diffe Tile Wood Floor Heights
Related Posts


