Create A Unique Look With Glass Tile Backsplash Clearances In Bathroom
The bathroom, often a smaller space within the home, presents a unique opportunity for design expression. Backsplashes, particularly those crafted from glass tiles, can introduce both practical protection and aesthetic enhancement. Understanding the clearances required for a glass tile backsplash within a bathroom context is crucial for achieving a visually appealing and functional outcome. Careful consideration of spacing, tile size, and mounting hardware, alongside adherence to building codes, is paramount for a successful installation.
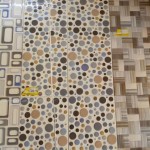
Glass tile backsplashes are favored for their ability to reflect light, creating an illusion of spaciousness, as well as their resistance to moisture, a common concern in bathroom environments. The reflective qualities of glass tiles can significantly brighten a bathroom, making it feel more open and inviting. Furthermore, glass is a non-porous material, rendering it resistant to water damage, mold growth, and staining – crucial factors when considering bathroom design choices. The versatility of glass tiles, available in a wide array of colors, sizes, and textures, allows for considerable design flexibility.
However, the successful integration of a glass tile backsplash involves meticulous planning and execution. This includes accurate measurements of the installation area, selection of appropriate adhesives and grouts, and precise cutting and installation techniques. In addition to aesthetic considerations, adherence to relevant building codes and regulations is vital to guarantee safety and compliance. Clearances, specifically, play a critical role in ensuring functionality, accessibility, and long-term stability of the backsplash installation.
Understanding Backsplash Clearances: The Foundation of a Successful Installation
Clearance, in the context of backsplash installation, refers to the designated space maintained between the backsplash and adjacent elements. These elements may include countertops, cabinets, plumbing fixtures (such as faucets and showerheads), electrical outlets, and light fixtures. Understanding and adhering to clearance requirements is essential for several reasons, encompassing functionality, accessibility, safety, and design integrity.
Functionally, adequate clearance ensures that the backsplash serves its intended purpose of protecting the wall from water damage and splashes without impeding the use of fixtures or creating awkward gaps. For example, insufficient clearance between a faucet and the backsplash can make it difficult to clean behind the faucet or potentially cause water to collect and damage the wall. Similarly, appropriate clearance around electrical outlets allows for safe access and operation of electrical devices.
Accessibility is another crucial factor. Clearance needs to accommodate the movement of hands and cleaning tools. Tight spaces can hinder the ability to properly clean the backsplash and surrounding areas, leading to hygiene concerns. Furthermore, accessibility must also consider potential future maintenance or repairs. If plumbing or electrical work is required behind the backsplash, adequate clearance provides access without the need for extensive demolition or removal of tiles.
Safety considerations revolve primarily around electrical components. Building codes often stipulate minimum clearances around outlets and light fixtures to prevent electrical hazards. These clearances are designed to minimize the risk of short circuits, fires, and electrical shock. Compliance with these codes is not only legally mandated but also critical for the safety of the occupants.
Finally, appropriate clearances contribute to the overall design integrity of the bathroom. Consistent and well-planned spacing enhances the visual appeal of the backsplash and the surrounding elements. Uneven or insufficient clearances can create a cluttered or unbalanced appearance, diminishing the overall aesthetic impact.
Key Clearance Considerations for Glass Tile Backsplashes in Bathrooms
Several specific clearance considerations are pertinent when installing a glass tile backsplash in a bathroom. These considerations involve understanding the appropriate spacing around various fixtures and features commonly found in bathroom environments.
Countertop Clearance: The most basic clearance to consider is the distance between the countertop surface and the bottom edge of the backsplash. Typically, this clearance is minimal, often flush or with a small overhang of the tile extending slightly over the countertop. The primary function of this clearance is to prevent water from seeping behind the countertop and damaging the wall. The use of a sealant, such as caulk, along this joint is crucial for creating a watertight barrier. The type of sealant used should be specified for bathroom applications, resistant to mold and mildew growth.
Faucet Clearance: Determining the appropriate clearance around faucets requires careful consideration of the faucet’s design and functionality. Sufficient space must be provided to allow for unrestricted movement of the faucet handles and spout. Insufficient clearance can lead to difficulties in operating the faucet and potential damage to the backsplash. The recommended clearance will vary depending on the size and style of the faucet, but a minimum of several inches is generally recommended. It is also advisable to consider the reach of the faucet's spout to ensure water flows properly into the sink without splashing the backsplash excessively.
Showerhead Clearance: For backsplashes installed within shower areas, clearance around the showerhead and controls is essential. The backsplash should extend high enough to protect the wall from water spray. The specific height requirement will depend on the type of showerhead and the spray pattern. Adequate clearance around the shower controls ensures ease of use and prevents water from accumulating around the controls. Furthermore, it's important to consider the placement of any shower niches or shelves, ensuring sufficient clearance to allow for easy access and cleaning.
Electrical Outlet Clearance: Building codes mandate specific clearances around electrical outlets in bathrooms to ensure safety and prevent electrical hazards. These clearances are typically defined in terms of distance from water sources, such as sinks and showers. The National Electrical Code (NEC) provides detailed guidelines on the placement of electrical outlets in bathrooms to minimize the risk of electrical shock. The backsplash installation must comply with these codes to avoid potential safety hazards and legal violations. Typically, outlets must be GFCIs (Ground Fault Circuit Interrupters) when installed near water sources.
Lighting Fixture Clearance: Clearance around lighting fixtures is important for both functional and aesthetic reasons. Adequate clearance ensures that the light fixtures provide sufficient illumination without being obstructed by the backsplash. The type of lighting fixture will influence the required clearance. For example, recessed lighting will have different clearance requirements compared to sconces or vanity lights. Furthermore, clearance around lighting fixtures allows for easy access for bulb replacement and maintenance.
Cabinet Clearance: If the backsplash extends to meet upper cabinets, the clearance between the countertop and the bottom of the cabinets must be considered. This clearance is often dictated by the standard height of backsplash installations. Maintaining a consistent backsplash height ensures a uniform and visually appealing look. The clearance should also accommodate any under-cabinet lighting or accessories. Additionally, consider the ease of accessing items stored in the upper cabinets. If the backsplash extends too close to the cabinet doors, it may hinder access or create an uncomfortable feel.
Installation Best Practices for Achieving Optimal Clearances
Achieving optimal clearances during glass tile backsplash installation requires careful planning, precise execution, and adherence to best practices. The following guidelines can help ensure a successful and visually appealing outcome:
Precise Measurement and Planning: Begin by meticulously measuring the installation area, including the dimensions of countertops, cabinets, and fixtures. Create a detailed plan that outlines the placement of tiles and the required clearances around all elements. Consider the size and shape of the glass tiles and how they will be arranged to achieve the desired aesthetic effect. This initial planning phase is crucial for identifying potential clearance issues and addressing them proactively.
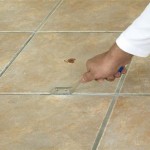
Using Spacers and Leveling Tools: Employ tile spacers during the installation process to maintain consistent gaps between the tiles. Spacers ensure uniform grout lines and contribute to a clean and professional appearance. Use a level to verify that the tiles are installed straight and level. Any irregularities in the surface can affect the overall appearance of the backsplash and potentially create clearance issues. Laser levels can be particularly helpful for ensuring accurate alignment across larger areas.
Precise Cutting Techniques: Glass tiles often require precise cutting to fit around fixtures and corners. Use a wet saw with a diamond blade designed for cutting glass to minimize chipping and breakage. Practice cutting on scrap tiles to develop proficiency and ensure clean, accurate cuts. Avoid forcing tiles into place, as this can lead to cracking or damage to the surrounding tiles. Pay extra attention to cuts around electrical outlets and plumbing fixtures to guarantee a snug and safe fit.
Proper Adhesive and Grout Selection: Select an adhesive specifically formulated for use with glass tiles and suitable for bathroom environments. The adhesive should be moisture-resistant and capable of bonding securely to both the tile and the underlying surface. Choose a grout that complements the color and style of the glass tiles and is also resistant to mold and mildew growth. Apply the adhesive and grout according to the manufacturer’s instructions, paying attention to drying times and application techniques.
Sealing and Finishing: After the grout has cured, apply a sealant to protect the grout lines from water damage and staining. Select a sealant that is compatible with the type of grout used and designed for bathroom applications. Caulk the joints where the backsplash meets the countertop, cabinets, and other fixtures to create a watertight seal. Use a high-quality caulk that is resistant to mold and mildew growth. Ensure that the caulk is applied smoothly and evenly for a professional finish.
Professional Consultation: If the installation involves complex layouts, intricate cuts, or electrical work, consider consulting with a professional tile installer or contractor. A professional can provide expert advice and ensure that the installation is completed safely and according to building codes. Professionals have the tools and expertise to handle challenging installations and achieve optimal results.
Careful planning and execution, combined with adherence to best practices and relevant building codes, are essential for creating a unique and functional glass tile backsplash in a bathroom. By paying close attention to clearance requirements and employing appropriate installation techniques, homeowners can achieve a visually appealing and durable backsplash that enhances the overall aesthetic of their bathroom.

Shine Bright With Iridescent Tiles Backsplash And Deco

52 Walk In Shower Design Step Large Doorless Showers

32 Backsplash Behind Bathroom Sink Stylish Tiles

Beautiful Glass Mosaic Tile For The

Beautiful Glass Mosaic Tile For The

Glass Wall Tile For Kitchens Bathrooms More The

31 Gray Bathroom Backsplash Sleek Cool Hues

World Of Color Inspiring Colorful Bathroom Tile Ideas Stone Depot

Inspiring Bathroom Wall Tile Ideas For A Stunning Makeover Tiles And Deco

Beautiful Bathroom Tile Trends For This Year Ideas
Related Posts