How To Lay Ceramic Tile In Your Bathroom: A Comprehensive Guide
Laying ceramic tile in a bathroom is a popular home renovation project. Ceramic tile offers durability, water resistance, and a wide variety of aesthetic options, making it a suitable choice for bathroom floors and walls. However, successful tile installation requires careful planning, preparation, and execution. This article provides a detailed guide on how to lay ceramic tile in a bathroom, covering everything from initial planning to grouting and cleanup.
Key Point 1: Planning and Preparation: The Foundation for Success
Before any tile is laid, thorough planning and preparation are essential. Improper preparation can lead to tile failures, such as cracking, loosening, or uneven surfaces. This stage involves measuring the area, selecting the tile and materials, preparing the subfloor, and laying out the tile design.
Measuring the Area: Accurate measurement is the first critical step. Use a measuring tape to determine the length and width of the bathroom floor or wall surfaces to be tiled. Multiply these measurements to calculate the total square footage. Add approximately 10-15% to this figure to account for cuts, waste, and potential breakage during the installation process. This will ensure an adequate supply of tile.
Selecting Tile and Materials: Choosing the right tile involves considering several factors, including aesthetics, durability, and slip resistance. Ceramic tiles are typically rated based on their durability and suitability for different applications. For bathroom floors, tiles with a high abrasion resistance rating are recommended. For wet areas like shower floors, slip-resistant tiles are crucial to prevent accidents. The thickness of the tile will also influence the type of mortar required. In addition to the tile, gather the necessary materials, including:
- Mortar: Select a mortar specifically formulated for ceramic tile. Thin-set mortar is a common choice, available in various types such as unmodified, modified, and rapid-setting. The type of mortar needed depends on the type of tile, the substrate, and the environmental conditions.
- Grout: Grout fills the spaces between the tiles and provides a waterproof seal. Choose a grout color that complements the tile. Options include sanded grout for wider grout lines and unsanded grout for narrow grout lines. Epoxy grout offers superior stain and water resistance but requires more skill to install.
- Sealer: A tile and grout sealer helps protect the tile and grout from stains and moisture damage. Apply a sealer after the grout has cured.
- Tools: Essential tools include a tile saw (wet saw preferred), notched trowel, grout float, sponge, measuring tape, level, pencil, buckets, safety glasses, and gloves.
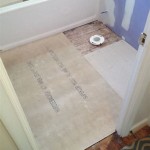
Preparing the Subfloor: A clean, level, and stable subfloor is crucial for successful tile installation. The subfloor must be structurally sound and free from dust, debris, grease, and loose materials. Concrete subfloors should be free of cracks and properly cured. Wood subfloors should be checked for rot and adequately supported. Repair any damaged areas before proceeding. For wood subfloors, it may be necessary to install a layer of cement backer board to provide a stable and waterproof surface for the tile. Cement backer board is attached to the subfloor with screws and thin-set mortar.
Laying Out the Tile Design: Before applying mortar, dry-fit the tiles to determine the best layout. Start by finding the center of the room and establishing a center line. Lay out the tiles along this line, working towards the walls. This will help ensure a symmetrical and visually appealing design. Adjust the layout as needed to avoid small cuts along the edges of the room. If necessary, adjust the center line slightly to ensure that the perimeter tiles are at least half a tile wide. Mark the layout lines on the subfloor with a pencil. This step is crucial for preventing uneven cuts and ensuring a professional finish.
Key Point 2: Applying Mortar and Setting the Tile: Precision and Patience
With the subfloor prepared and the layout planned, the next step is to apply the mortar and set the tile. This process requires a steady hand and attention to detail to ensure a level and uniform surface.
Mixing the Mortar: Follow the manufacturer's instructions to mix the mortar to the correct consistency. Use a mixing drill with a paddle attachment to ensure a smooth and lump-free mixture. Avoid adding too much water, as this can weaken the mortar and affect its bonding properties. Allow the mortar to slake (rest) for a few minutes after mixing to allow the chemicals to activate.
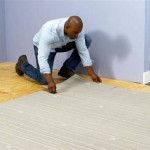
Applying the Mortar: Using a notched trowel, spread a thin, even layer of mortar onto the subfloor. Hold the trowel at a 45-degree angle and apply enough pressure to create ridges in the mortar. The size of the notches on the trowel should match the manufacturer's recommendations for the tile size and type. Work in small sections, typically no more than 2-3 square feet at a time, to prevent the mortar from drying out before the tile can be set.
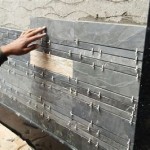
Setting the Tile: Place the first tile onto the mortar and press down firmly. Use a slight twisting motion to ensure good contact between the tile and the mortar. Place subsequent tiles, using tile spacers to maintain consistent grout lines. Tile spacers are available in various sizes to achieve the desired grout line width. Periodically check the level of the tiles using a level. Tap any high spots with a rubber mallet to bring them into alignment with the surrounding tiles. Immediately remove any excess mortar from the tile surface with a damp sponge.
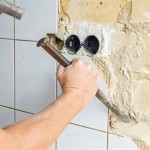
Cutting Tiles: When necessary, cut tiles to fit around obstacles or along the edges of the room. A wet saw is the preferred tool for cutting ceramic tile, as it provides clean, accurate cuts and minimizes dust. Mark the cutting line on the tile with a pencil and carefully guide the tile through the saw. For smaller cuts, a tile nipper can be used. Always wear safety glasses when cutting tiles.
Allowing the Mortar to Cure: Once all the tiles have been set, allow the mortar to cure according to the manufacturer's instructions. This typically takes 24-48 hours. Avoid walking on the tiles during this time to prevent them from shifting or becoming dislodged.
Key Point 3: Grouting and Cleanup: Finishing Touches for a Professional Look
After the mortar has cured, the next step is to apply the grout. Grouting fills the spaces between the tiles, provides a waterproof seal, and enhances the overall appearance of the tiled surface. Cleanup is an essential final step to ensure a professional and polished finished product.
Mixing the Grout: Mix the grout according to the manufacturer's instructions. Use a mixing drill with a paddle attachment to create a smooth and consistent mixture. Add water gradually to avoid a runny consistency. Let the grout slake for a few minutes before applying it.
Applying the Grout: Using a grout float, spread the grout diagonally across the tile surface, forcing it into the grout lines. Work in small sections and apply pressure to ensure that the grout lines are completely filled. Remove excess grout from the tile surface with the edge of the grout float, holding it at a 45-degree angle.
Cleaning the Tile Surface: After the grout has had a chance to set up slightly (usually 15-30 minutes), begin cleaning the tile surface with a damp sponge. Rinse the sponge frequently in clean water and wring out the excess water. Avoid using too much water, as this can weaken the grout and cause it to shrink. Use a circular motion to remove the grout haze from the tile surface. Change the water frequently to prevent redepositing the grout haze.
Polishing the Tile: After the initial cleaning, allow the grout to dry for at least 24 hours. Then, polish the tile surface with a clean, dry cloth to remove any remaining grout haze. A vinegar and water solution can also be used to remove stubborn grout residue.
Sealing the Grout: Apply a grout sealer to protect the grout from stains and moisture damage. Follow the manufacturer's instructions for application. Apply the sealer evenly to the grout lines, using a small brush or applicator. Allow the sealer to dry completely before using the shower or bathroom.
Final Inspection and Cleanup: Conduct a final inspection of the tiled surface to ensure that all grout lines are properly filled and that the tiles are clean and free of debris. Sweep or vacuum the floor to remove any remaining dust or dirt. Dispose of any leftover materials properly. Ensure all tools are cleaned and stored correctly.
Laying ceramic tile in a bathroom is a challenging but rewarding home improvement project. By following these detailed instructions and taking the time to plan and prepare carefully, individuals can achieve a professional-looking and durable tile installation that will enhance the beauty and functionality of their bathroom.

How To Tile A Small Bathroom Floor Diy Bath Remodel

Laying Floor Tiles In A Small Bathroom Houseful Of Handmade

How To Lay Bathroom Tile 5 Easy Steps Rubi Blog Usa

Laying Floor Tiles In A Small Bathroom Houseful Of Handmade

How To Tile A Bathroom Floor For Beginners Making Maanita

How To Install A Tile Floor In Your Bathroom Dumpsters Com

Bathroom Floor Tile Layout In 5 Easy Steps Diytileguy

How To Lay Bathroom Tile 5 Easy Steps Rubi Blog Usa

Plank Tile Bathroom Flooring Happihomemade Family Friendly Recipes

Subfloor For Tile Installation Everything You Need To Know
Related Posts