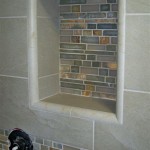
How To Lay Ceramic Tiles In Bathroom
Laying ceramic tiles in a bathroom is a common home improvement project that can significantly enhance the aesthetic appeal and functionality of the space. However, it requires careful planning, preparation, and execution to achieve a professional and long-lasting result. This article provides a detailed guide on how to approach this project systematically, covering essential steps from initial assessment to final grouting.
Before embarking on the tiling process, an accurate assessment of the bathroom's existing conditions is crucial. This involves inspecting the subfloor, walls, and overall layout. Identifying any pre-existing issues, such as uneven surfaces, water damage, or structural weaknesses, is paramount. Addressing these problems before tiling is essential to ensure the tiles adhere properly and prevent future problems.
Gathering the necessary tools and materials is a critical step. This includes ceramic tiles of the desired size, color, and pattern; tile adhesive suitable for bathroom environments (often waterproof or water-resistant); grout; spacers; a tile cutter (manual or wet saw); a notched trowel; a rubber grout float; a sponge; a measuring tape; a level; a pencil; safety glasses; and gloves. Having all these items readily available will streamline the process and minimize interruptions.
Preparing the Subfloor
The subfloor must be clean, level, and stable before tiling. This often involves removing old flooring materials, such as vinyl or linoleum, and thoroughly cleaning the surface to remove any debris, dust, or adhesive residue. If the subfloor is concrete, it should be inspected for cracks or unevenness. Any cracks should be filled with a concrete patching compound, and uneven areas should be leveled using a self-leveling compound.
For wood subfloors, ensure the wood is solid and free from rot or water damage. If there are any signs of weakness, the damaged sections must be replaced. It is generally recommended to install a layer of cement backer board (CBU) over the wood subfloor. CBU provides a stable, water-resistant surface that is ideal for tiling in a bathroom environment. The CBU should be screwed to the wood subfloor at regular intervals using corrosion-resistant screws.
Priming the subfloor after cleaning and leveling is recommended. A suitable primer will improve the adhesion of the tile adhesive and help prevent moisture from penetrating the subfloor. Follow the manufacturer's instructions for application and drying time. Choosing the right primer for the subfloor material is essential for optimal results.
Planning the Tile Layout
Planning the tile layout before applying any adhesive is essential for achieving a visually appealing and symmetrical result. Start by finding the center point of the room. This can be done by measuring the length and width of the room and marking the halfway points. Draw intersecting lines through these points to create a cross that marks the center of the room.
Dry-lay the tiles along these center lines to visualize the layout. Adjust the position of the tiles to minimize the number of small cuts needed at the edges of the room. If necessary, shift the starting point slightly to achieve a more balanced appearance. Consider the placement of fixtures, such as toilets and vanities, when determining the layout.
Mark the layout on the subfloor using a pencil or marker. This will serve as a guide when applying the tile adhesive and laying the tiles. Using spacers during the dry-lay will help ensure consistent grout lines and a uniform appearance. Take photographs of the planned layout for reference during the installation process.
Applying Adhesive and Laying Tiles
Once the layout is planned, begin applying the tile adhesive. Use a notched trowel to spread the adhesive evenly over a small section of the subfloor, typically no more than a few square feet at a time. The size of the notches on the trowel will determine the thickness of the adhesive layer. Follow the adhesive manufacturer's recommendations for the appropriate trowel size.
Place the first tile in the designated position, pressing it firmly into the adhesive. Use a twisting motion to ensure good contact between the tile and the adhesive. Place spacers between the tile and adjacent tiles to maintain consistent grout lines. Continue laying tiles, working outwards from the center lines, and ensuring each tile is level with its neighbors. Periodically check the level of the tiles using a spirit level.
When encountering obstacles, such as pipes or corners, use a tile cutter to cut the tiles to the required shape and size. A manual tile cutter is suitable for straight cuts, while a wet saw is recommended for more intricate cuts or for cutting harder tiles. Always wear safety glasses when using a tile cutter to protect your eyes from debris. After cutting, smooth the edges of the cut tiles with a tile file or sandpaper.
After laying all the full tiles, cut and install the edge tiles. These tiles often require precise measurements and cuts to fit snugly against the walls or fixtures. Use a tile nipper for small adjustments and a wet saw for larger cuts. Once all the tiles are laid, allow the adhesive to dry completely, typically for 24 to 48 hours, before proceeding to the next step.
Grouting and Finishing
After the adhesive has dried, remove the spacers and prepare the grout. Mix the grout according to the manufacturer's instructions, adding water gradually until a smooth, paste-like consistency is achieved. Avoid adding too much water, as this can weaken the grout and make it more prone to cracking.
Apply the grout to the tile surface using a rubber grout float. Spread the grout diagonally across the tiles, forcing it into the grout lines. Ensure the grout lines are completely filled. Use the float to remove excess grout from the tile surface. Work in small sections, cleaning up the excess grout as you go.
After the grout has partially set, typically after 15 to 30 minutes, use a damp sponge to clean the tile surface. Wring out the sponge frequently to avoid over-wetting the grout. Wipe the tiles in a circular motion to remove any remaining grout residue. Rinse the sponge thoroughly and repeat the process until the tiles are clean.
Allow the grout to cure completely, typically for 24 to 72 hours, before exposing the tiled surface to water. Apply a grout sealer to protect the grout from staining and moisture penetration. Follow the manufacturer's instructions for application and drying time. Regular cleaning and maintenance will help keep the tiled surface looking its best for years to come.

How To Put Ceramic Tile On Bathroom Floor A Complete Diy Guide City Wall And Tiles

Small Bathroom Tile Upgrade How To

Bathroom Floor Tile Layout In 5 Easy Steps Diytileguy

5 Reasons Ceramic Tiles Work In Bathrooms Direct

How To Tile A Shower Floor Without Pan In 6 Steps Rubi Blog Usa

5 Most Popular Tile Installation Patterns Msi

Laying Floor Tiles In A Small Bathroom Houseful Of Handmade

Bathroom Floor Tiles Install And Wall Design

Big Tile Or Little How To Design For Small Bathrooms And Living Spaces S Of America

Laying Floor Tiles In A Small Bathroom Houseful Of Handmade
Related Posts


